...
| Info |
|---|
Operations App is continuously updating and page layouts may differ. See here for other versions. |
| Anchor | ||||
|---|---|---|---|---|
|
| Table of Contents |
|---|
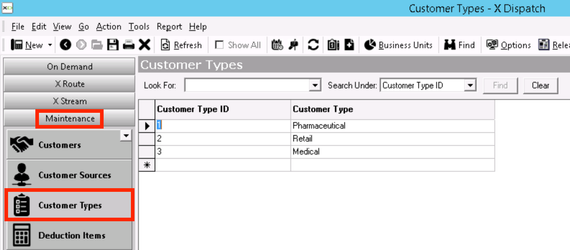
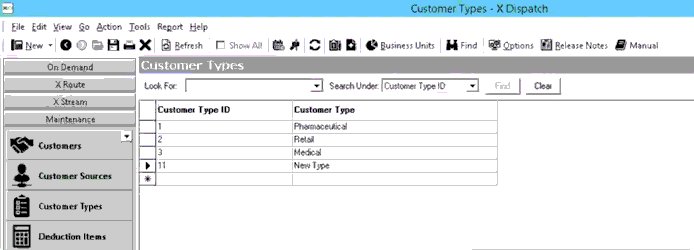
Customer types do not have any default values so that you can customize this for your business. Examples include "Legal", "Medical" or "Retail" and can be used to group together customers for custom reporting. See How to download more Finds to your system for more information.
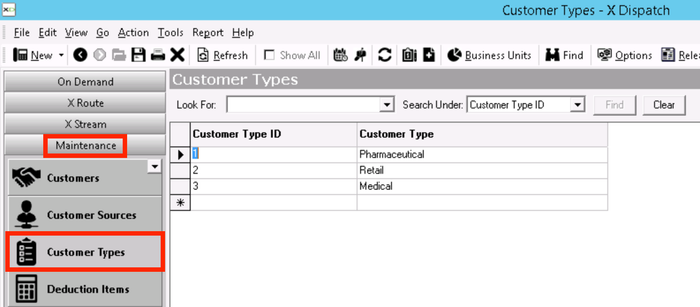
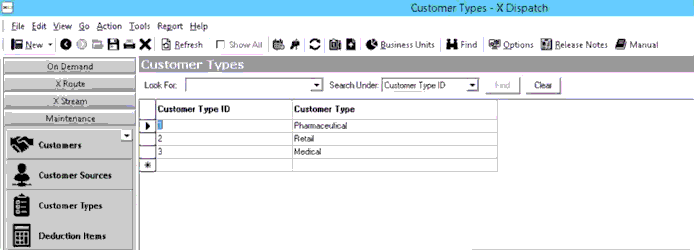
Customer types are set up in Maintenance > Customer Types.
| Field Name | Description | |
|---|---|---|
| Customer Type Description of ID | Unique numerical ID for customer type. | ID |
| Unique numerical ID for Customer Type | Description of customer type. |
How to Add a Customer Type
- Go to Maintenance > Customer Types.
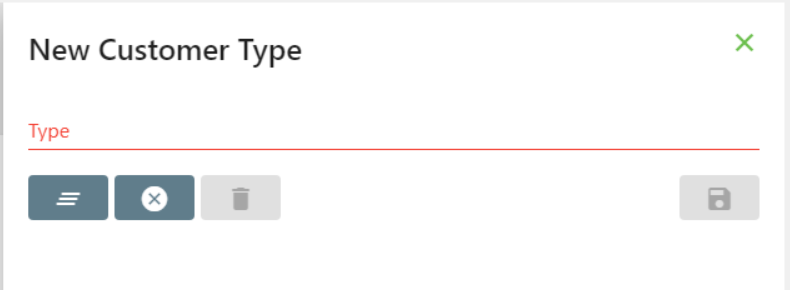
- Click the
 button.
Alternate Steps
- Click the arrow next to the New button, or press Alt + N keys.
- Select Customer Type.
...
- Scroll to the bottom of the list of customer types and add the new customer type in the empty row.
- Click the save icon
 in the toolbar.
How to Edit a Customer Type
| Note |
|---|
This will also update any customer record that uses this customer type. |
- Go to Maintenance > > Customer Types. Click the customer type
Edit the field(s) you would like to
edit or right-click the row and select Edit. edit.
Warning Changing the Customer Type ID will break the link in any customer record using that type, and the customer type will no longer show up on the customer record.
- Click the save icon in the toolbar.
How to Delete a Customer Type
- Go to Maintenance > Customer Types.
- Click customer typeon the box to the left of the Customer Type ID you would like to delete, the row will be highlighted blue.
- Click the
 button.
Section Functions
...
- the delete icon
 in the toolbar or press the delete button.
 - Click the save icon in the toolbar.
Customer Types in X Dispatch
...
Users need to have permission to be able to add or edit customer types.
Giving Customer Type User Permissions
- Go to Maintenance > PermissionsUsers.
- Select a user by double clicking on the User ID.
- Click the + next to the checkbox for Maintenance Functions.
- Click the + next to the checkbox for Customer Types.
- Check the box for Customer Types and/or Edit Customer Types.
...
Follow the steps above to uncheck the boxes.
| Page Properties | ||
|---|---|---|
| ||
|