| Table of Contents |
|---|
...
Obtain a Plug'n Pay Account
After your Merchant Processing account is created, you will need to contact Plug'n Pay and tell them you need a new account to use with CXT Software's integrated solution.
| Info | ||
|---|---|---|
| ||
Donna Mongelli, Executive Sales, and Business Development, 800-945-2538 x. 5935, donna@plugnpay.com |
- You may need to provide them with the VAR sheet received from your Merchant Processor.
- Plug'n Pay will provide you with a username and password.
- Ask Plug'n Pay to disable auto batching.
| Note | ||
|---|---|---|
| ||
Worldpay FIS will supply Plug n Pay with the VAR sheet, and automatically create an account on your behalf. Please reach out to Plug'n Pay to complete setup of your account, and follow the instructions below. |
Complete Setup with Plug'n Pay and X Dispatch
- Obtain and note your IP Addresses (you will need this in step 7 below)
For X Dispatch Cloud: Open the Cloud Client, click the Resources tab → FAQs → What IP Ranges Do I Need To Allow?
Div 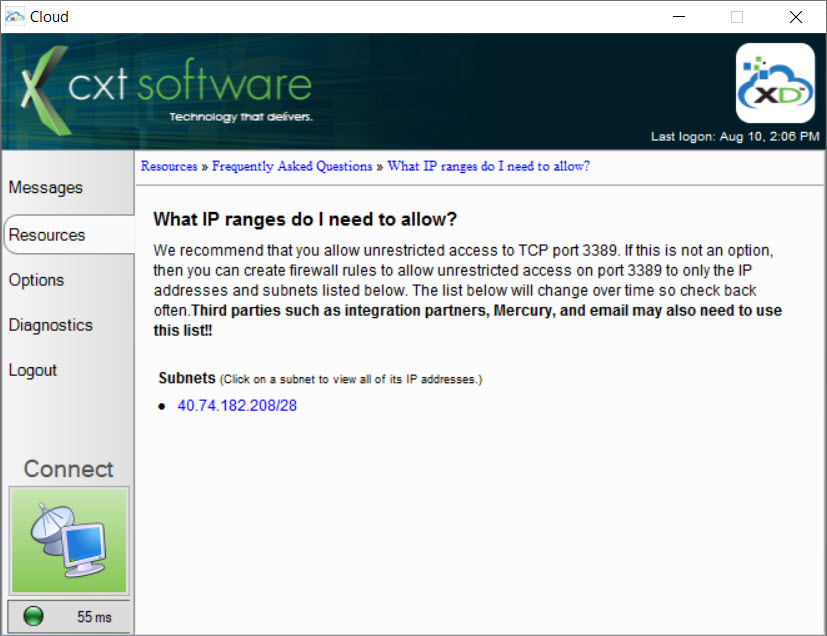
For On-Premise customers: Note the IP address of your X Dispatch server.
- Go to https://pay1.plugnpay.com/ADMIN.
- Enter the username and password given by your Merchant Processor or Plug'n Pay to log in.
Click on "Security Administration" located in the "Settings" section.
Div 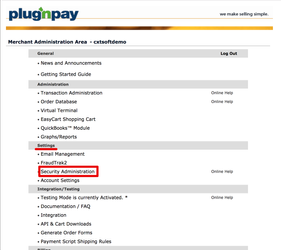
Click on "Transaction Security Administration".
Div 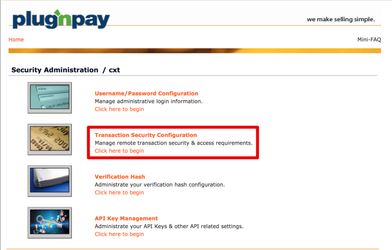
- Scroll down to "Add IP Address".
Enter the IP address(es) you noted in Step 1, including the associated subsets, if applicable.
Div Example: IP Range 40.74.182.208/28 would be entered as
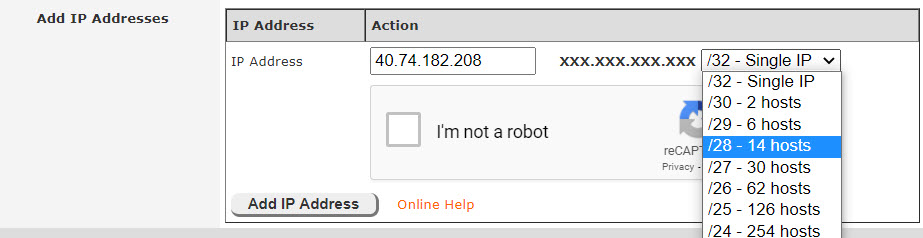
- Click "Add IP Address".
Click "Security Administration" near the top of the screen.
Div 
Click on "Username/Password Configuration".
Div 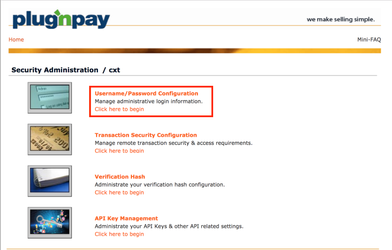
Click on "Manage Remote Client Password" button under "Remote Client".Anchor RemoteClientPassword RemoteClientPassword Enter a "Remote Client Password".
Note This password will be entered in X Dispatch. For security purposes, the password should be different than the one given by Plug'n Pay.
- Click the "Add/Edit Remote Password" button.
...
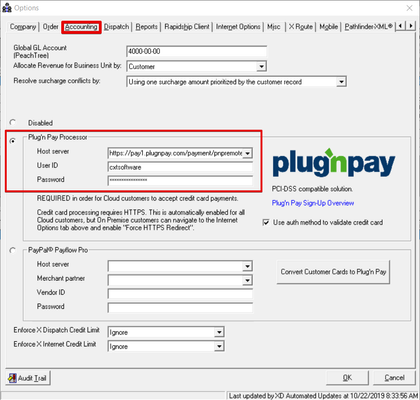
- Go to Options > Accounting.
- Enable Plug'n Pay Processor.
- Complete the following fields
- Host Server: https://pay1.plugnpay.com/payment/pnpremote.cgi
- User ID: Enter user id provided by Plug'n Pay.
- Password: Enter the "Remote Client Password" set up in Plug'n Pay.
| Page Properties | ||
|---|---|---|
| ||
|