...
| Note |
|---|
The customer name in QuickBooks must match the customer name generated by the export, otherwise, QuickBooks will try to create a duplicate customer. |
How to Export Invoices for QuickBooks
| Info |
|---|
Save to QuickBooks Online File Format requires the QuickBooks Online Plus or QuickBooks Online Advanced plan. |
- Go to Actions > Invoices > Invoice Center.
- Expand Batches or Single Invoices to find the invoice information you would like to import into QuickBooks.
- Right-click on the batch or invoice.
Select Export then the QuickBooks file format you would like.
Div 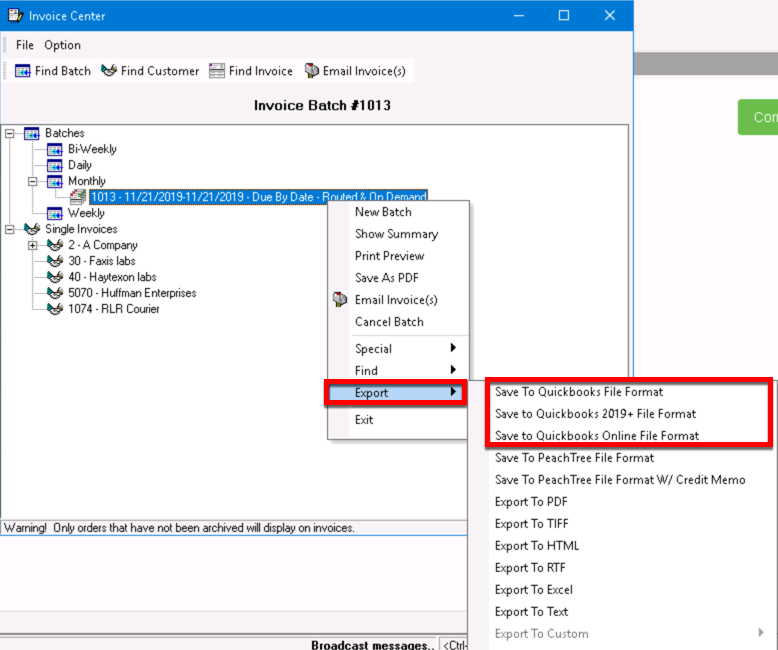
| Tip | ||
|---|---|---|
| ||
If you need more help with importing into QuickBooks, see their help section https://quickbooks.intuit.com/learn-support/. |
...
- Use the Save to QuickBooks 2019+ File Format export option.
In QuickBooks navigate to File > Utilities > Import > IIF Files.
Div 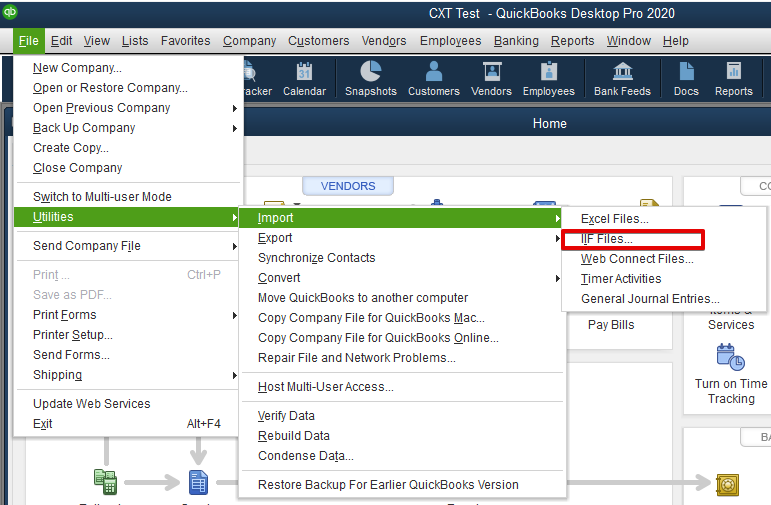
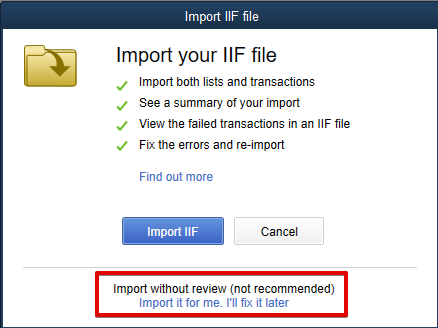
Choose the import option you wish to use.
Div "Import it for me. I’ll fix it later" link at the bottom - This is the recommended option. Click here to continue to the steps below.
Tip title Quick Tip This option is recommended because of the overall import success rates.
- Import IIF button to import with a data review - This option is not recommended. Click here to continue to the steps below.
| Anchor | ||||
|---|---|---|---|---|
|
...
Create a backup if desired, then select Import IIF.
div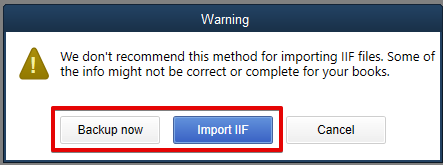
Navigate to the IIF file you would like to import and select Open.
Select OK.
...
| Expand | ||
|---|---|---|
| ||
|

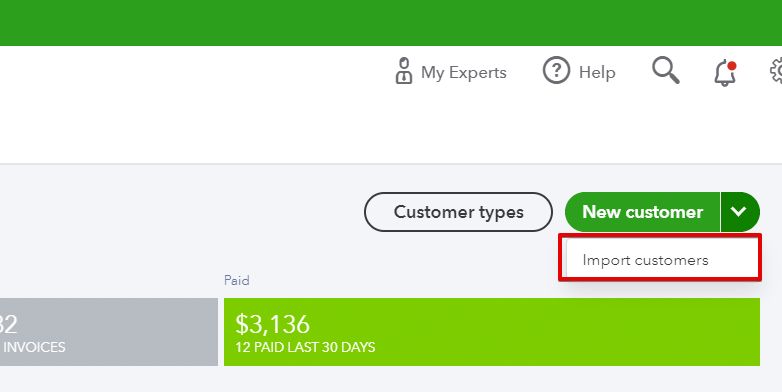
- Use the Save to QuickBooks Online File Format export option.
In QuickBook Online, go to Sales > Invoices.
Div 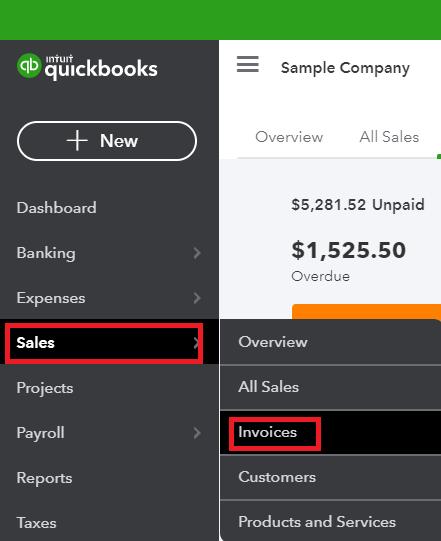
Open the dropdown next to New invoice and then select Import invoices.
Div 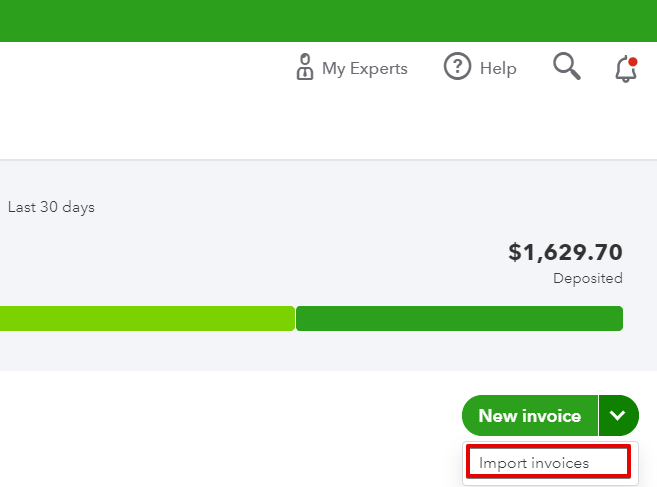
- Select Browse.
Navigate to the invoices .csv you would like to import and select Open.
Tip title Quick Tip You can check Add new customers to QuickBooks if you would like to create new customers in QuickBooks for any customers on the invoice that do not already exist in QuickBooks. We recommend you use the standalone customer import instead as it will import more complete customer information.
- Select Next.
- Verify the spreadsheet field mapping if desired and select Next.
Select Next for any additional screens that come up regarding verifying information.
Tip title Quick Tip The terms will be the number of days for billing set on the customer record in X dispatch. For example, a customer with 30 days for billing will have 30 as the term. You will need to create these terms in QuickBooks Online before the import if they have not already been created in QuickBooks Online.
- Select Start Import.
- Select OK.
...