Adding and deleting user accounts need to be done in the Resources section of the Cloud Client and not the Permissions section from X DispatchUsers section of the Operations App.
How to Correctly Add a User Account
| Excerpt |
|---|
| Note |
|---|
Once a user account is created, it can take up to 20 minutes before the account becomes fully activated and available for use. |
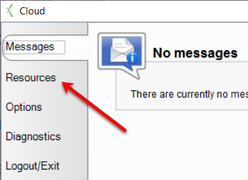
Go to the Resources tab. | Div |
|---|
|
Click the "Create New User Account" link. | Div |
|---|

|
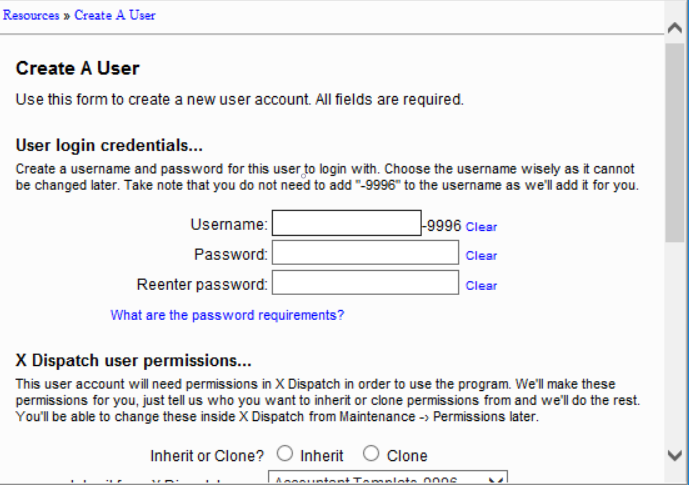
Enter your password to confirm you are the administrative user. (If you have already entered your password to confirm your identity a previous time during this session, you might not be asked this again. Skip to the next step.) Enter in a username for the new user. The username will automatically have the CXT Customer ID attached to the end of it. | Div |
|---|
|
Enter a password, then reenter the password to confirm it. | Tip |
|---|
| Click on the "What are the password requirements?" link to read more about the minimum requirements for passwords. |
Select whether the new user account will inherit its permissions from another account, or clone the permissions from another user account. | Tip |
|---|
| Inherit permissions means that it will watch another user and always copy the user permissions from that user if changes are made. Cloning means that it will copy permissions from another user one time and then not update permissions from that user if changes are made. |
Select the user you would like to inherit or clone permissions from. Select the user group that the user will be a part of. | Note |
|---|
By default, you will have an Administrators group and a Users group. The Administrators group will give full control over Cloud Client users and should be reserved only for managerial users. |
Read the legal disclaimer, then click the checkbox to approve the additional charge for adding an additional user to your account. | Div |
|---|

|
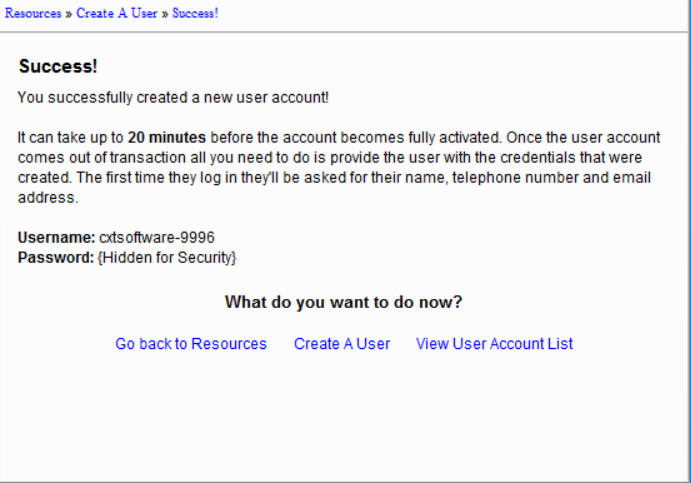
Click the Create User button. A confirmation message will be displayed. | Div |
|---|
|
|
User accounts take up to 20 minutes to create and will be indicated by a spinning wheel next to their name when viewing the user list.
...
Go to the Resources Tab.
| Div |
|---|
|
Click the "Manage User Accounts" link.
| Div |
|---|

|
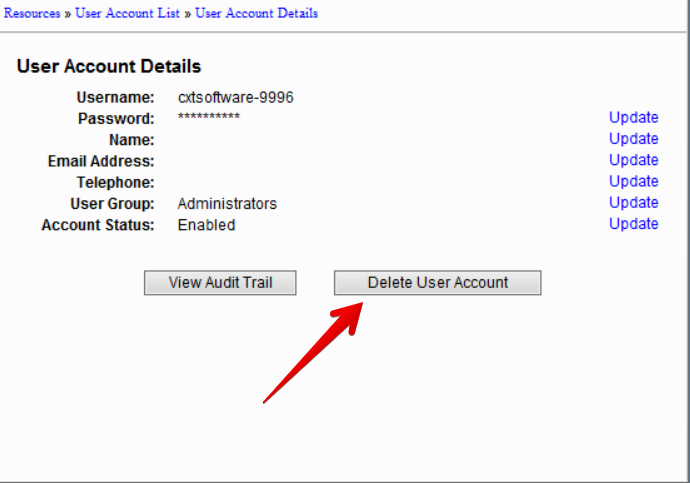
Click on the name of the user you would like to delete.
Click on the Delete User Account button.
| Div |
|---|
|
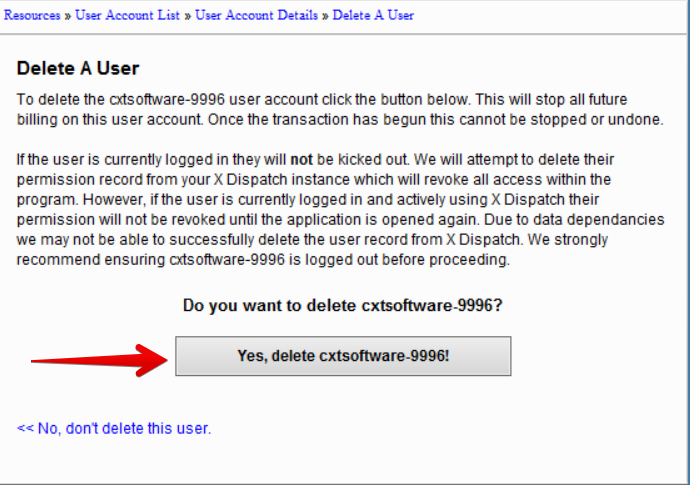
Enter your password to confirm you are the administrative user. (If you have already entered your password to confirm your identity a previous time during this session, you might not be asked this again. Skip to the next step.)
Read the disclaimer to understand the consequences of deleting the user, then click on the "Yes, delete user" button.
| Div |
|---|
|
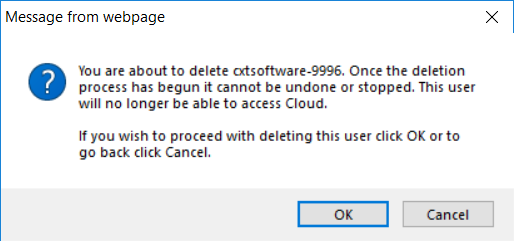
A message will appear to confirm you want to delete the user. Click on the OK button.
| Div |
|---|
|
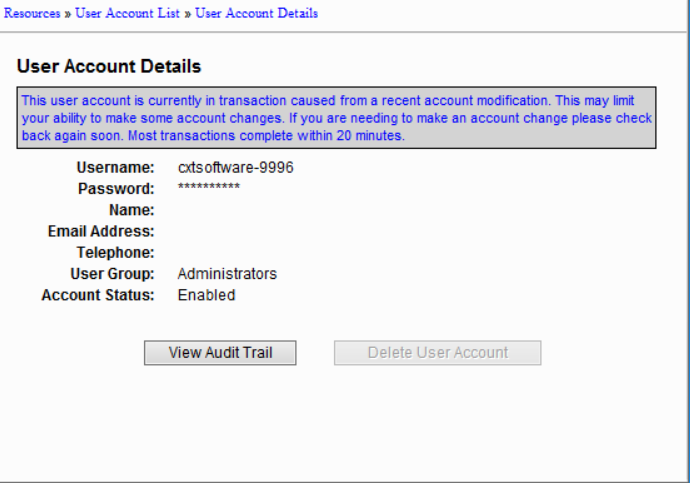
The User Account Details screen will show up again and inform you that the account is in transaction and the user you selected will be deleted within 20 minutes.
| Div |
|---|
|
The INCORRECT Way to Delete a User Account
| Warning |
|---|
Attempting to add or delete a user account by adding or removing a permissions record in X Dispatch will not delete the user account in the Cloud Client or remove that account from billing. Please see the warning messages that are displayed in X Dispatch the Operations App when adding or removing a permissions record. Do not ignore these warning messages. They are reminders for how to properly add and delete user accounts. |
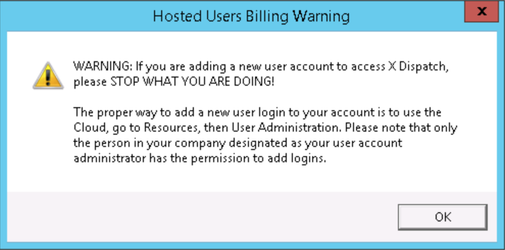
If a new permissions record in X Dispatch user record in the Operations App is added, the following warning message is displayed:
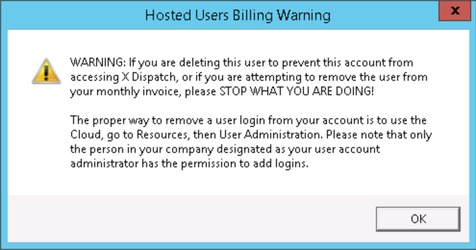
When deleting a permissions user record in X Dispatchthe Operations App, the following warning message is displayed:
...