...
...
...
...
...
...
...
...
...
...
...
...
| Info |
|---|
ROWS requires an X Stream License. Please contact your account manager or technical support for more information. |
| Table of Contents |
|---|
ROWS is an integration between two CXT customers for on demand ordersfor on demand orders.
| Warning |
|---|
ROWS will not transfer parcel-level data or signatures through the web service. |
As orders are entered in X Dispatch the Operations App on the originator's system, they are transferred via the CXT remote order web service to the recipient's system and will populate as new orders in X Dispatchthe Operations App. As the recipient completes the orders, updates, including completion times for pickups and deliveries along with PODs, are transferred via the CXT web service back to the originator's system.
Information that will transfer through ROWS:
...
At Origin
Picked Up
At Destination
Delivered
Confirmed
...
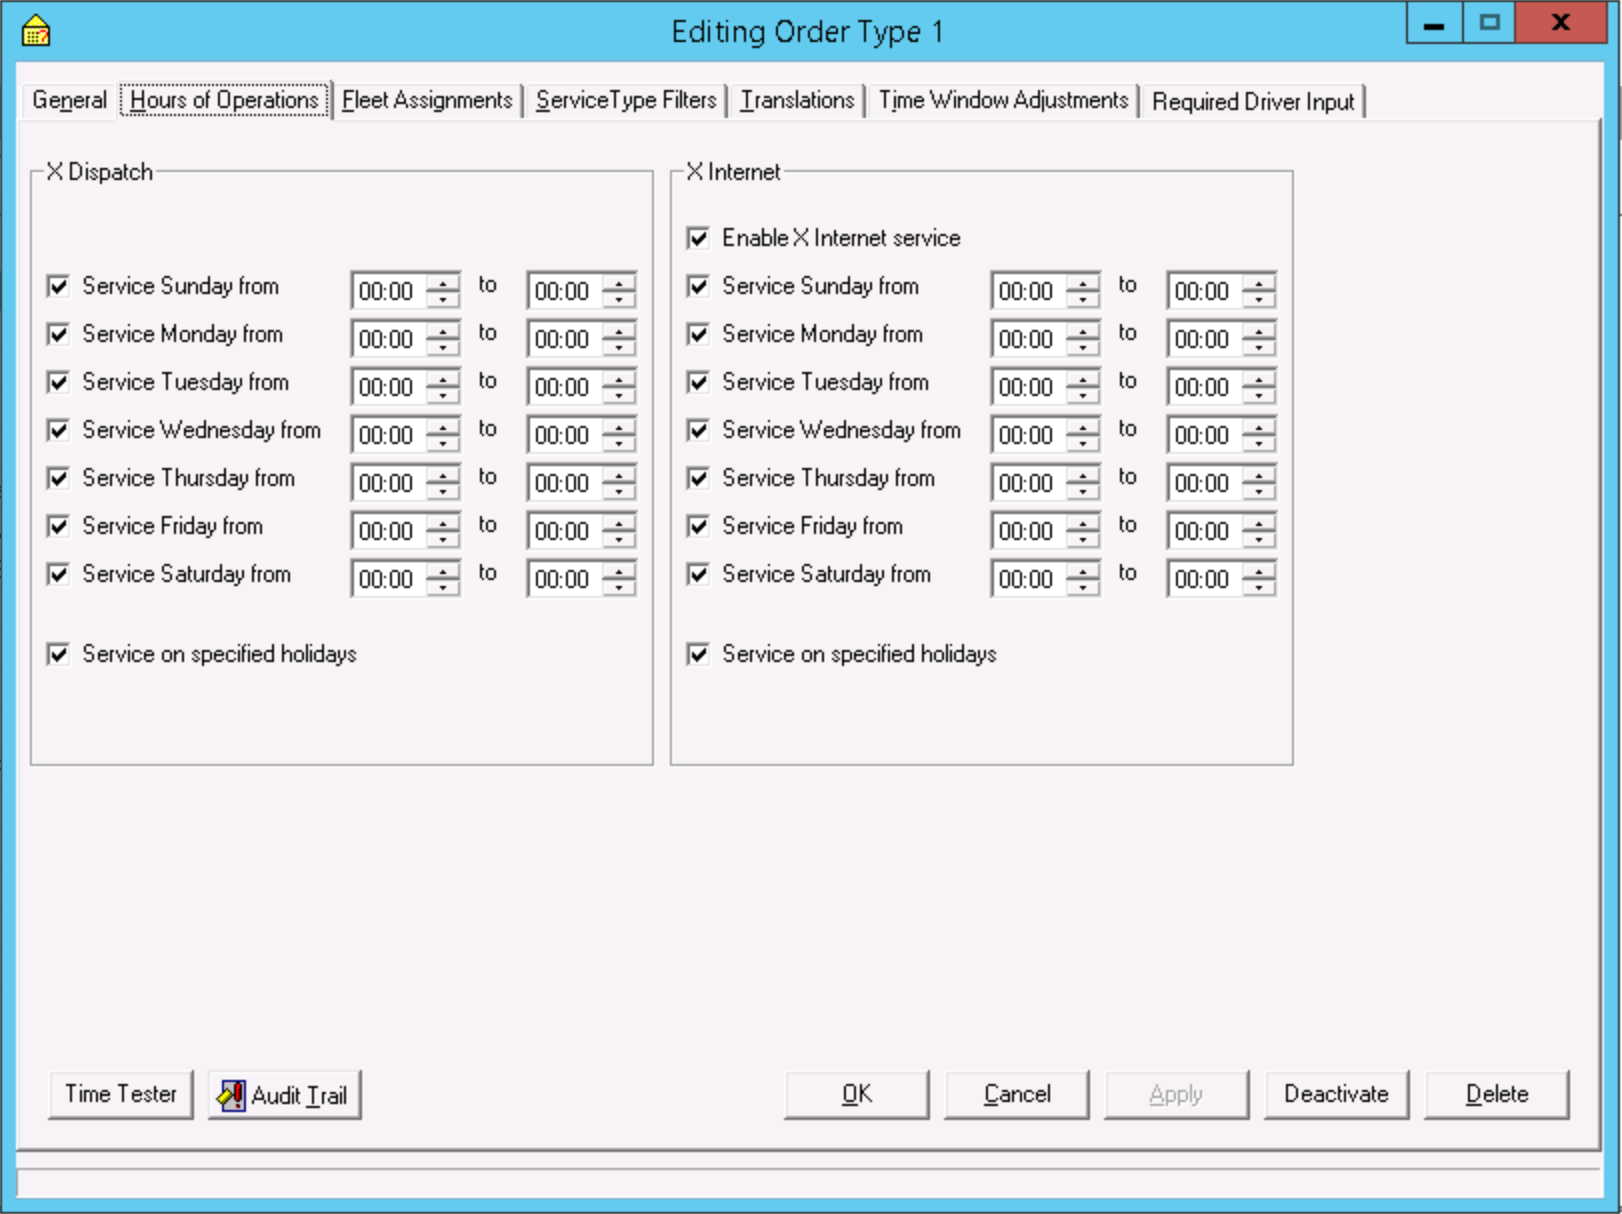
Configuration for Originator
Fully setup customer record(s).
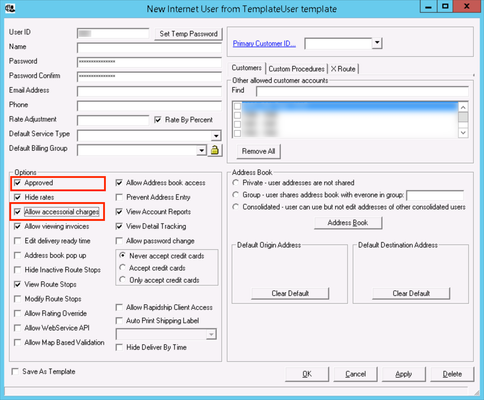
Create the internet user for the customer record(s). See Internet Users (Classic Operations App) for more information.
Check the following boxes:
Approved
Allow Accessorial Charges
Select other options as needed.
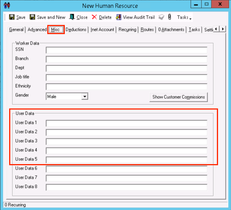
Create a human resource record. See Human Resources - New / Edit Human Resource for more information.
On "Misc" tab:
Enter the following data in the "UserData" fields:
UserData1: Internet user's "User ID" from the recipient's system that the orders will be created under.
UserData2: Internet user's password from the recipient's system.
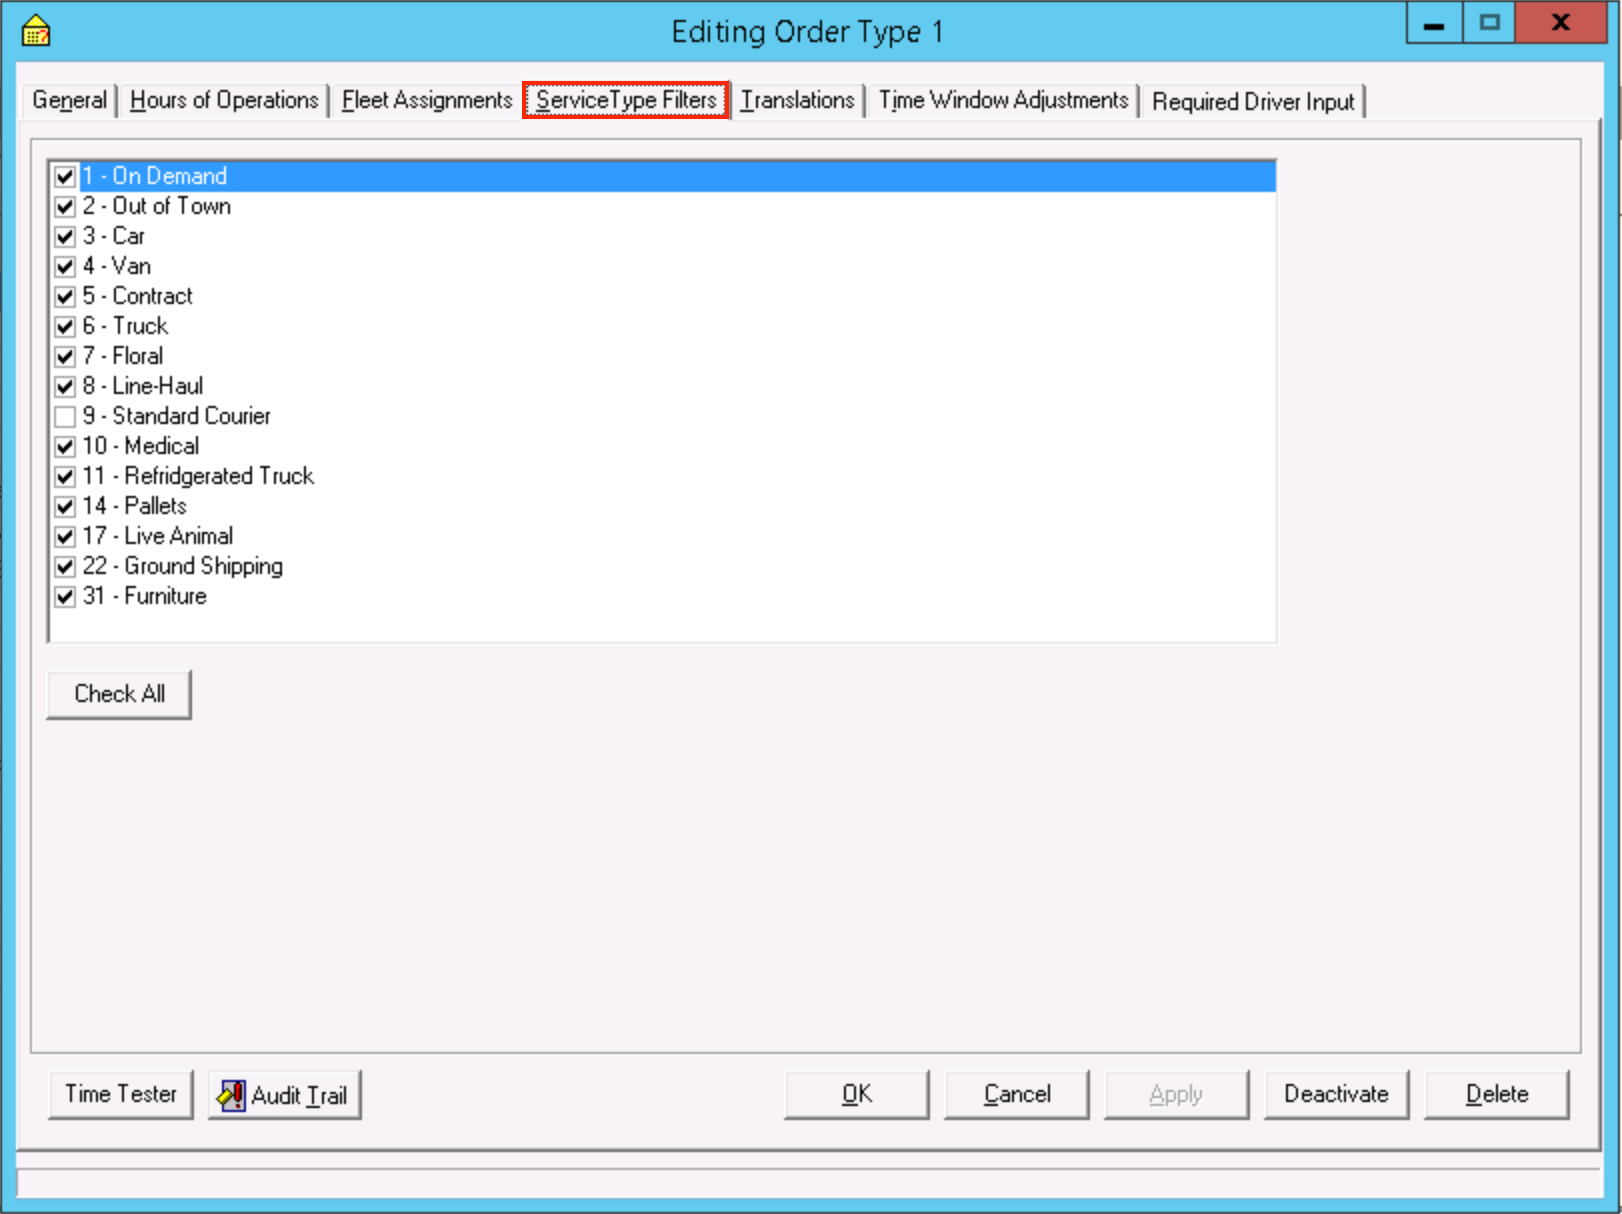
UserData3: ServiceTypeID from recipient's system that will be used when placing the order. Enter a 0 if no service type will be used. See Service Types (Classic Operations App) for more information.
UserData4: Order type ID from the recipient's system. Only one order type per human resource / driver is permitted. For multiple order types, create additional human resources.
UserData5: ROWS URL (for originator customer):https://<domain>/rows.rows.asmx

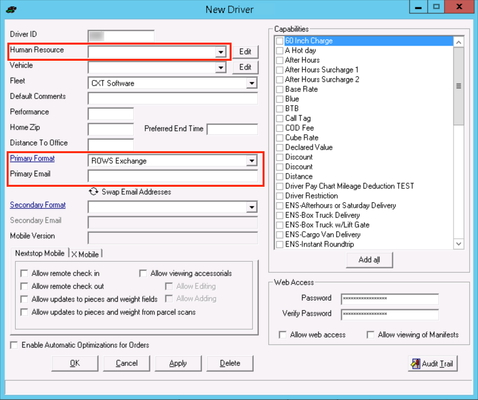
Create a driver record. See Drivers - NClaw / Edisic Driver for more information.
Set up the following:
Human Resources: Select the human resource created in the previous step.
Primary Format: Select "ROWS Exchange".
Primary Email: Enter the ROWS URL from the recipient's system. https://<domain>/rows.rows.asmx@ROWS For cloud customers, <domain> would be <CXTID>.cxtsoftware.net, where <CXTID> is the 4 digit CXT customer id. For example, if the CXT customer id is 9999, this would be https://9999.cxtsoftware.net/rows/rows.
asmx@ROWSasmx@ROWS

| Note |
|---|
A human resource / driver record must be created for each order type that the recipient's system will carry out. |
Configuration for Recipient
Fully setup customer record(s).
Create the internet user for the customer record(s). See Internet Users (Classic Operations App) for more information.
Check the following boxes:
Approved
Allow Accessorial Charges
Select other options as needed.
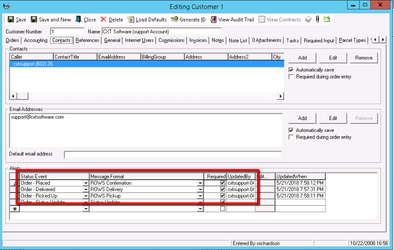
Create or modify the following message formats: I believe these are included in the baseline database, so they may/should exist for the customer depending on their version of XD.
ROWS Delivery (Order - Delivered)
Set "Message Type" to "Customer - On Demand".
Format date as "ddd mm/dd/yy h:nn AM/PM".
Check the "Execute SQL Statement" box on the Advanced tab.
Enter the following SQL on the Advanced tab for each ROWS message format:
EXEC spQueueRowsStatusSendCode Block EXEC spQueueRowsStatusSend @OrderID=[OrderID]
ROWS Pickup (Order - Picked Up)
Set "Message Type" to "Customer - On Demand".
Format date as "ddd mm/dd/yy h:nn AM/PM".
Check the "Execute SQL Statement" box on the Advanced tab.
Enter the following SQL on the Advanced tab for each ROWS message format:
EXEC spQueueRowsStatusSendCode Block EXEC spQueueRowsStatusSend @OrderID=[OrderID]
ROWS Confirmation (Order - Status Update)
Set "Message Type" to "Customer - On Demand".
Format date as "ddd mm/dd/yy h:nn AM/PM".
Check the "Execute SQL Statement" box on the Advanced tab.
Enter the following SQL on the Advanced tab for each ROWS message format:
EXEC spQueueRowsStatusSendCode Block EXEC spQueueRowsStatusSend @OrderID=[OrderID]
See Message Formats (Classic Operations App) for more information.
Attach the message formats to the customer record where orders are received from the originator.
| Note |
|---|
See Order Types (Classic Operations App) for more information. |


...