| Anchor | ||||
|---|---|---|---|---|
|
| Info |
|---|
For X Dispatch 19.0 or newer. See here for older versions. |
| Table of Contents |
|---|
Each address record has 3 tabs:
...
Location Barcode tab - Allows the generation of location barcode label, which can be copied to the clipboard and pasted into a document for printing.
| Info |
|---|
For X Dispatch 19.1 or newer, location barcodes can be emailed directly from the Location Barcode tab. |
Addresses used in X Dispatch go through an address validation process. Using validated addresses guarantees the address is real and prevents potential delivery issues. Different third-party validation services are available, some at an additional monthly charge, please . Please contact your CXT Software Account Manager for more details.
Addresses can be global or customer specific. For Inet Addresses, which are created and maintained on the internet user records, see Internet User (Address Book).
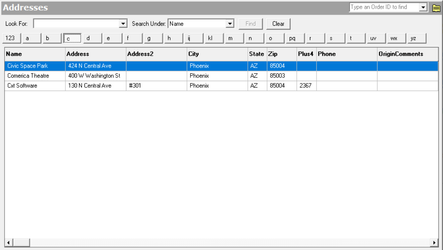
How to Add and Validate a New Address
Go to Maintenance > Addresses and click the
 button.
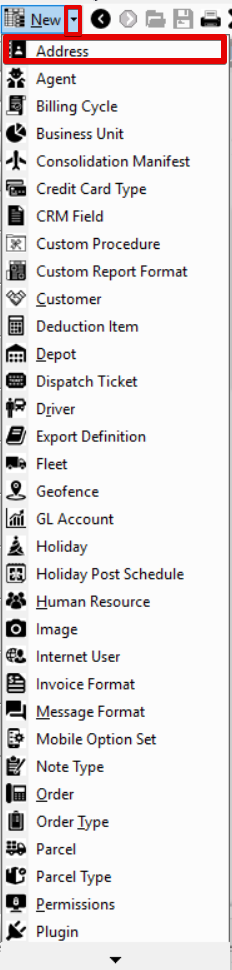
 Div Alternate Steps
Click the arrow next to the New button, or press Alt + N keys and select Address.
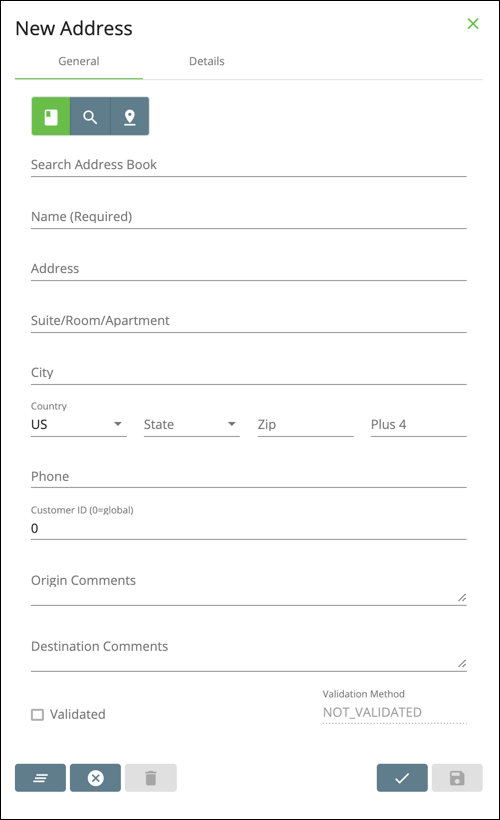
- Enter the address information. Required information to validate an address is:
Address
Info The Address field is the street address in "US Postal Code" format. This includes numeric address, street name, and proper prefixes (N, S, E, W, etc), suffixes (Place, Pl, Road, Rd, Lane, Ln), and abbreviations when used. If a suite or room number is included in this field, the validation process will move it to the Suite/Room/Apartment field.
- City
- State/Zip/+
Enter a Customer ID for the address to be customer specific. The default is set to 0, meaning all customers can use the address. See Global Address vs Customer Specific Address for more information.
- Automatically or manually validate the address:
Click the validate button
 to automatically validate an address.
 Tip title Quick Tip (For X Dispatch 19.1 or newer) Click the save button to save Google changes or use the revert icon
 to revert the changes. Google changes are in black and the original input in orange.
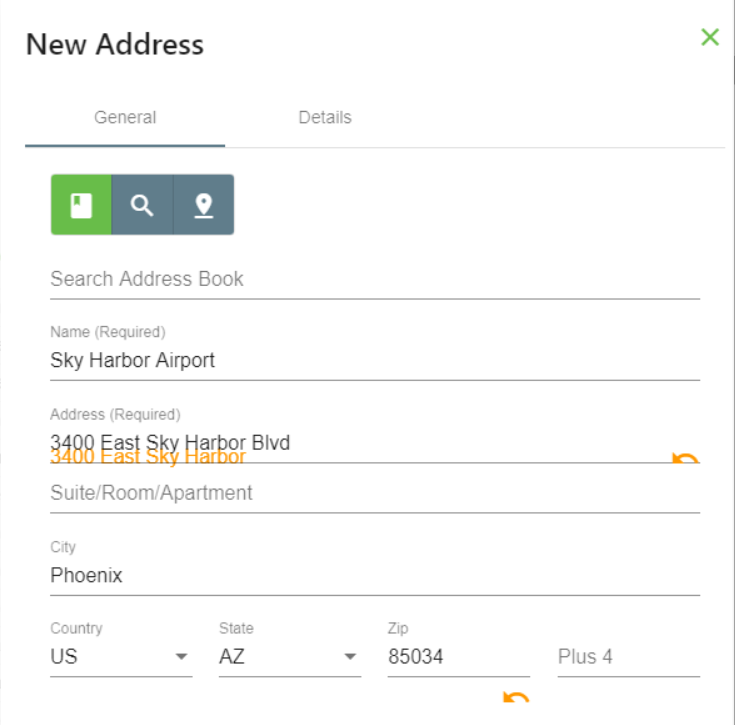
- Check the Validated checkbox to manually validate an address.
...
- Go to Maintenance > Addresses.
Click the address you would like to delete.
Click the
 button to delete the address.
Address Form
General
The General tab of the address form contains the address, phone, and default order information.
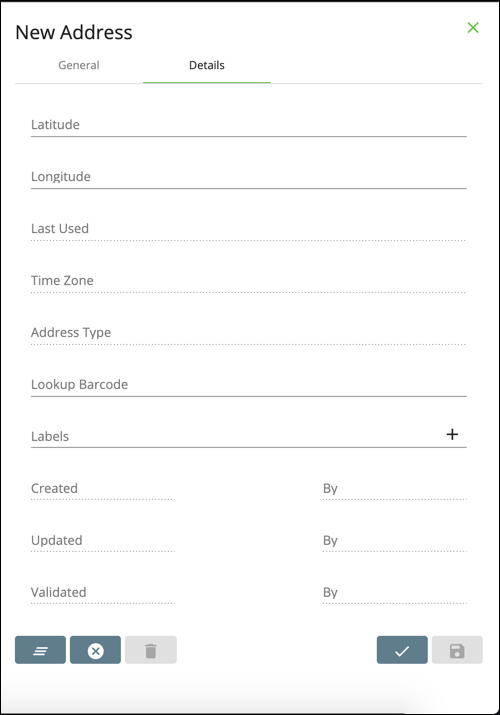
Details
The Details tab of the address form display geocoded location data in addition to several audit tracking fields.
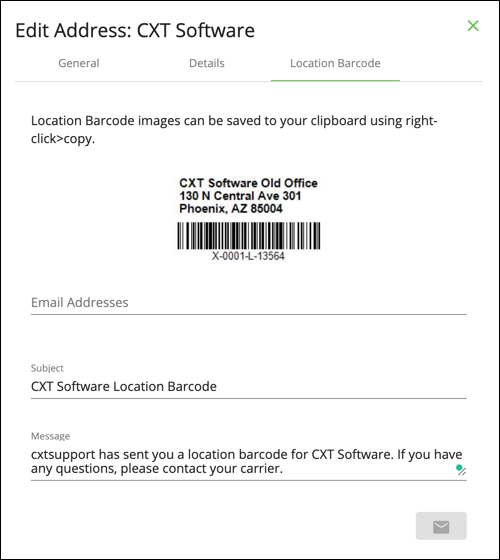
Location Barcode
The Location Barcode tab of the address form is visible once the address is saved. It displays the generated location barcode label which can be copied to the clipboard and pasted into a document for printing.
| Info |
|---|
For X Dispatch 19.1 or newer, location barcodes can be emailed directly from the Location Barcode tab. |
Section Functions
Insert excerpt X Next Dispatch Web Section FeaturesX Next Dispatch Web Section Features nopanel true
...
A global address is available when placing orders for any customer in X Dispatch. A customer specific address is available to only that specific customer ID during order placement inside X Dispatch.
| Note |
|---|
"Allow Customer Address Points" in the Orders tab of the customer record must be checked to view customer specific addresses. See Customers - New/Edit Customer for more information. |
Example
Customer 1 has a customer specific address for the Phoenix Zoo.
...