| Anchor | ||||
|---|---|---|---|---|
|
| Info |
|---|
Operations App is continuously updating and page layouts may differ. See here for other versions. |
| Table of Contents |
|---|
Addresses used in X Dispatch the Operations App go through an address validation process. Using validated addresses guarantees the address is real and prevents potential delivery issues. Different third-party validation services are available, some at an additional monthly charge. Please contact your CXT Software Account Manager for more details.
Addresses can be global or customer specific. For Inet Addresses, which are created and maintained on the internet user records, see Internet User (Address Book).
How to Add and Validate a New Address
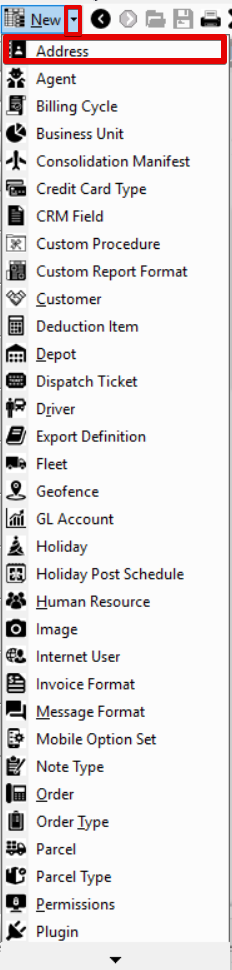
Go to Maintenance > Addresses and click the New button in the toolbar.
Div Alternate Steps
Click the arrow next to the New button, or press Alt + N keys and select Address.
- Enter the address information. Required information to validate an address is:
Address
Info - City
- State/Zip/+
Enter a Customer ID for the address to be customer specific. The default is set to 0, meaning all customers can use the address. See Global Address vs Customer Specific Address for more information.
- Automatically or manually validate the address:
Click the Process Address button to automatically validate an address.
- Check the Validated checkbox to manually validate an address.
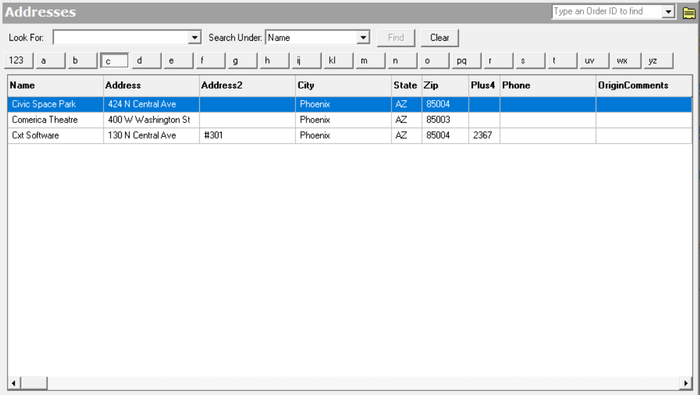
How to Edit an Address
- Go to Maintenance > Addresses.
Double-click the address you would like to edit.
How to Delete an Address
- Go to Maintenance > Addresses.
Click the address you would like to delete.
- Click the delete icon
 in the toolbar.
Address Form
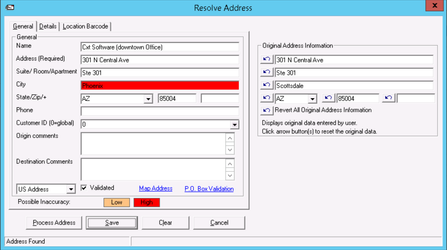
General
The General tab of the address form contains the address, phone, and default order information.
...
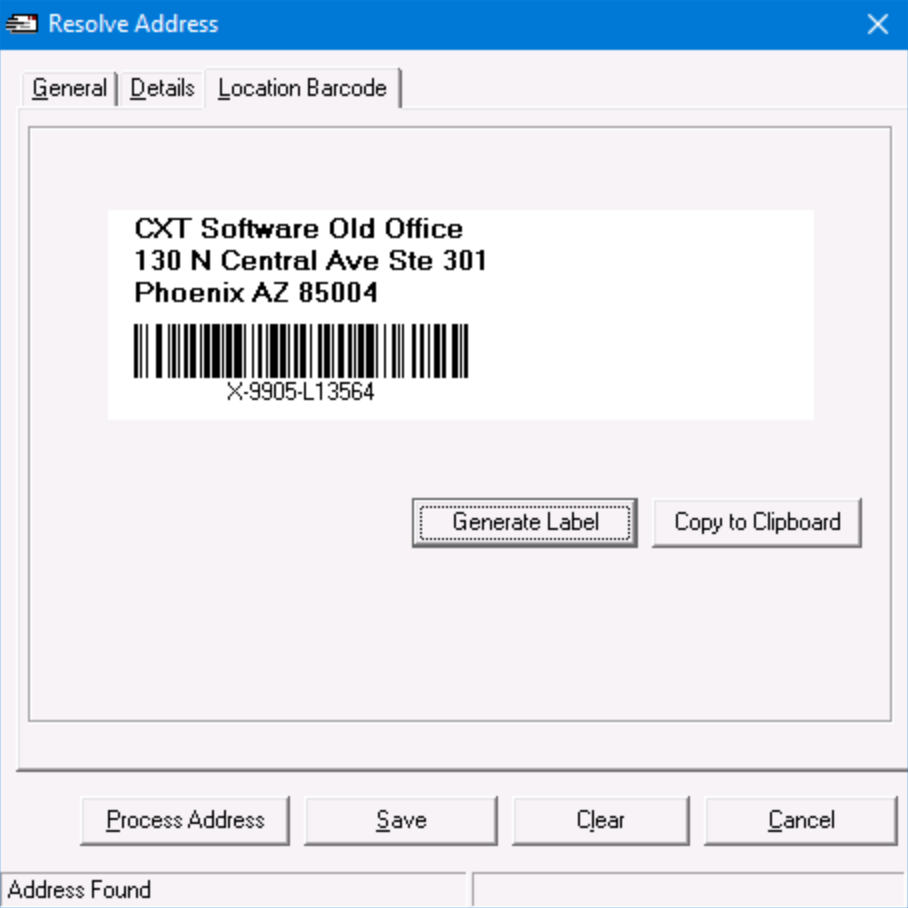
The Location Barcode tab of the address form is visible once the address is saved. It displays the generated location barcode label which can be copied to the clipboard and pasted into a document for printing.
...
Location barcodes are customer specific.
| Note |
|---|
The address must be processed right before generating the location barcode. If the address was already validated, it must be processed again to generate the barcode. |
Orange and Red Fields After Validation
...
Example: The original city entered did not match so the corrected change is highlighted red.
| Anchor | ||||
|---|---|---|---|---|
|
A global address is available when placing orders for any customer in X Dispatchthe Operations App. A customer specific address is available to only that specific customer ID during order placement inside X Dispatchthe Operations App.
| Note |
|---|
"Allow Customer Address Points" in the Orders tab of the customer record must be checked to view customer specific addresses. See Customers - New/Edit Customer for more information. |
Example
Customer 1 has a customer specific address for the Phoenix Zoo.
...
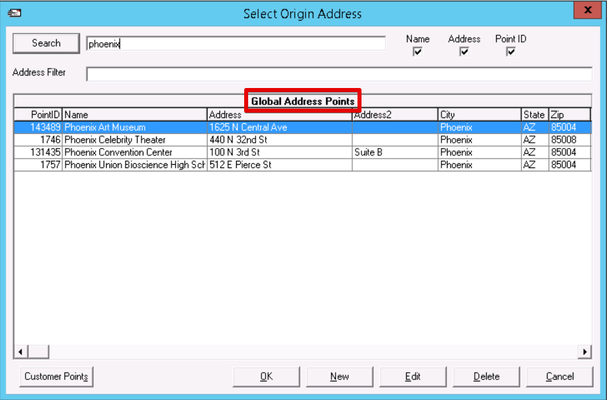
However, if the Phoenix Art Museum is set up as a global address, where the Customer ID is set to 0, then both Customer 1 and Customer 1106 can see the Phoenix Art Museum address.
| Page Properties | ||
|---|---|---|
| ||
|