Recurring orders and routes can be posted manually or automatically, and unposted manually.
| Table of Contents | ||
|---|---|---|
|
...
Click the Post/Unpost icon in the toolbar.

Alternative: From the top menu, select Action > Post Recurring...

Select a business unit and click OK.
Double click on the date, or dates, you would like to post or unpost. Selected date(s) will be highlighted yellow and the current calendar date text is in green.
Select whether you would like to Post or Unpost in the Action section.
Select if would like to post or unpost
Recurring Orders - Recurring orders post to the active On-Demand Dispatch board. See Recurring Order.
Routes - Routes post to the active Route Dispatch board. See Planning - New/Edit Route.
Route ASNs - Imported route stops that have been imported through an ASN. This option is only available when performing the unpost action.
Click OK.
| Tip |
|---|
Quick Tip : When the posting recurring orders, select Send Placed Alerts in the Action section to trigger any email notifications to customers (if configured on the order form and customer record). |
...
Dates recurring orders or routes were posted are highlighted in purple with the text "On-Demand" for recurring orders and "Routed" for routes.
| Excerpt | ||||
|---|---|---|---|---|
| ||||
 |
Auto Posting Recurring Orders or Routes
...
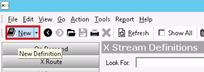
Go to X Stream > Definitions.
Click the New button in the toolbar.
Enter "Posting" as the Configuration Type.
Select "Posting-Posting" for Export Type.
Enter "Posting Routed and OnDemand" as the Configuration Description.
Add the following keys with their value in the definitions list:
Business Units - Enter multiple business unit IDs as comma separated numbers. For example 1,2,3,7,8.
Posting Types - Enter posting types “Routed” or “OnDemand’. If posting for both routed and on demand, enter the value as "Routed,OnDemand".
Days Offset - Enter the number of days in advance that you wish to have the routes posted once the definition is run. For example, if you are posting "Routed,OnDemand" stops for the following day, you would use a 1 day offset. If you want all of your Routed,OnDemand orders posted for a week out, you would use a 7 day offset. This would post on the seventh date in the future. As the definition is executed each day, the customer would always have 7 days worth of Routes and OnDemand Orders in the Operations App.
SendODEmails - Optional. Enter "true". Add this key and value pair if you want to automatically send the emails for the message formats associated with order placement.
Click Apply once the Key/Value pairs are entered.
Click Add Schedule to select the time that you want the definition to run so that your route stops and/or on demand orders are posted to the Dispatch board(s) and click OK. Auto posting at midnight can cause unexpected results. Auto posting should be scheduled a few minutes before or after midnight.
Click OK to save the definition.
...
| Tip |
|---|
Quick Tip: If posting on a Friday for work to be done on Saturday, Sunday, and Monday (for example) you would need three different schedules set up, all to post on Friday. The first would be a 1 day offset, then the second a 2 day offset, and the third, a 3 day offset. |
| Excerpt | ||||
|---|---|---|---|---|
| ||||

|
| Page Properties | ||
|---|---|---|
| ||
|