| Table of Contents |
|---|
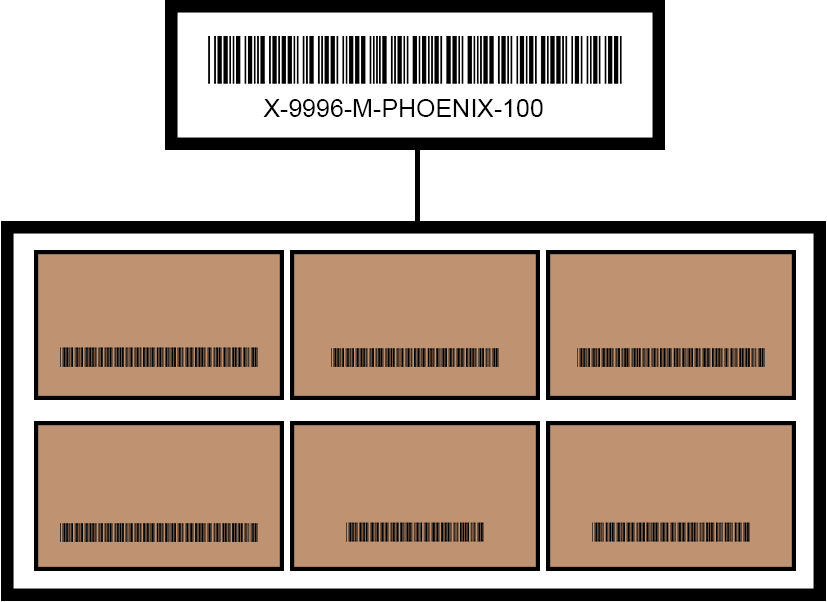
A master barcode can be used to associate multiple parcel scans with one barcode. This is useful when wrapping pallets, or locking totes. Drivers can scan a master barcode and mark all associated parcels as scanned.
For master barcodes that will be scanned at a depot, you can use a prefixed master barcode where the barcode begins with “X-[CXTID]-M-” so that the driver can use palletized scanning. Palletized scanning allows a driver at a depot to scan a prefixed master barcode and placing all subsequent parcel scans under that master barcode. For example, if your CXT Software ID is 9996, you would have master barcodes such as "X-9996-M-PHOENIX-100" and "X-9996-M-OFFICEDEPOT-PALLET-100".
| Info |
|---|
Palletized scanning requires Nextstop 3 or newer. |
How to Create Master Barcodes
In X Dispatch
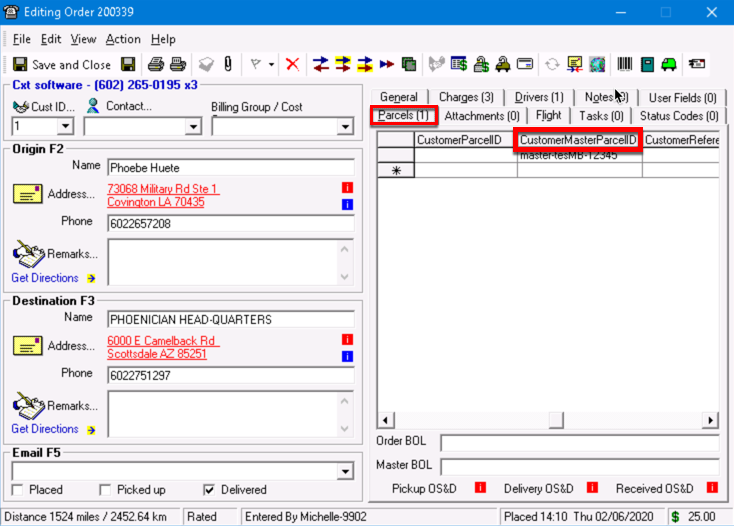
On Demand Order
Open the order.
Use the search bar in the top right of X Dispatch to search for the order
Select the order from the Orders.
Click the Parcels tab.
Enter the master barcode in the CustomerMasterParcelID field.
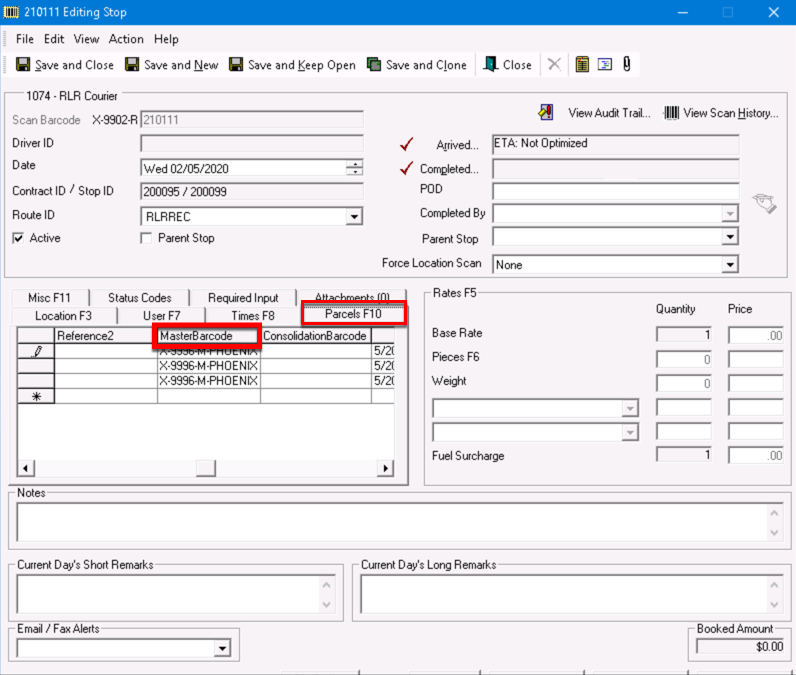
Route Stop
Open the stop.
Use the search bar in the top right of X Dispatch to search for the stop
Select the stop from the route manifest.
Click the Parcels tab.
Enter the master barcode in the MasterBarcode column.
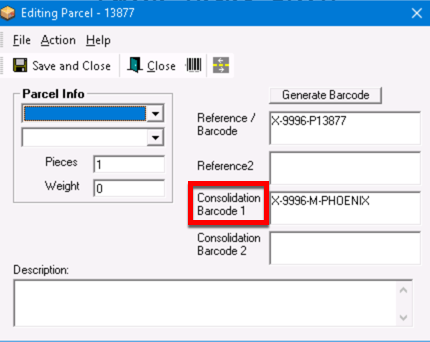
Alternate Steps
Open the stop.
Use the search bar in the top right of X Dispatch to search for the stop
Select the stop from the route manifest.
Click the Distributions Parcels icon.

In the top left click File.
Select Add Parcel.
Enter master barcode in the Consolidation Barcode 1 field.
In Nextstop
Master barcodes can also be created in Nextstop by drivers in the Receiving or Stop sections.
| Info |
|---|
For Nextstop 3 driver documentation please see How to Create a Master Barcode. Driver(s) must have the “Create Master Barcodes” mobile option enabled.
|
| Tip |
|---|
Quick Tip: In Nextstop 3.0.16 or newer, drivers can swipe left on a master barcode to manually scan or unscan the master barcode. When the driver manually scans the master barcode, all parcels under the master barcode will be marked as being manually scanned. |
From Receiving
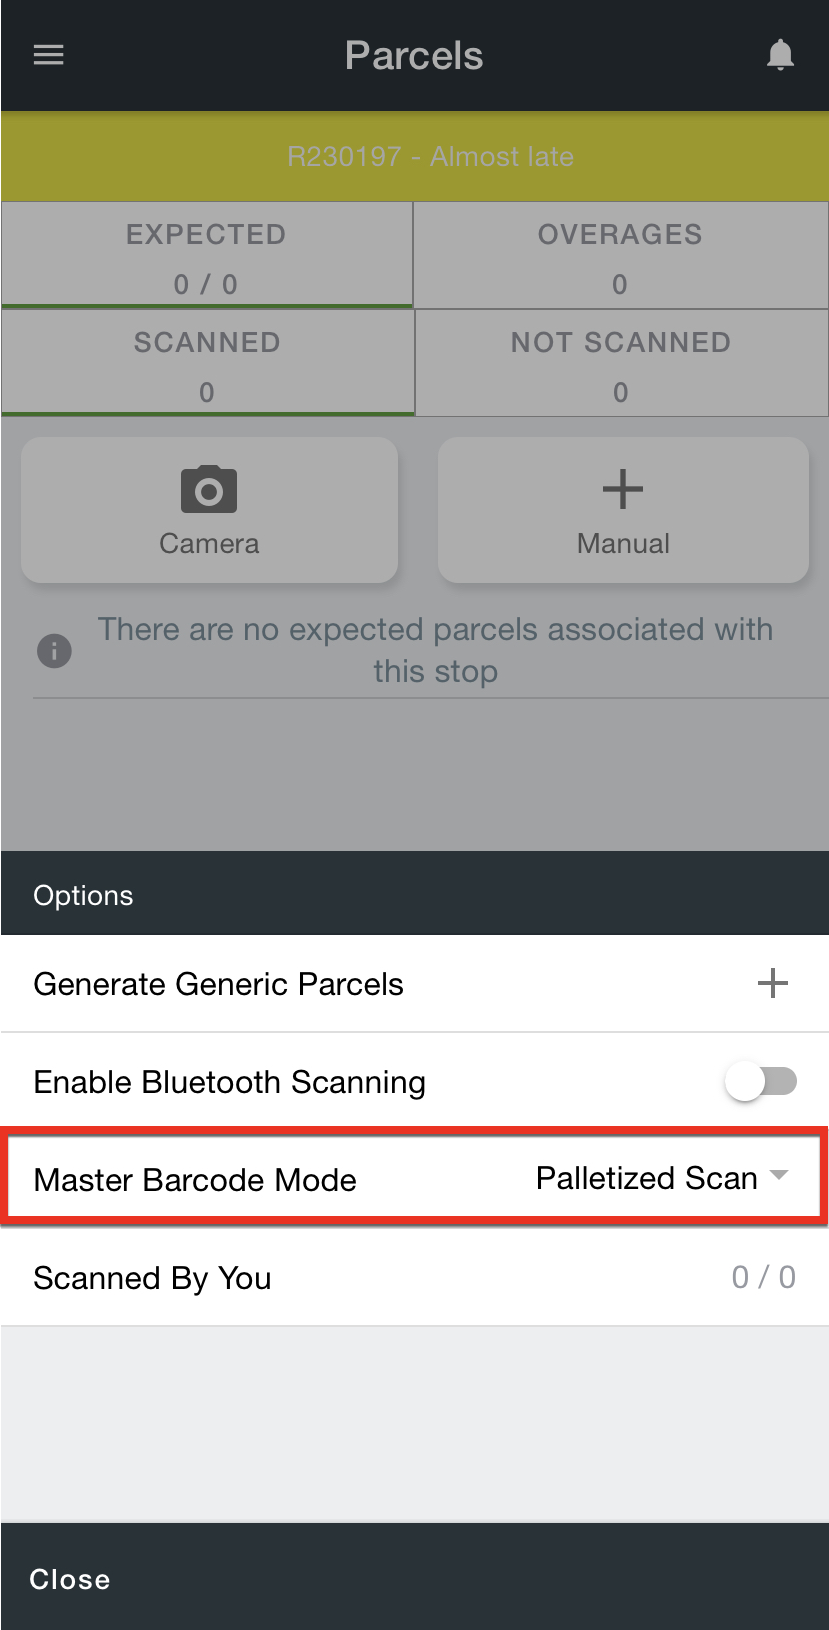
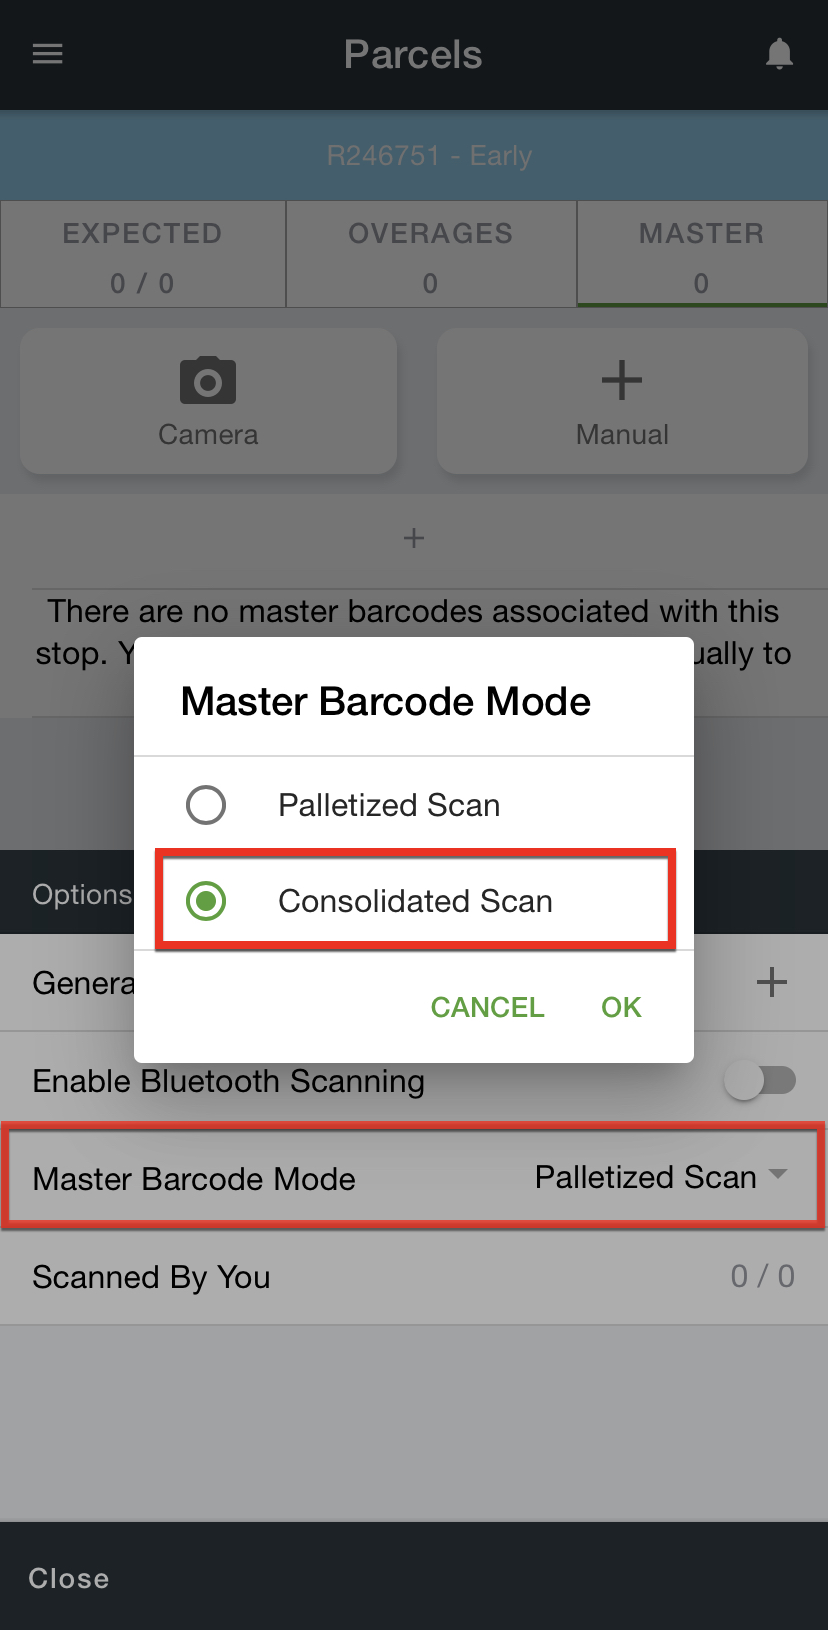
There are two master barcode modes in the receiving section: Palletized Scan and Consolidated Scan.
To select which Master Barcode Mode to use, tap the green options menu.
Palletized Scanning
| Info |
|---|
Required Nextstop 3 or newer. To add details to any scanned parcel, tap the 'i”. |
| Note |
|---|
|
By default, the Master Barcode Mode is set to “Palletized Scan” on receive stops.
Scan a Formatted Master Barcode with a Bluetooth Scanner
Tap the menu icon in the top left and select Receiving.
Select the facility, or depot, that the receive stop you would like to add the master barcode to is associated with.
Select the receive stop.
Scan master barcode with a Bluetooth scanner.
Scan parcels associated with the master barcode.
To scan another master barcode, repeat steps 4 and 5.
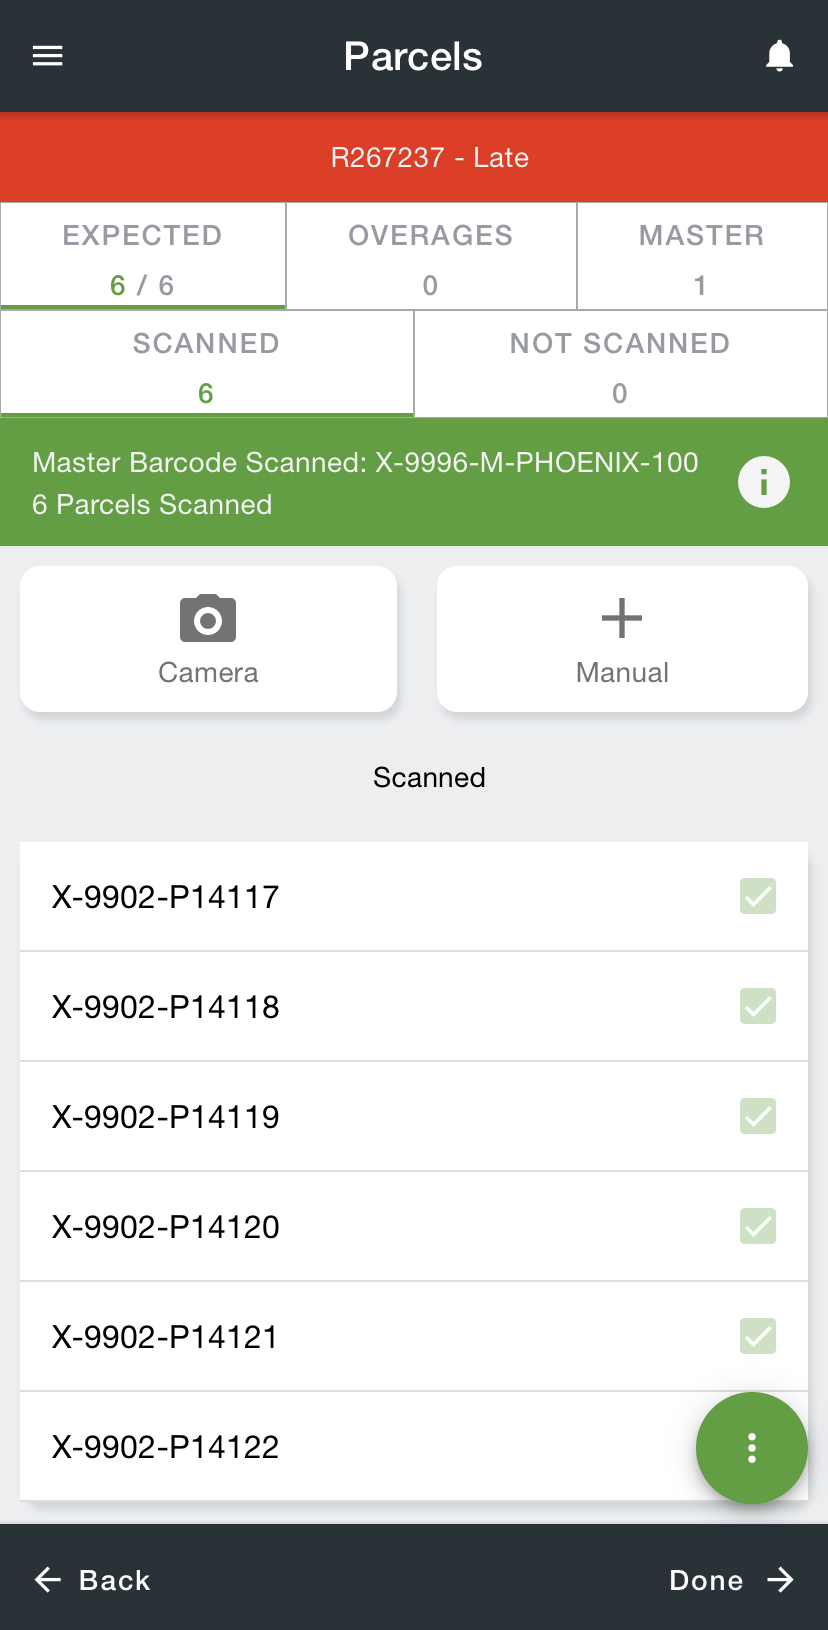
Scan a Master Barcode
Tap the menu icon in the top left and select Receiving.
Select the facility, or depot, that the receive stop you would like to add the master barcode to is associated with.
Select the receive stop.
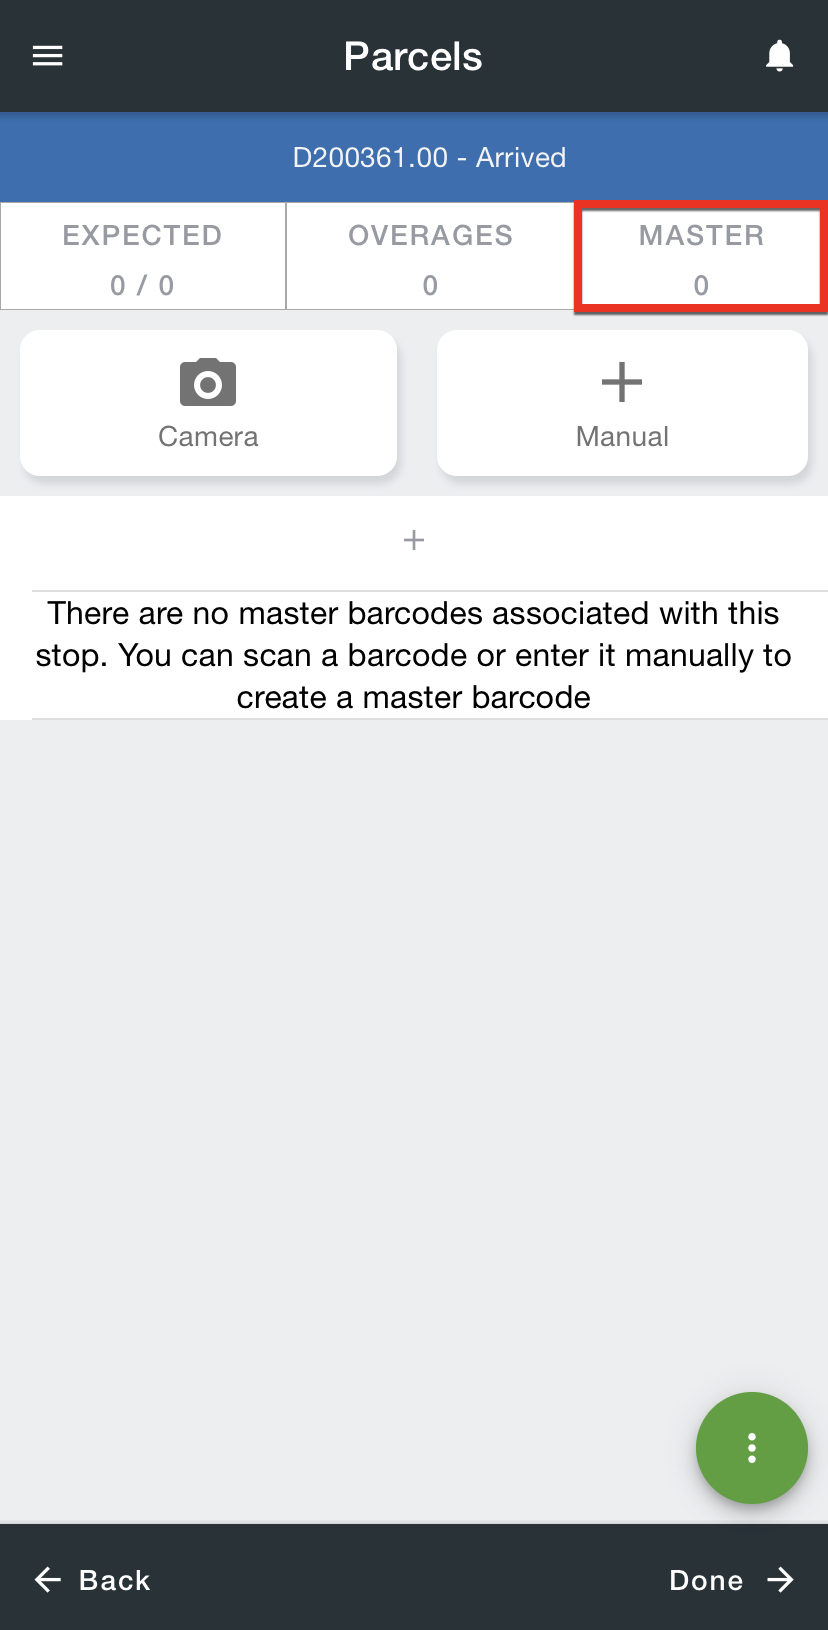
Tap MASTER in the top right.

Scan master barcode using one of the following methods:
Scan with a Bluetooth scanner.
Select Camera to use your mobile device’s camera to scan a master barcode.
Select Manual to enter a master barcode manually.
Scan parcels associated with the master barcode.
To scan another master barcode, click Back to return to the Master Barcode screen and repeat steps 5 and 6.
Consolidated Scanning
| Note |
|---|
|
Tap the menu icon in the top left and select Receiving.
Select the facility, or depot, that the receive stop you would like to add the master barcode to is associated with.
Select the receive stop.
Tap MASTER in the top right.
Tap the green options menu in the bottom right.
For the Master Barcode Mode, select “Consolidated Scan” and tap OK.
Scan master barcode using one of the following methods:
Scan with a Bluetooth scanner.
Select Camera to use your mobile device’s camera to scan a master barcode.
Select Manual to enter a master barcode manually.
Scan parcels associated with the master barcode.
To scan another master barcode, click Back to return to the Master Barcode screen and repeat steps 7 and 8.
From a Stop
| Note |
|---|
If a parcel barcode is scanned, but it is already associated with another master barcode the parcel will be counted as a duplicate. |
Tap the menu icon in the top left and select Stops List.
Select the stop you would like to add the master barcode for.
Tap Parcels.
Tap MASTER in the top right.
Scan master barcode using one of the following methods:
Scan with a Bluetooth scanner.
Select Camera to use your mobile device’s camera to scan a master barcode.
Select Manual to enter a master barcode manually.
Scan parcels associated with the master barcode.
To scan another master barcode, click Back to return to the Master Barcode screen and repeat steps 5 and 6.
Example
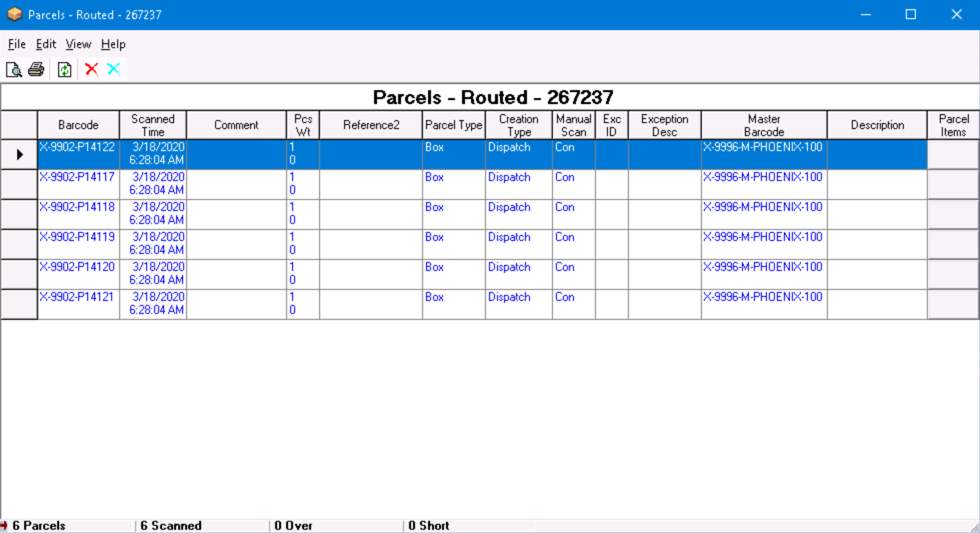
You have a pallet that has been built with individually barcoded boxes, with the individual barcodes created as parcels in X Dispatch and associated with a master barcode.
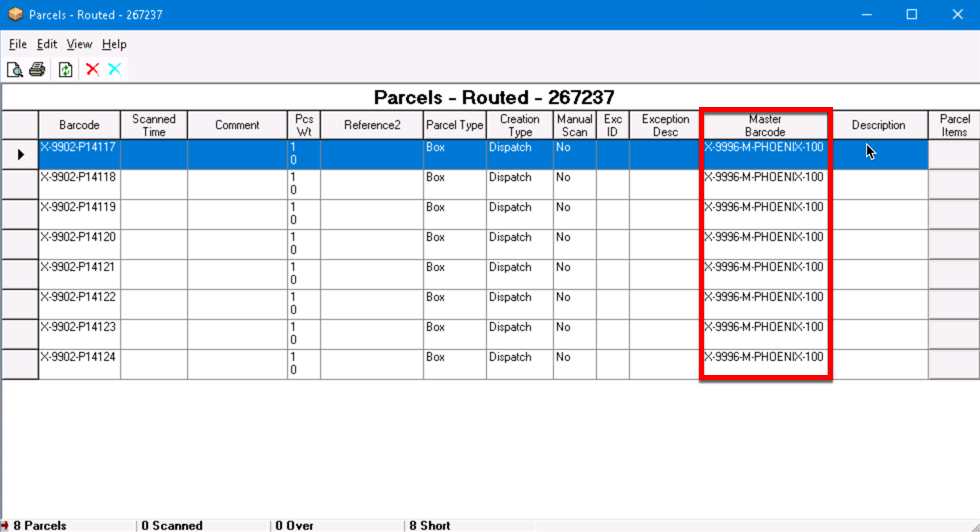
The pallet is shrink-wrapped and the corresponding Master Barcode label is placed on the outside of the pallet. Then when a driver scans the master barcode in Nextstop, all parcels will be marked as scanned.
| Page Properties | ||||
|---|---|---|---|---|
| ||||
|