The contract stop form contains the information required to bill the customer, pay the driver (if pay needs to be overridden from the route level), and manage the stop of a contract.
Newly created contract stops must:
- Have their own recurring schedule. See How to Edit Weekly Stop Schedules for Contract Stops in X Route.
- Be posted to activate them on the dispatch board. See Post Recurring Orders or Routes.
How to Add a New Contract Stop
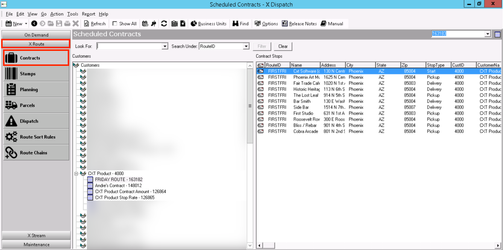
- Go to X Route > Contracts.
- Double-click the customer associated with the contract.
- Double-click the contract you would like to add the stop to.
- Click the AddStop button
 at the top of the contract stop form.
You can clone a stop from the Edit Stop form by clicking the clone button in the toolbar. See Top toolbar below.
How to Clone a Contract Stop
Requires X Dispatch 20.0 or newer.
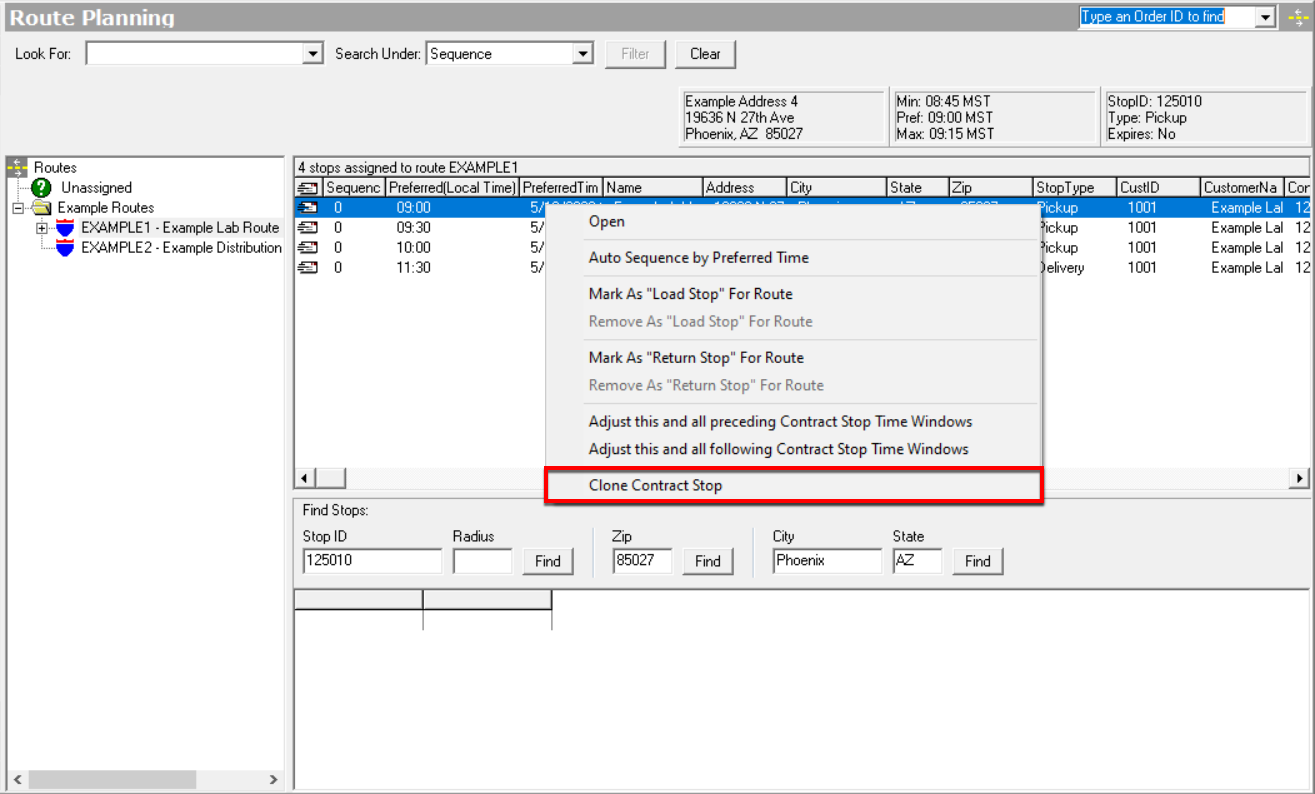
From Route Planning
- Go to X Route > Contracts.
- Right-click on the stop you would like to clone on the right in the stops pane.
- Select Clone Contract Stop.
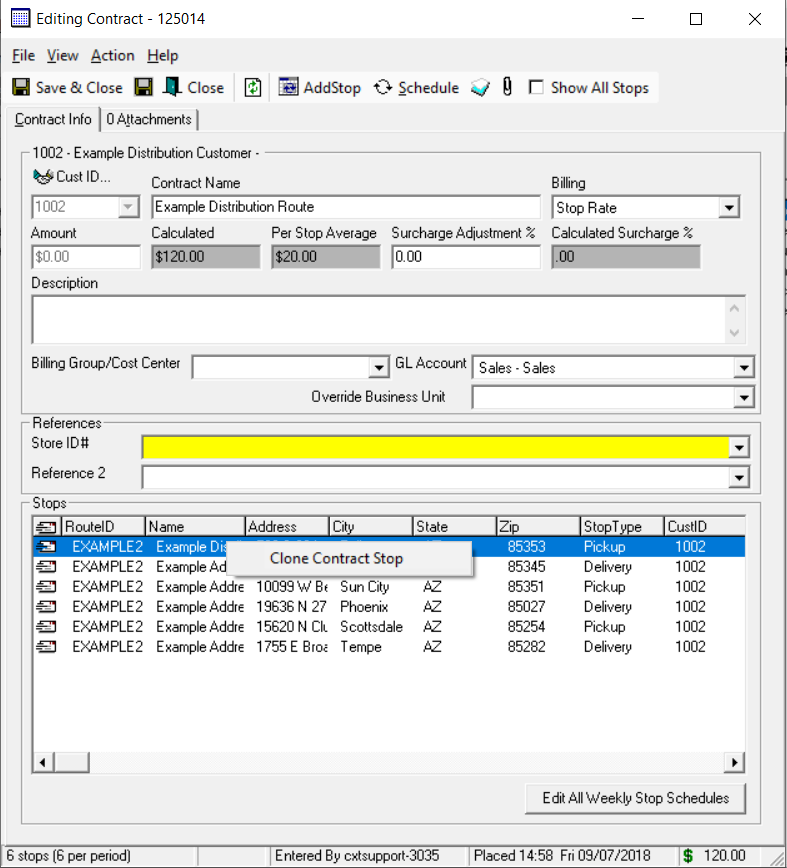
From the Contract Form
- Under Stops, right click on the contract stop you would like to clone.
- Select Clone Contract Stop.
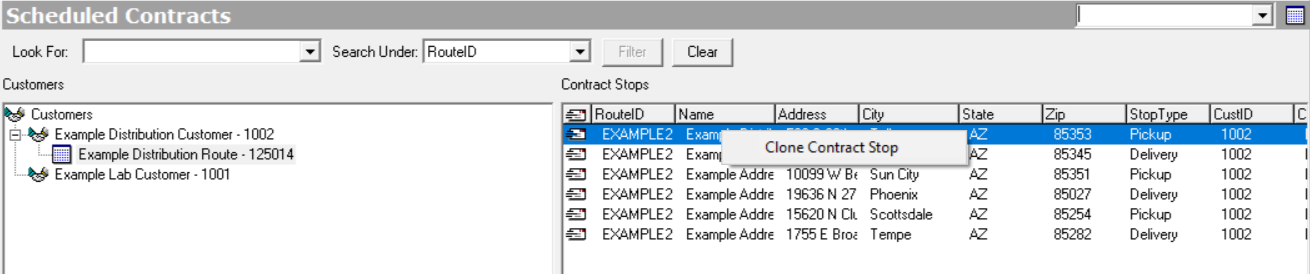
From Contracts
- Under Customers, click on the customer associated with the contract stop you would like to clone.
- Click the contract with the contract stop you would like to clone.
- Under Contract stops, right click the contract stop you would like to clone.
- Select Clone Contract Stop.
How to Edit a Contract Stop
From X Dispatch
Use the search field in the top right under the toolbar.
From Scheduled Contracts
- Double-click the customer associated with the contract.
- Double-click the contract with the stop you would like to edit.
- Double click the contract stop you would like to edit.
Alternate steps
- Double-click the customer associated with the contract.
- Click the contract with the stop you would like to edit.
- In the Contract Stops section on the right, double click the contract stop you would like to edit.
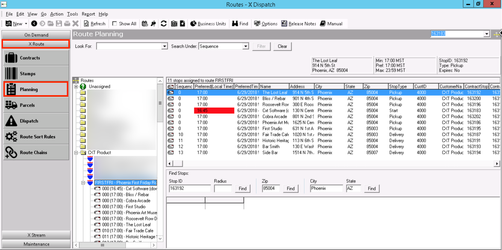
From Route Planning
- Double-click the group folder if applicable.
- Click the route.
- Click the plus sign next to the route name.
- Double-click the stop.
How to Deactivate a Contract Stop
- From the contract stop form, click Action > Schedule, or click Schedule in the toolbar.
In the Recurring Schedule form, select End on under Range of Recurrence.
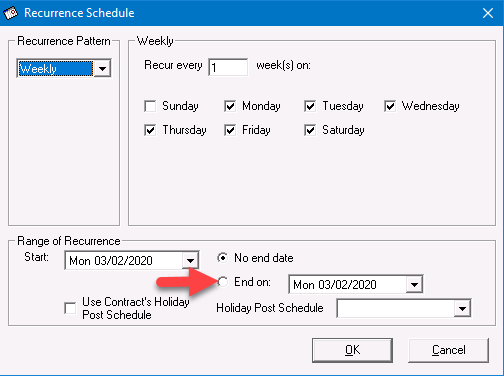
- Select the date you would like the contract stop to be deactivated.
How to Delete a Contract Stop
From the contract stop form, click Action > Delete at the top of the form.

Stop Form
Top toolbar
The top toolbar contains icons representing actions that can be taken in regard to the contract stop.

| Icon | Field Name | Description |
|---|---|---|
| Save and Close | Saves contract stop changes and closes the form. |
| Save and Keep Open | Save changes to the current contract stop and keep the form open. |
| Close | Close the form without saving any changes. |
| Schedule | Opens recurrence schedule window. |
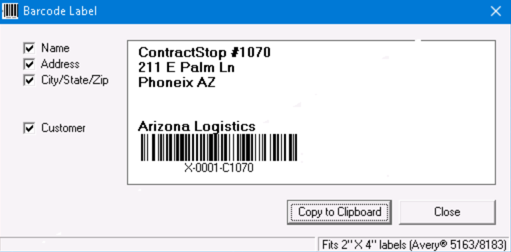
| Generate Label | Generate a barcode label with information about the parcel that can be copied and used in another application in order to print out a label for the parcel.
Quick Tip You can also generate a label by going to Action > Generate Label in the top of the parcel form. |
| Parcels | Displays parcels assigned to the contract stop. |
| Clone | Creates a new contract stop by copying current stop information onto a new stop. The original stop is saved and closed. |
| View XS Data | Display XS Data. X Stream (XS) Data is used during integration imports if needed for the integration. |


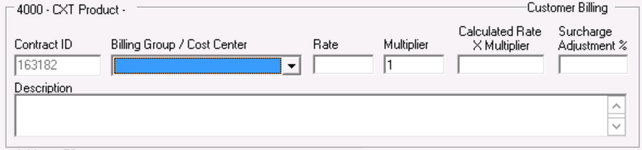
Customer Billing
Availability in this section is dependent upon how the contract is set up. See Contracts.
| Field Name | Description |
|---|---|
| Contract ID | Shows ID of the contract to which stop is assigned. This field is an auto-populated display only field and cannot be edited. |
| Billing Group/ Cost Center | Enter a new billing group/cost center, or select from the list. Billing groups are maintained in the customer record's "Reference" tab. See Customers - New/Edit Customer. This is an optional field to attach information such as a department or cost center to be billed for delivery service. Invoices can be sorted and subtotaled by this field. |
| Rate | The rate customer is billed each time this stop is posted unless a multiplier is used. This field is active only on stop rate and stop rate multiplier billing type. |
| Multiplier | The rate multiplier for the stop and used with the contract schedule used when Billing on the contract is set to "Stop Rate * Multiplier". Example If the contract stop schedule is set to post 5 days a week, but the contract schedule is set to post 2 days a week, the invoiced amount would be the Multiplier value, multiplied by the Rate value, multiplied by the 2 days in the contract schedule. |
| Calculated Rate X Multiplier | The product of the previous two fields: Rate and Multiplier. If used, the customer is charged this amount when the contract is invoiced instead of the Rate multiplied by the number of days the stop is posted during the billing period. This field is active only on stop rate and stop rate multiplier billing type. |
| Surcharge Adjustment % | Surcharge adjustment for contract stop. This field adjusts the surcharge based on global settings (in Options > X Route). This field is active only on stop rate and stops rate multiplier billing type. |
| Description | Description of the stop. This will not appear on the customer's invoice. |
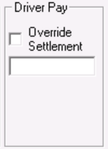
Driver Pay
| Field Name | Description |
|---|---|
| Override Settlement | If checked, the pay defined on the route level is overridden by the value entered in the text box. |
Address
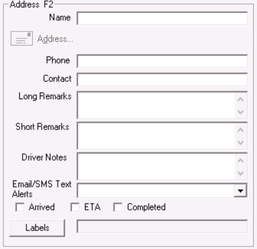
| Field Name | Description |
|---|---|
| Name | Name of company, person, etc., for contract stop. Not required but it should generally be used. The first few characters of an existing address point can be entered to find saved points. |
| Address | The complete street address for the stop. Not required but it should generally be used (is required for successful route optimization). Address information is accessed by clicking on the "Address" button |
| Phone | The phone number for the stop. This field is alphanumeric so both digits and formatting characters are saved. |
| Contact | Contact name information. |
| Long Remarks | Detailed information about the stop. This information is sent to the driver's mobile device. Quick Tip Entering a URL in this field will display as a clickable link in Nextstop 3.1.1 or newer. |
| Short Remarks | Summarized information about the stop. This information appears on the manifest and is sent to the driver's mobile device. Quick Tip Entering a URL in this field will display as a clickable link in Nextstop 3.1.1 or newer. |
Driver Notes Notes for X Dispatch 20.0 or older. | General notes about the contract stop. Displayed in Nextstop on the Stop Info screen and in X Internet it is displayed under Short Remarks column with the Current Day's Short Remarks in Route Tracking. If the stop is consolidated in Nextstop, only the Remarks of the first consolidated will be displayed. Quick Tip Entering a URL in this field will display as a clickable link in Nextstop 3.1.1 or newer. |
Email/SMS Text Alerts Email/ Fax Alerts for X Dispatch 20.0 or older | Email address(es) and/or phone number(s) that will automatically receive status update notifications for the posted contract stop. Separate multiple entries with a semicolon ";". |
Arrived / ETA / Completed | Requires X Dispatch 21.1 or newer. These checkboxes determine which emails will be sent during the pickup or delivery process. If a checkbox is grayed and you are unable to check it, this means that the status event is not set up with a message format in the customer record for the customer on the order.
|
| Labels | Requires X Dispatch 20.0 or newer. Label(s) for the customer to be used for reporting purposes. See Labels (Classic Operations App). |

Tabbed Section
This is the tabbed section of the form.
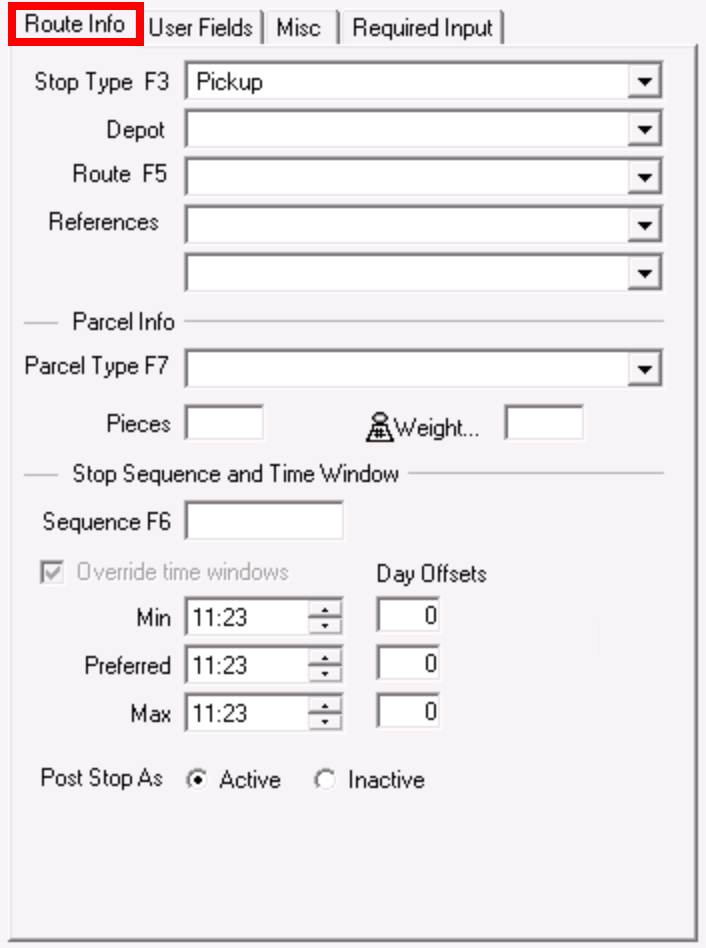
Route Info
The Route Info tab contains important information about the stop.
| Field Name | Description |
|---|---|
| Stop Type | Specify stop type by selecting from these options: Start, Pickup, Delivery, Exchange, Meet, Flight, and End. Required. Additional stop types can be used, as needed. See Stop Types (Classic Operations App). |
| Depot | Set Depot for the contract stop. See Depots (Classic Operations App). |
| Route | Shows route to which contract stop will post. |
| Reference 1 | This value will automatically be entered into the "Reference 1" field on the posted route stop form. |
| Reference 2 | This value will automatically be entered into the "Reference 2" field on the posted route stop form. |
| Parcel Info | |
| Parcel Type | Sets default parcel type for the contract stop. |
| Weight | Sets default weight for the contract stop. Clicking Dimensional Weight Calculator required X Dispatch 21.1 or newer. |
| Pieces | Sets default number of pieces. |
| Stop Sequence and Time Window | |
| Sequence | Sequence this contract stop will have when it posts. |
| Override time windows | Overrides the global Options > X Route "Stop Time Settings". See Global Options. |
| Min | The earliest time the stop should be completed. You can add the number of days to be offset by. |
| Preferred | Preferred time for the stop to be completed. You can add the number of days to be offset by. |
| Max | Latest time the stop should be completed. You can add the number of days to be offset by. |
| Post Stop As | Determines how routed work will post with routed work postings.
|

User Fields
This tab contains any data placed in user fields in relation to a contract stop.

| Field Names | Description |
|---|---|
| User Field 1 | Available fields for additional data to capture on route stops. These field names can be customized on the customer record in the "General" tab under "Route Stop User Field Captions". See Customers - New/Edit Customer. |
| User Field 2 | |
| User Field 3 | |
| User Field 4 | |
| User Field 5 | |
| User Field 6 |
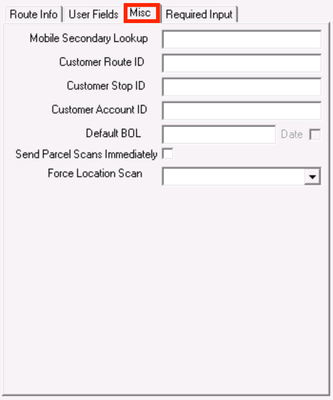
Misc
This tab contains miscellaneous information about the contract stop.
| Field Name | Description |
|---|---|
| Mobile Secondary Lookup | A reference that can be used for Location Scanning by mobile devices. |
| Customer Route ID | This field can be used with Customer Stop ID and Customer Account ID to track data regarding a customer's internal reference data relating to a given route and its stops. ExampleUsed in an imported record needs to make note of the shipping partner's names. |
| Customer Stop ID | The Stop ID, if any used by the customer to reference this contract stop. |
| Customer Account ID | The Account ID, if any used by the customer to reference this stop/route/location. |
| Default BOL | BOL, or Bill Of Lading, is used for grouping. Nextstop consolidation replaces the use of BOL. Example for X MobileYou have a route that runs in downtown Phoenix and services 4 different customers, but you don't want to have 4 different routes, and prefer to have 1 route with co-mingled route stops for all 4 customers. However, your driver needs to have a parcel chain of custody for the imported work to give the shipper visibility to when the freight is loaded onto the truck and when it is delivered - this means 4 separate Load Stops for each customer. A BOL on the Contract Stop level can be used to set a grouping value that will allow the driver to take bulk action on all 4 route stops at once without having to open each route stop, find the right parcels to scan while loading the truck, and add separate POD/signature info for each stop. |
| Date | When enabled, appends the date to the BOL, for each day the stops are posted to the dispatch board. This allows stops to be separated by date. This should be enabled for BOL to work as expected. |
| Send Parcel Scans Immediately | Enable parcel scan timestamps in X Mobile to be sent immediately, instead of after the stop is marked "Completed". |
| Force Location Scan | Introduced in X Dispatch 18.0.
See Force Location Scan. |
Required Input
This tab contains required driver input for the stop. Click the Add New button to add a new required driver input for the stop. See Nextstop Required Driver Input. Double click on a required driver input to add a driver response or edit / delete the required driver input.
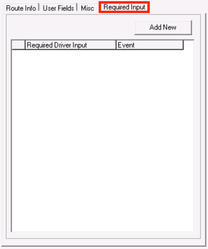
Field Name | Description |
|---|---|
| Required Driver Input | The prompt the driver will see at the stop. |
| Event | When the required driver input occurs. "Arrived" or "Completed". |
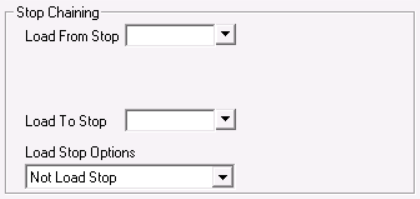
Stop Chaining
| Field Name | Description |
|---|---|
| Load From Stop | Add the Contract Stop ID for the given stop's Receive Stop. This value is generally only populated on the route's Load Stop(s). This function chains all parcels upstream, from the route's load stop to the receive stop. Only numeric values can be entered. |
| Load To Stop | Add the Contract Stop ID for the stop where the given contract stop's parcels should chain to. This function is generally used when no ASN file is processed but some level of OS&D reporting is required. Only numeric values can be entered. ExampleA customer has lab samples to be picked up from various labs throughout the day and returned to one stop at the end of the route. The "Load to Stop" for each pickup stop should be set to the Contract Stop ID of the final delivery stop. This configuration makes it so that as the driver scans each parcel as an overage at the pickup stop, parcels will be automatically chained to the final delivery stop so a true OS&D report can be generated based on the parcels from the pickups. |
| Load Stop Options | Requires X Dispatch 21.0 or newer.
See Route Chaining. |