...
...
...
...
...
...
...
...
...
...
...
...
...
...
...
...
...
...
...
...
...
...
...
...
...
...
...
...
...
...
...
...
...
...
...
...
...
...
...
...
...
...
...
...
...
...
...
...
...
...
...
...
...
...
| Table of Contents |
|---|
Enabling the credit limit feature within X Dispatch allows a user to import and reference QuickBooks accounts receivable and aging data to easily monitor the line of credit for a specific customer. This tool can ensure that orders are not placed for any customer who is over their credit limit, warn when a customer has reached their credit limit and can keep track of the invoiced and un-invoiced order amounts.
| Note |
|---|
Imported A/R records are updated according to the specific schedule set in the Credit CalculationsCalculations X Stream Definitions. For assistance updating the interval please contact Customer Support. Credit limits are not currently supported by Rapidship Client. |
How to Set or Edit Credit Limits Permissions for
...
Operations App Users
You can set permissions for an X Dispatch Operations App user to use the credit limits feature. See Users (Classic Operations App).
Go
...
to Maintenance > Permissions.
Select the user you would like to set or edit credit limits permissions for.
Click the '+' next
...
to X Dispatch Functions.
Click the '+' next
...
to Customers.
Select which permission you would like to set for the user by checking, or unchecking, View Credit Limits, Edit Credit Limits, and/or Import Credit Limit Data.
...
Press OK
...
to save and close the permission record.
...
How to Enable Credit Limits for Customers
You can set a credit limit on the customer record. See Customers - New/Edit Customer.
Go to Maintenance > Customers.
Select and open the customer record you would like to set a credit limit on.
Go to the Invoices tab.
Check the Enable Credit Limit box.
Enter the Credit Limit amount you want to set for the customer.
Click the Save button.
...
Configuring Credit Limit Enforcement
The configuration of credit limits enforcement is done in the global options. See Global Options.
Click the Options button in the toolbar.
Configure Enforcement in
...
the Operations App and/or
...
the Client Portal
Go to the Accounting tab.
Go to Enforce X Dispatch Credit Limit and/or Enforce X Internet Credit Limit and select how you would like to enforce credit limits. You can choose between:
Ignore - Any credit limit set on a customer record will be ignored and all orders can be placed.
Warn - This option is only available for Enforce X Dispatch Credit Limit. A warning will be displayed when entering the Customer ID of a customer with a credit limit when placing an order or editing any posted route stop.
...
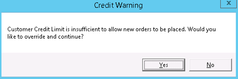
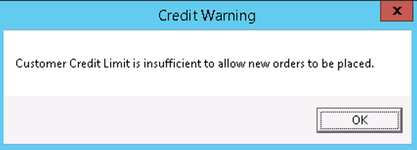
Enforce -
...
A warning will be displayed when entering the Customer ID of a customer with a credit limit when placing an order or editing any posted route stop. See Configure Internet Credit Exceeded Message for the warning message in
...
the Client Portal.
...
...
The Warn and Enforce message for all orders placed inside of
...
the Operations App is set by CXT Software and cannot be changed,
Click OK or continue to the steps below to configure the internet credit exceeded message.
| Anchor | ||||
|---|---|---|---|---|
|
Go to the Internet Options tab.
In the Orders section under Credit Exceeded Message, enter the text you would like to display.
Click OK.
Export from QuickBook and Import to
...