...
...
...
...
| Info |
|---|
This page is for the Classic Operations App. For the Operations App please see Email Find Results. |
| Table of Contents |
|---|
...
The Email Find Results/Report tool
...
allows you to send an email directly from the
...
Find tool to a recipient with the results attached as a CSV or a PDF without first having to export the file to your local workstation.
...
This feature is controlled by a user permission, please remember to enable the permission for users that need access to this feature. Additionally, customers must have their Mail Manager configured for outbound email. See the following article for more information on configuring your Mail Manager: Troubleshooting Email Problems in X Dispatch.
| Note |
|---|
If a Custom Report is associated with a Find, the report takes the place of the CSV file as an attached PDF. |
Setting Permissions
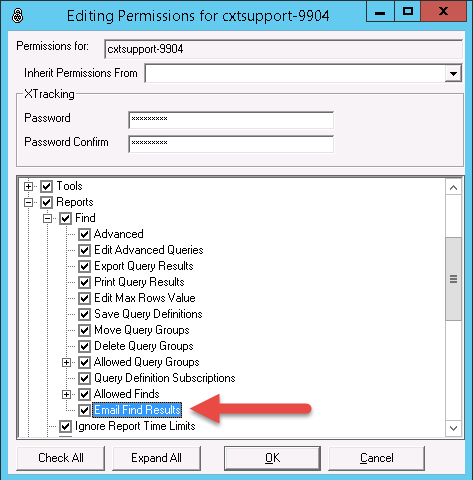
- Navigate to Maintenance > Permissions and open the Permissions record for the User ID that you would like to configure.
- Expand Reports > Find and enable Email Find Results.
- Press OK to save and close the Permission record.
Creating a Message Format
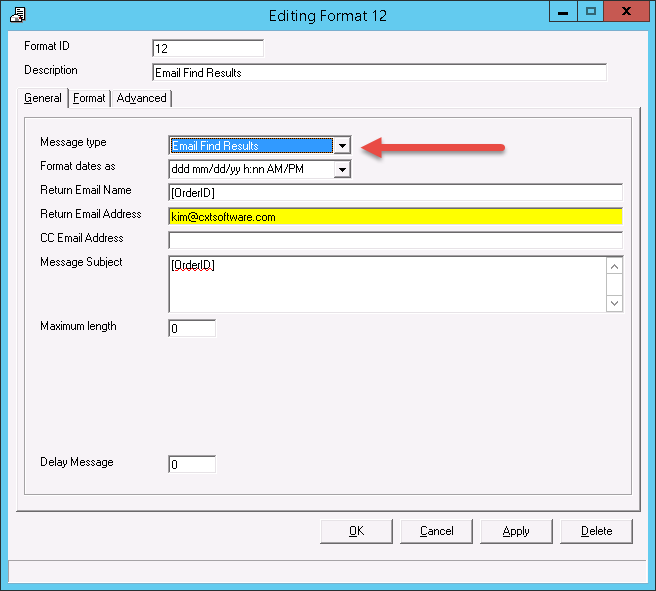
- In X Dispatch > Maintenance > Message Formats, create a New Message Format.
- As a best practice, in the Description field, name this message format Email Find Results. If you create multiple message formats to send Find results, ensure that the Description (name) of the message format clearly tells the user when to use it.
- From the Message Type select Email Find Results.
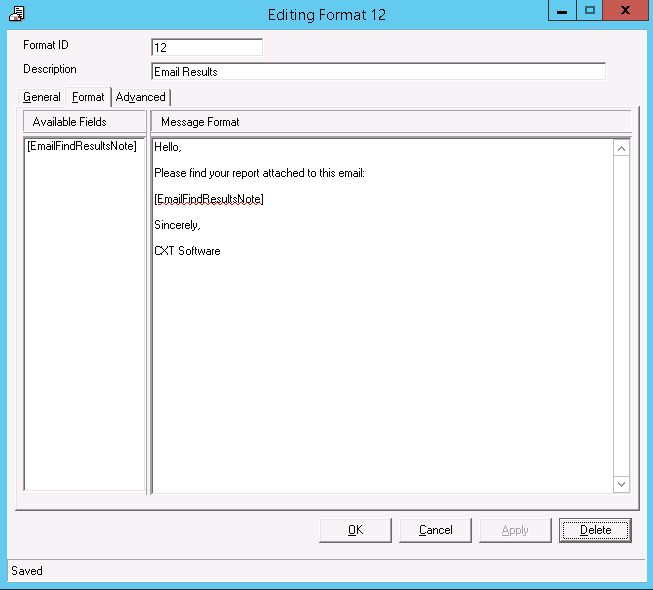
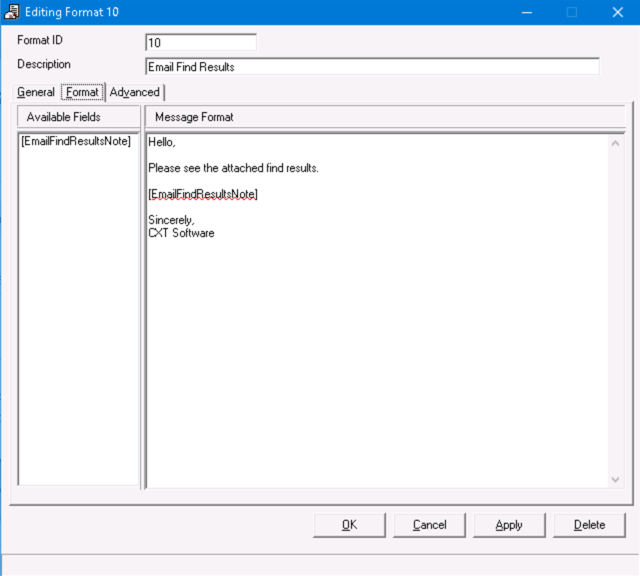
- From the Format tab choose [EmailFindResultsNote].
- Each time you email Find results from the Find tool, you are prompted to enter text that is included in the body of the email. The text you enter will appear in the body of the email in the [EmailFindResultsNote] field.
- Additional details are added to the Message Format to wrap around the [EmailFindResultsNote]. These additional details will appear on every email, and will not change. Only the [EmailFindResultsNote] part changes, depending on your input. This is typically used for signatures,
- Press Apply then OK to close the form.
Emailing Find Results
To utilize the Email Find Results feature, run a Find query then follow the steps below:
- Open Find from the top menu bar of X Dispatch.
- Fill in the form with what you would like to find, click the Exec button and the Email Find Results icon is enabled.
- Click on the Email Find Results icon.
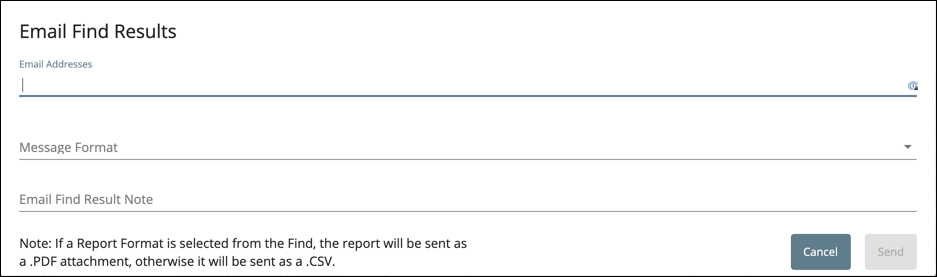
- Fill in the Recipient Email Address.
- Select Email Results from the Message Format drop-down.
 A PDF will be attached instead of a CSV file if a custom report is associated with the Find. See Custom Report Formats.
| Info |
|---|
You must have the "Email Find Results" permission enabled (see Users (Classic Operations App)) and have the Mail Manager configured for outbound email (see Troubleshooting Email Problems in the Operations App). |
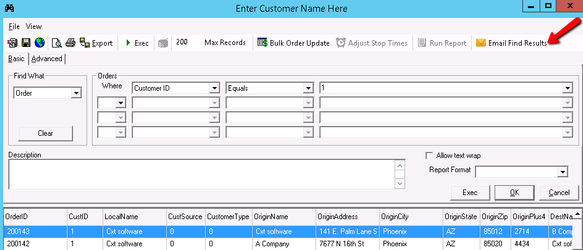
How to Email Find Results in Find
In the toolbar, click Find.
Execute a find. See Find (Classic Operations App).
Click on the Email Find Results in the top right. You may need to expand the Find window to see this option.
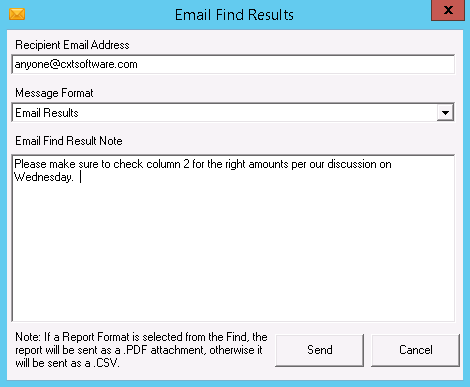
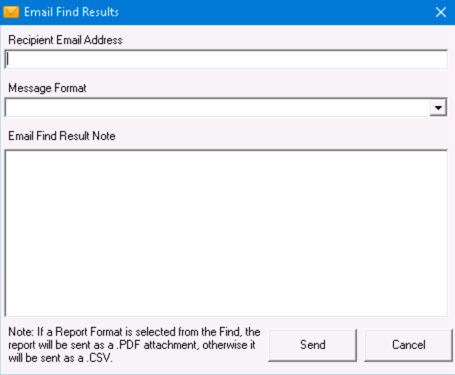
Fill out the Email Find Results form. Multiple addresses can be used by separating them with a semicolon. Select a message format that has [EmailFindResultsNote] field. To create a new message format or update an existing one see Message Formats (Classic Operations App).
Click the Send button.
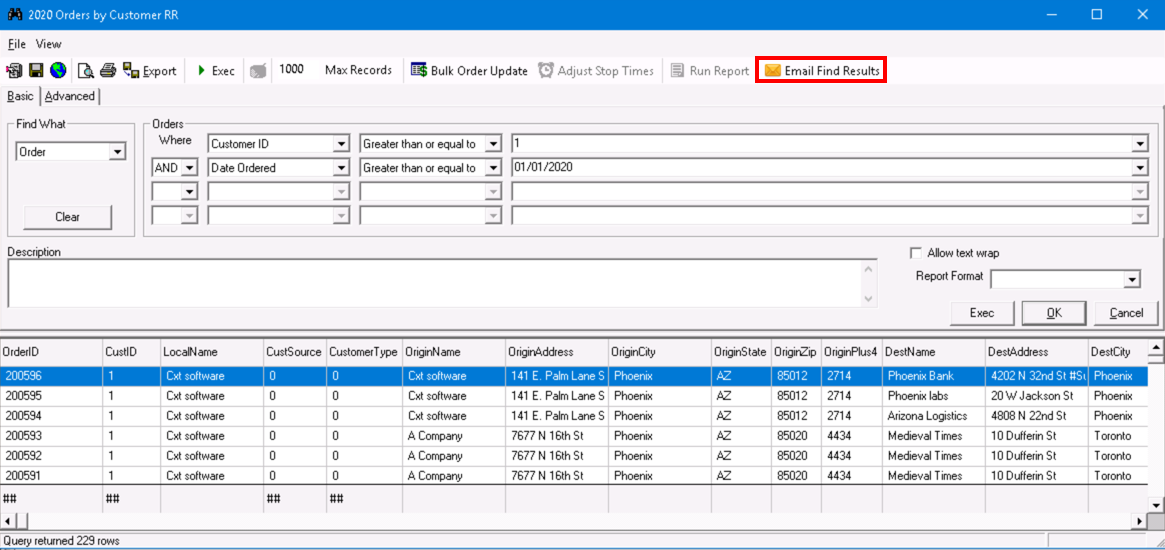
How to Email Find Results in Find (BETA)
In the toolbar, click Find (BETA).
Execute a find. See Find (BETA).
Click on the Email Find Report icon above the results table.
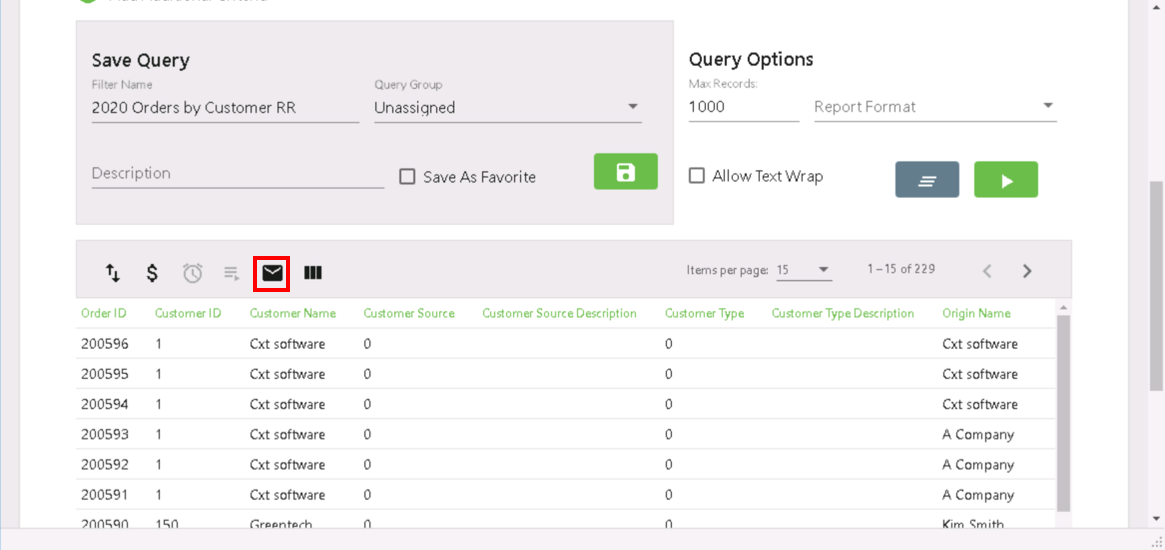
Fill out the Email Find Results form. Multiple addresses can be used by separating them with a comma or semicolon. Select a message format that has [EmailFindResultsNote] field. To create a new message format or update an existing one see Message Formats (Classic Operations App).
Click the Send button.
Example Email
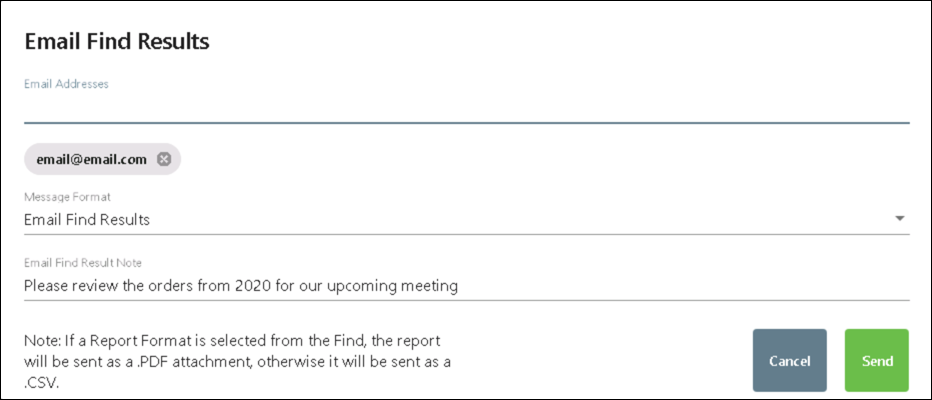
The following example uses a message format that has the [EmailFindResultsNote] field and the message "Please review the orders from 2020 for our upcoming meeting" entered in the Email Find Results Note field.
...
Message format using the [EmailFindResultsNote] field:
Completed Email Find Results form used to produce the email above: