Set up a Customer Record in the Classic Operations App
Go to Maintenance > Customers and click the New button in the top left, or click the down arrow next to the New button and click Customer. Enter a unique Customer Number. The customer number can be entered manually or generated using the "Generate ID" button Use numbers only. No special characters or letters. This number cannot be changed once the customer is saved. Enter a Name. Quick Tip: You can load default field entries by clicking the "Load Defaults" button located on the toolbar. See Default Customer. located on the toolbar. Generate ID generates the and ID number based on the "Customer ID Algorithm" setting in the global options' "Misc" tab. See Global Options for more information.
See Customers - New/Edit Customer for more information.
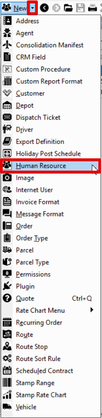
Set up a Human Resource record
Go to Maintenance > Human Resources. Click the New button in the toolbar. Required fields: ID Class Business Unit When adding a deduction to a new human resource record, you must save the record first. Click the arrow next to the New button, or press the Alt and N keys. Click Human Resources, or press the H key.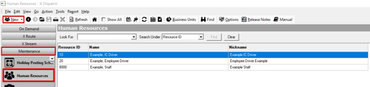
Alternate Steps
See Human Resources - New / Edit Human Resource for more information.
Set up a Driver Record
Go to Maintenance > Drivers. Click the New button in the toolbar. Click the arrow next to the New button, or press Alt + N keys. Select Driver, or press the R key.Alternate steps:
![]()
See Drivers (Classic Operations App) for more information.
Create a Route
Go to X Route > Planning. Click the New button. Click the arrow next to the New button, or press Alt + N keys. Select Route.Alternate Steps

See Planning - New/Edit Route for more information.
Create a Contract
Go to X Route > Contracts. Click the New button on the top toolbar, or press the Ctrl + N keys. Enter the contract information. Click Click Save & Close or Save. Quick Tip: This recurrence schedule is used for billing when the Billing field is set to "Contract Amount" or "Stop Rate * Multiplier" and for starting and expiring a contract. The recurrence schedule's Range of Recurrence is used to determine when to start and end posting the associated contract stops. If the contract's Billing field is set to "Contract Amount" or "Stop Rate * Multiplier", the recurrence schedule determines how frequently the contract amount should be billed regardless of the number of stops or when the stops post. If the contract's Billing field is set to "Stop Rate", the recurrence schedule is required to be set, but will not be factored into billing as rates will be captured from each stop inside the contract. or go to Action > Schedule to enter a recurring schedule of when the contract should be posted, then click OK. See Recurrence Schedule.
 Billing Example
See Contracts for more information.
Create Contract Stops
Go to X Route > Contracts.
Double-click the customer associated with the contract.
Double-click the contract you would like to add the stop to.
Click the AddStop button
 at the top of the contract stop form.
See Contract Stops - New / Edit Contract Stops for more information.
Post the Route
Routes can be posted manually or automatically. See Post Recurring Orders or Routes for more information.
Manually Post Routes
Click the Post/Unpost icon in the toolbar. Alternative: From the top menu, select Action > Post Recurring... Select a business unit and click OK. Double click on the date, or dates, you would like to post or unpost. Selected date(s) will be highlighted yellow and the current calendar date text is in green. Select whether you would like to Post or Unpost in the Action section. Select Routes. Click OK.![]()


Automatically Post Routes
Go to X Stream > Definitions. Click the New button in the toolbar. Enter "Posting" as the Configuration Type. Select "Posting-Posting" for Export Type. Enter "Posting Routed and OnDemand" as the Configuration Description. Add the following keys with their value in the definitions list: Business Units - Enter multiple business unit IDs as comma separated numbers. For example 1,2,3,7,8. Posting Types - Enter posting types “Routed” or “OnDemand’. If posting for both routed and on demand, enter the value as "Routed,OnDemand". Days Offset - Enter the number of days in advance that you wish to have the routes posted once the definition is run. For example, if you are posting "Routed,OnDemand" stops for the following day, you would use a 1 day offset. If you want all of your Routed,OnDemand orders posted for a week out, you would use a 7 day offset. This would post on the seventh date in the future. As the definition is executed each day, the customer would always have 7 days worth of Routes and OnDemand Orders in the Operations App. SendODEmails - Optional. Enter "true". Add this key and value pair if you want to automatically send the emails for the message formats associated with order placement. Click Apply once the Key/Value pairs are entered. Click Add Schedule to select the time that you want the definition to run so that your route stops and/or on demand orders are posted to the Dispatch board(s) and click OK. Auto posting at midnight can cause unexpected results. Auto posting should be scheduled a few minutes before or after midnight. Click OK to save the definition. Quick Tip: If posting on a Friday for work to be done on Saturday, Sunday, and Monday (for example) you would need three different schedules set up, all to post on Friday. The first would be a 1 day offset, then the second a 2 day offset, and the third, a 3 day offset.
