...
...
| Table of Contents |
|---|
You can send a message to mobile users from the On-Demand Dispatch board or the Route Dispatch board.
...
| Excerpt |
|---|
From the On-Demand Dispatch board or the Route Dispatch board.
|
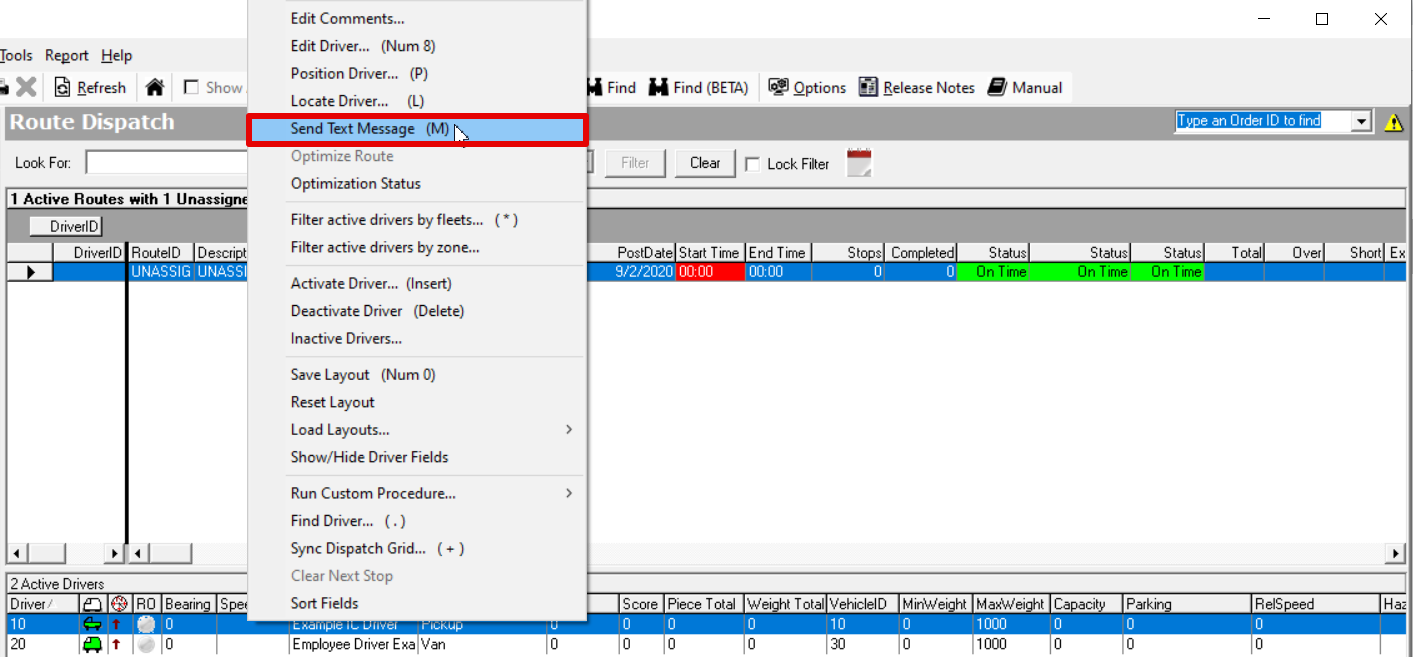

Send Text Message Form
The Sent Text Message form can be divided into 3 sections, From, To, and Messages.
Section | Description |
|---|---|
From |

 | The From field is the selected email address that the message is from. This will default to the last used email address used to send a text message or the default email address is set in the Global Options if no message has been sent yet. The default email address and the last used email address used will be displayed in the dropdown. To set up a default email address see How to Set a Default Dispatcher Email Address below. |
To |

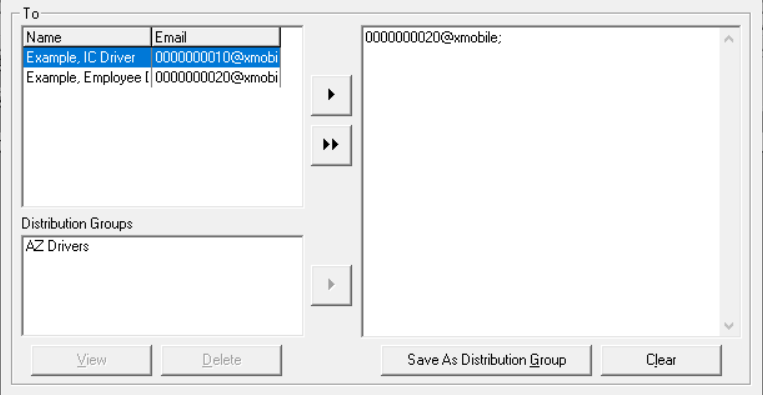 | The Primary Email found on the driver record of the drivers that will receive the message will be displayed in the box on the right. See Drivers (Classic Operations App). You can add more drivers to send the message to by selecting drivers from the box on the left and click the single arrow |
or click the double arrows |

to send the message to all drivers. You can also add, create, view and delete distribution groups. See Distribution Groups below.
| ||
Messages |
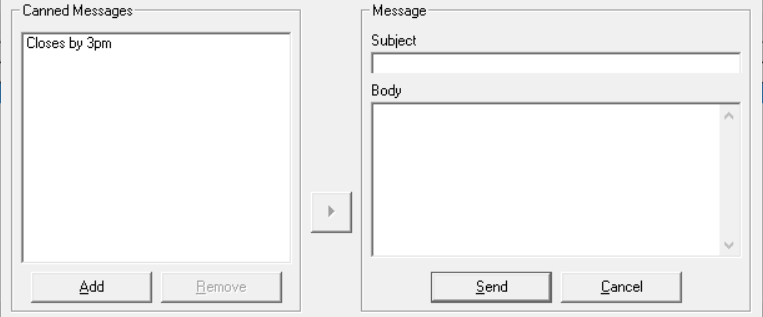
 | You can view, add, and remove canned messages on the left under Canned Messages. See Canned Messages below. The Subject and Body of the message is displayed on the right under Message. |
| Anchor | ||||
|---|---|---|---|---|
|
| Info |
|---|
You must have the "Text Messaging Distribution Groups" and "Edit Text Messaging Groups" permissions to create and edit distribution groups. See See Users or Users (Classic Operations App). |
...
Double click the distribution group or select the distribution group and click the arrow button  next to the list of distribution groups.
How to Add a New a Distribution Group
Add primary emails to the To field on the right.
Click the Save As Distribution Group button.
Enter a name for the distribution group and click Save.
...
How to Edit a Distribution Group
Select the distribution group and click the arrow button next to the list of distribution groups to add the group to the To field on the right.
Add or remove primary emails.
Click the Save As Distribution Group button.
Select the distribution group name you would like to edit and click Save.
How to View Primary Emails in the Distribution Group
...
Double click the canned message or select the canned message and click the arrow button next to the list of canned messages.
How to Add a New a Canned Message
| Note |
|---|
Canned messages have a 50 character max limit. |
Click the Add button under Canned Messages.
Enter the message.
Click OK.
...
How to Delete a Canned Message
...
The default dispatcher email address is set in the Global Options.
Click Options in the main toolbar.
Go to the Dispatch tab and enter
aa Default dispatcher E-mail address.
Click OK.
...