Requires X Dispatch 20.0 or newer.
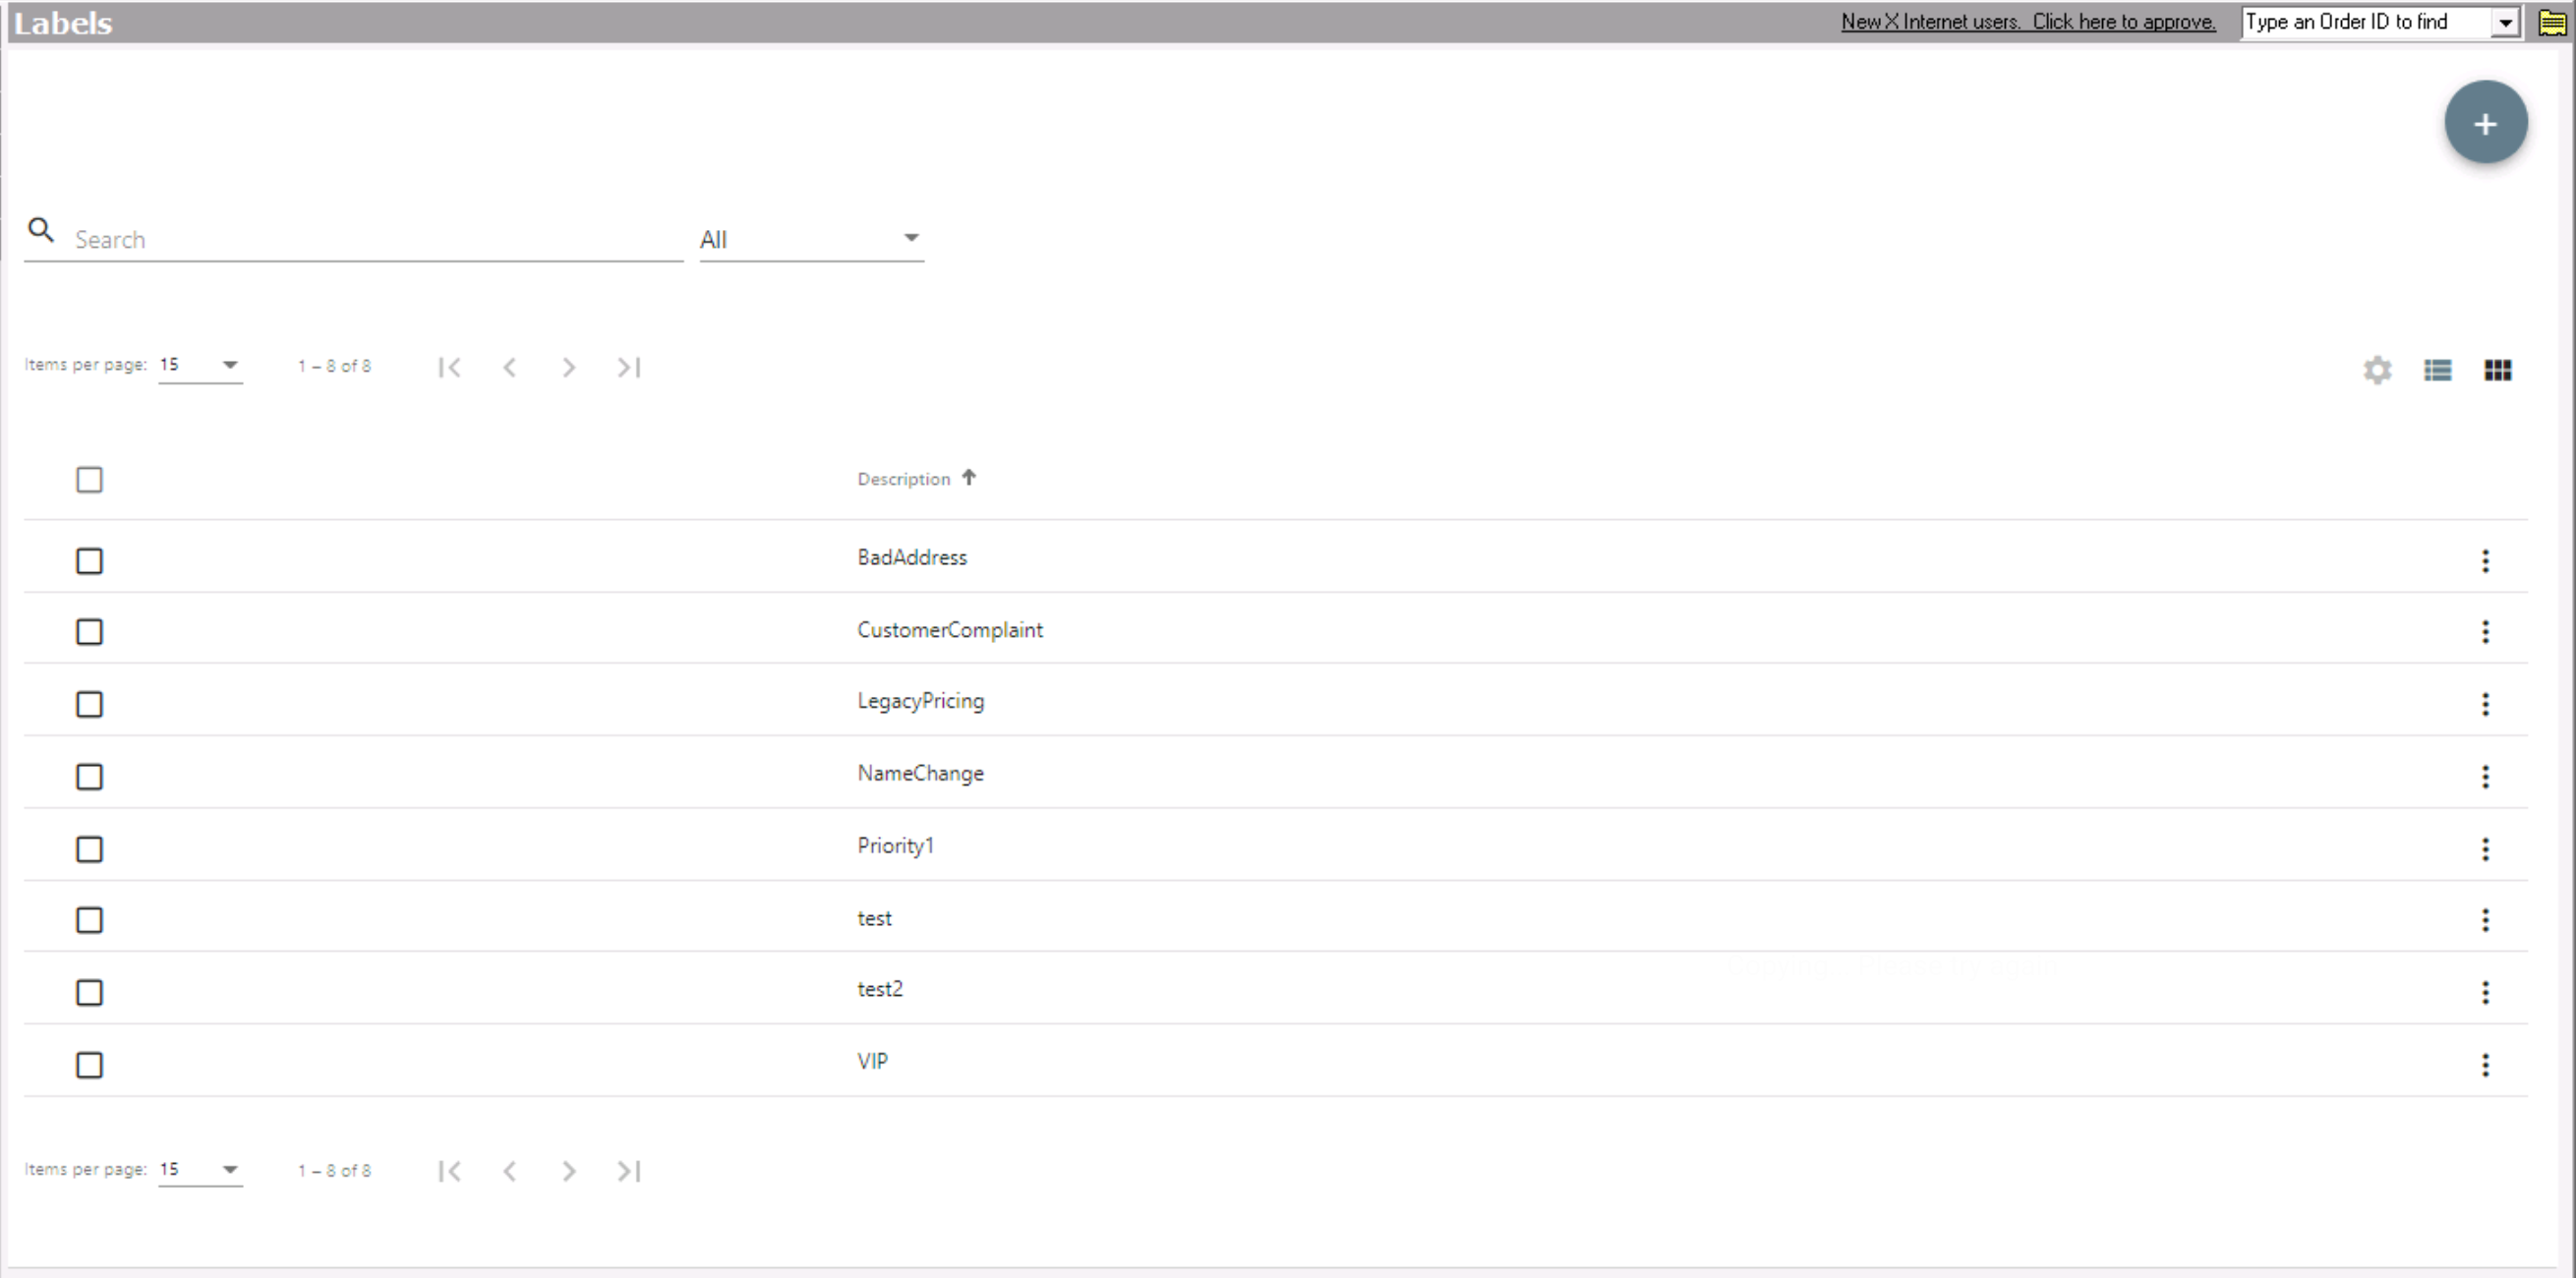
Labels allow you to tag orders, route stops, contract stops, customers, address, human resources, and drivers so that users can run reports and search based on the tagged labels. See Find (BETA).
The "Labels" permission must be enabled to view labels and the "Edit Labels" permission to add and edit labels. See Users (Desktop Operations App).
Go to Maintenance > Labels.
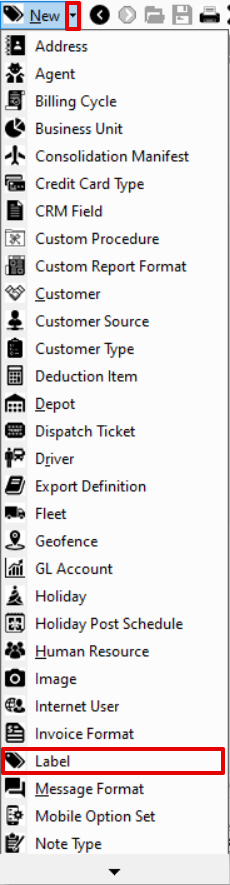
How to Create a New Label
- Go to Maintenance > Labels.
- Click the
 button.
Alternate Steps
- Click the arrow next to the New button, or press Alt + N keys.
- Select Label.
When Adding or Editing a Record
You can also create a new label from the orders, route stops, contract stops, customers, address, human resource records, or drivers records:
How to Edit a Label
- Go to Maintenance > Labels.
Click the label you would like to edit or right-click the row and select Edit.
The right-click menu option Open in New Window will open the edit form in a window that can be moved around.
How to Delete a Label
- Go to Maintenance > Labels.
Click the label you would like to delete.
Click the
 button.
You cannot delete labels that are in use.
Section Functions
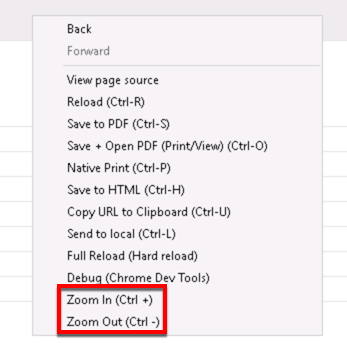
You can customize which columns you would like to view and arrange the order by clicking the Edit Grid Layout icon Requires X Dispatch 19.1 or newer. You can switch between a table view and a card view by clicking on the Card View icon Requires X Dispatch 21.0 or newer. You can zoom in or out of Next Dispatch pages in X Dispatch by right clicking on the page (other than on a card or table) and selecting Zoom In or Zoom Out, or use the Ctrl + or Ctrl - keys. Use the checkbox at the beginning of each row, or at the top of each card, to select multiple records. Quick Tip No more than 2 windows can be open or edited at a time. Right click on a row or card to view right click menu options.Customize Grid Layout
![]() .
. Change View
![]() or Table View icon
or Table View icon ![]() .
.Zooming Settings
Select
Right Click Menu