This page is for the Operations App. For the Classic Operations App please see Addresses (Classic Operations App).
Addresses used in the Operations App go through an address validation process to obtain geocoordinates to use for accurate location and distance calculation functions. Using validated addresses guarantees the address exists and prevents potential delivery issues. Different third-party validation services are available, some at an additional monthly charge. Please contact your CXT Software Account Manager for more details.
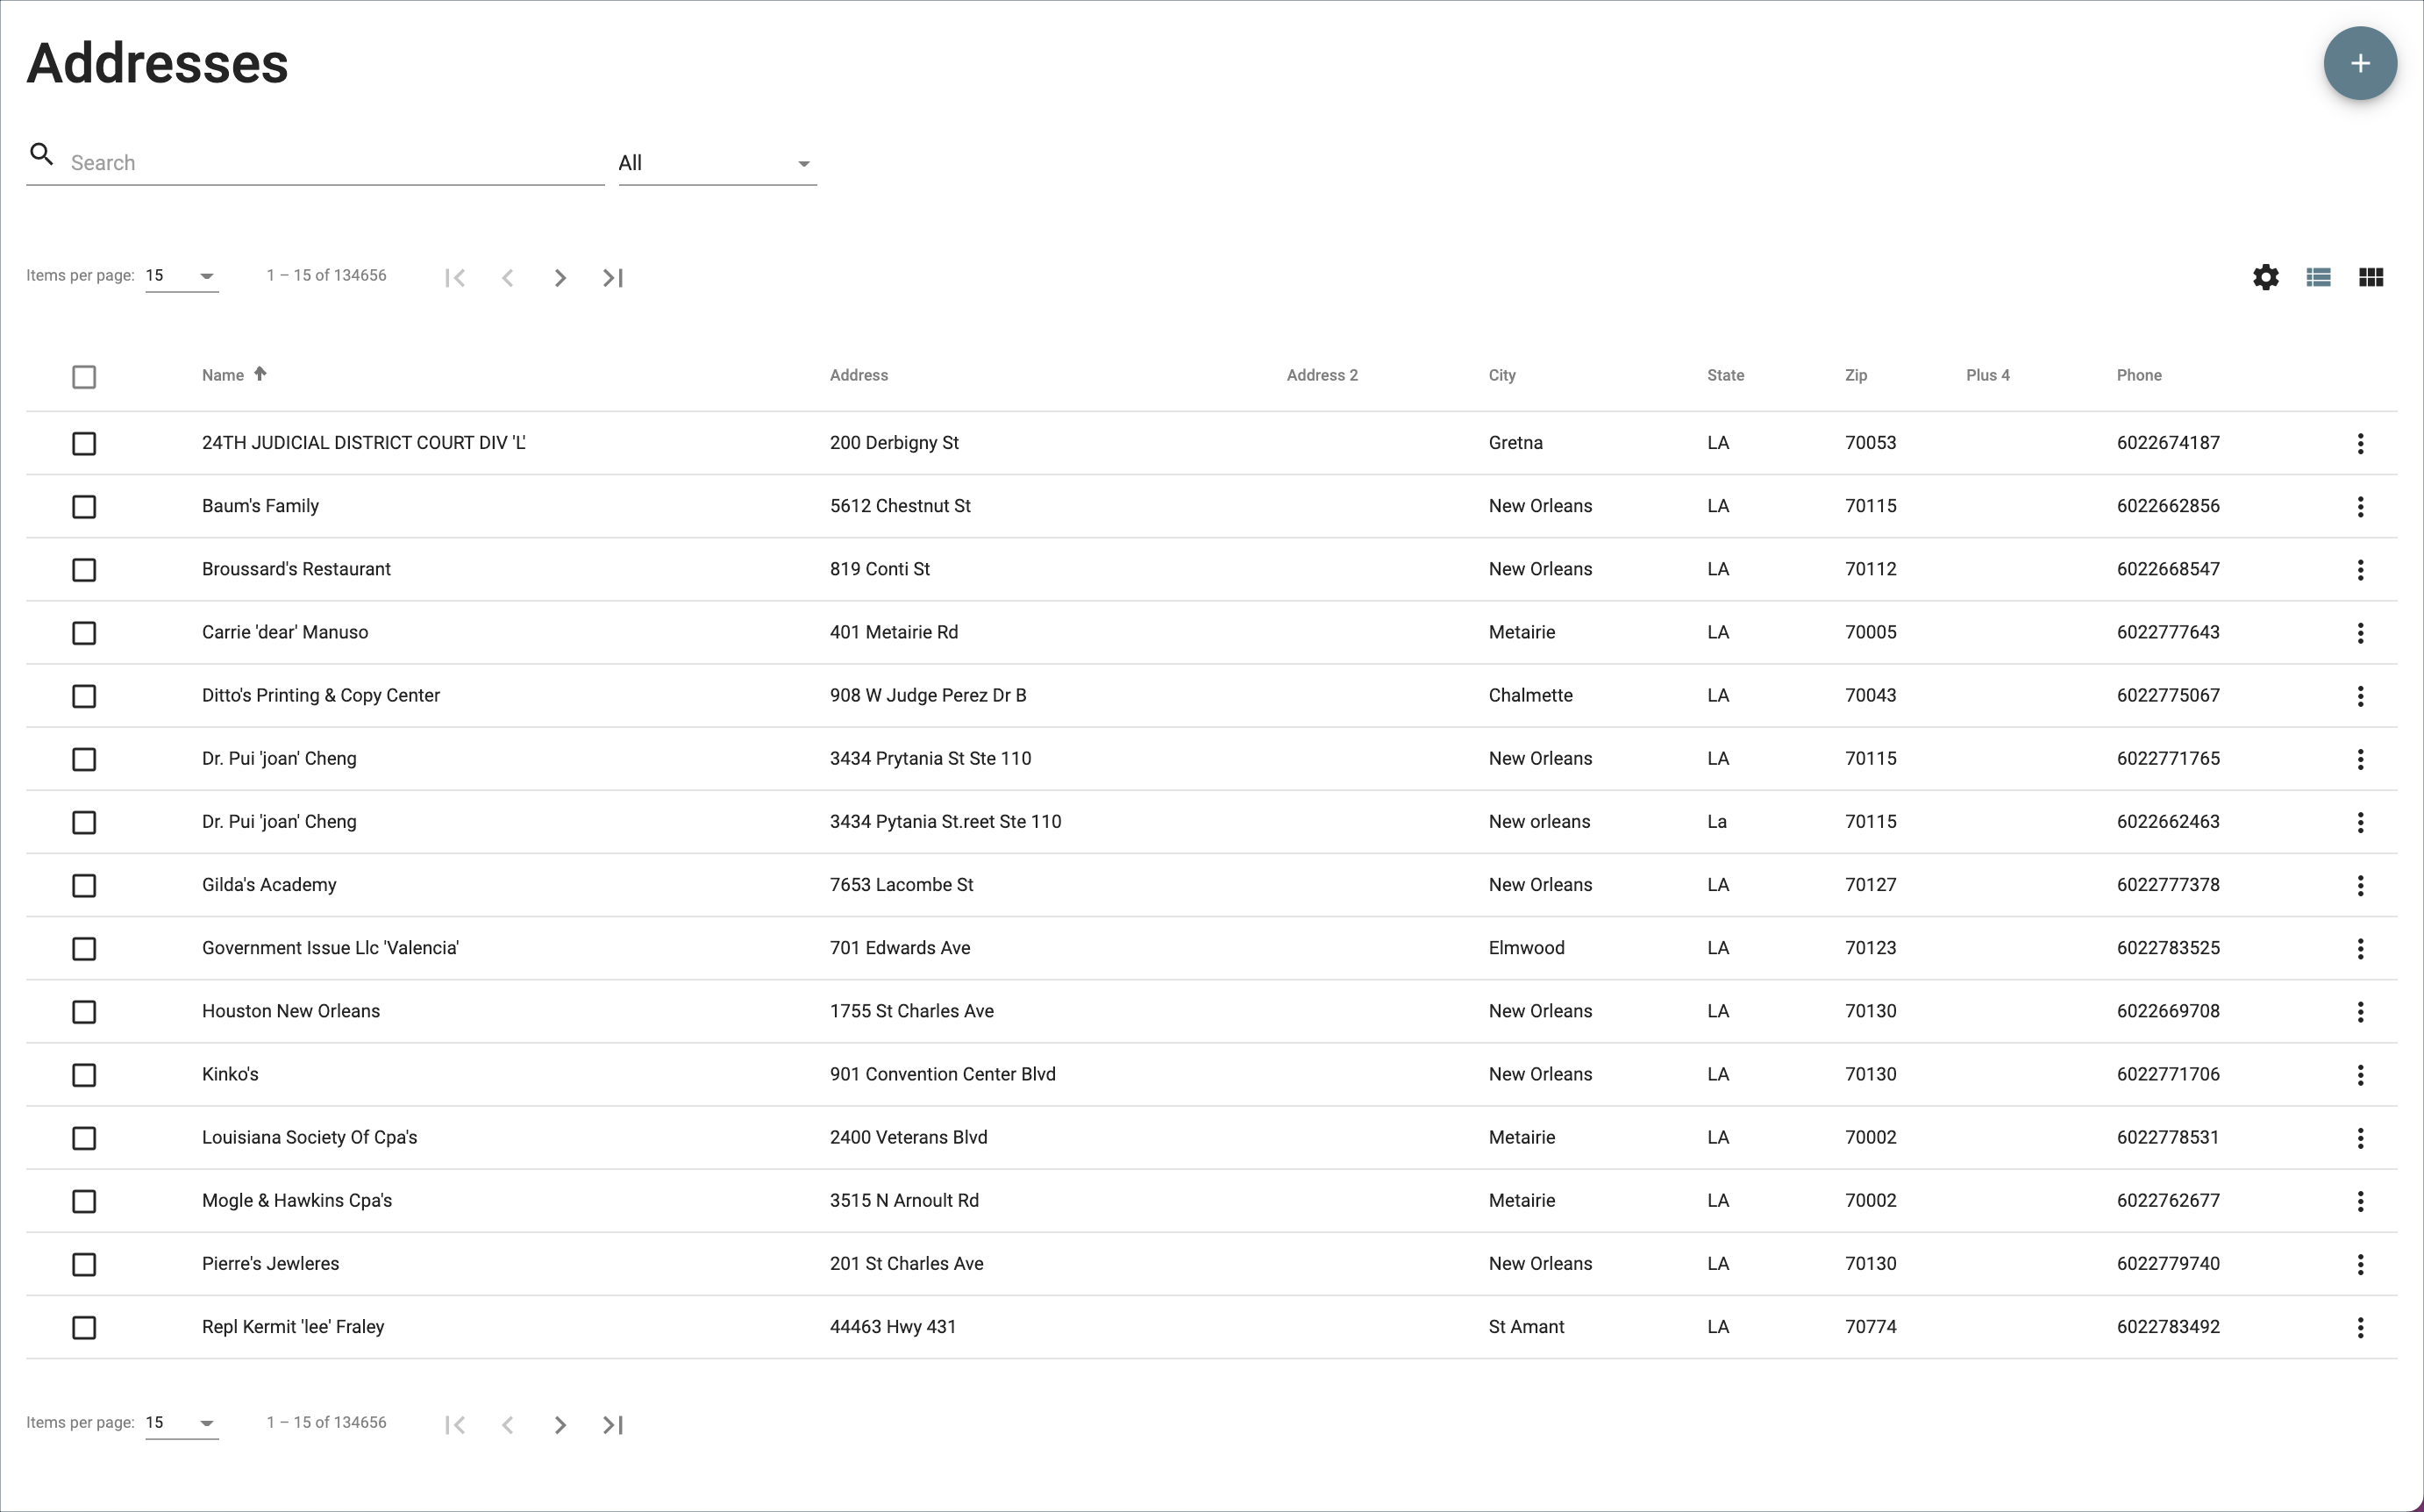
To get to the Address section, go to Maintenance > Address.
Quick Tip: For addresses used for online orders, which are created and maintained on the internet user records, see Internet Users.
How to Create and Validate a New Address
If an address cannot be validated, the distance will be based of the center of the zip code provided.
Go to Maintenance > Address.
Click the + button in the top right.
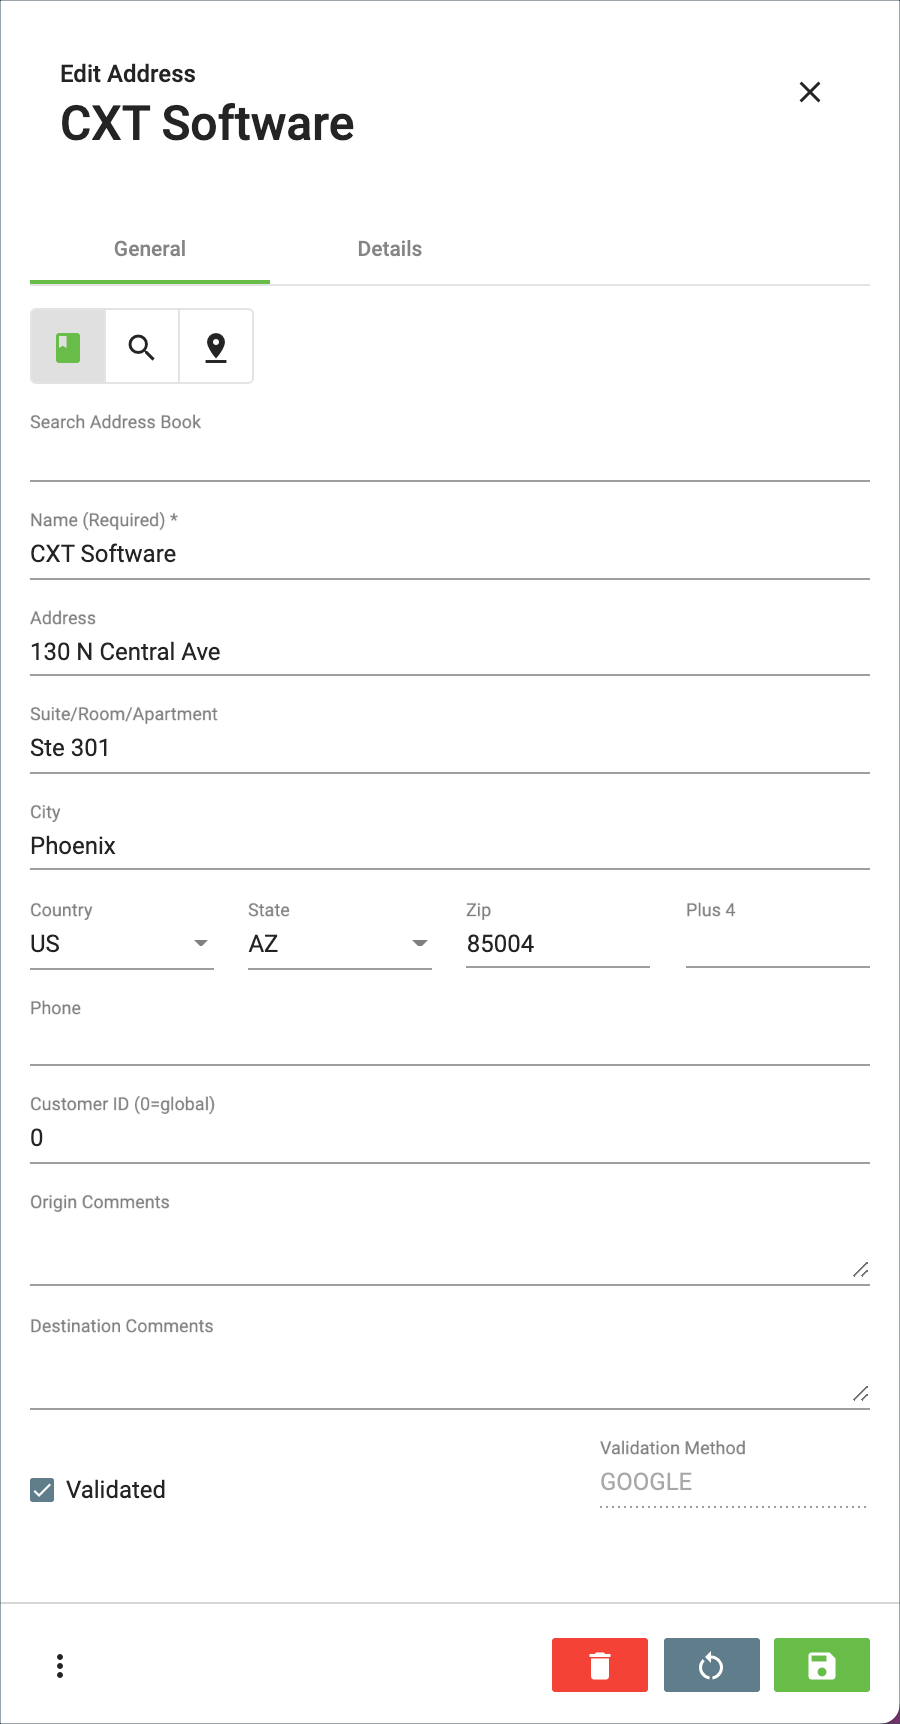
Enter the address information. Required information to validate an address is:
Address - The Address field is the street address in "US Postal Code" format. This includes numeric address, street name, and proper prefixes (N, S, E, W, etc), suffixes (Place, Pl, Road, Rd, Lane, Ln), and abbreviations when used. If a suite or room number is included in this field, the validation process will move it to the Suite/Room/Apartment field.
City
State/Zip/+
Enter a Customer ID for the address to be customer specific. The default is set to 0, meaning all customers can use the address. See Global Address vs Customer Specific Address for more information.
Automatically or manually validate the address:
Automatically: Click the action menu and select Process Address.
Manually: Check the Validated checkbox to manually validate an address.
How to Edit an Address
Go to Maintenance > Address.
Click the address you would like to edit or click the action menu at the end of the row and select Edit.
Quick Tip: You can open 2 edit forms by selecting the checkboxes of the addresses and clicking the edit pencil icon in the top right.
How to Delete an Address
Go to Maintenance > Address.
Check the checkbox of the address(es) you would like to delete.
Click the delete button in the top right.
Address Form
General
The General tab of the address form contains the address, phone, and default order information.
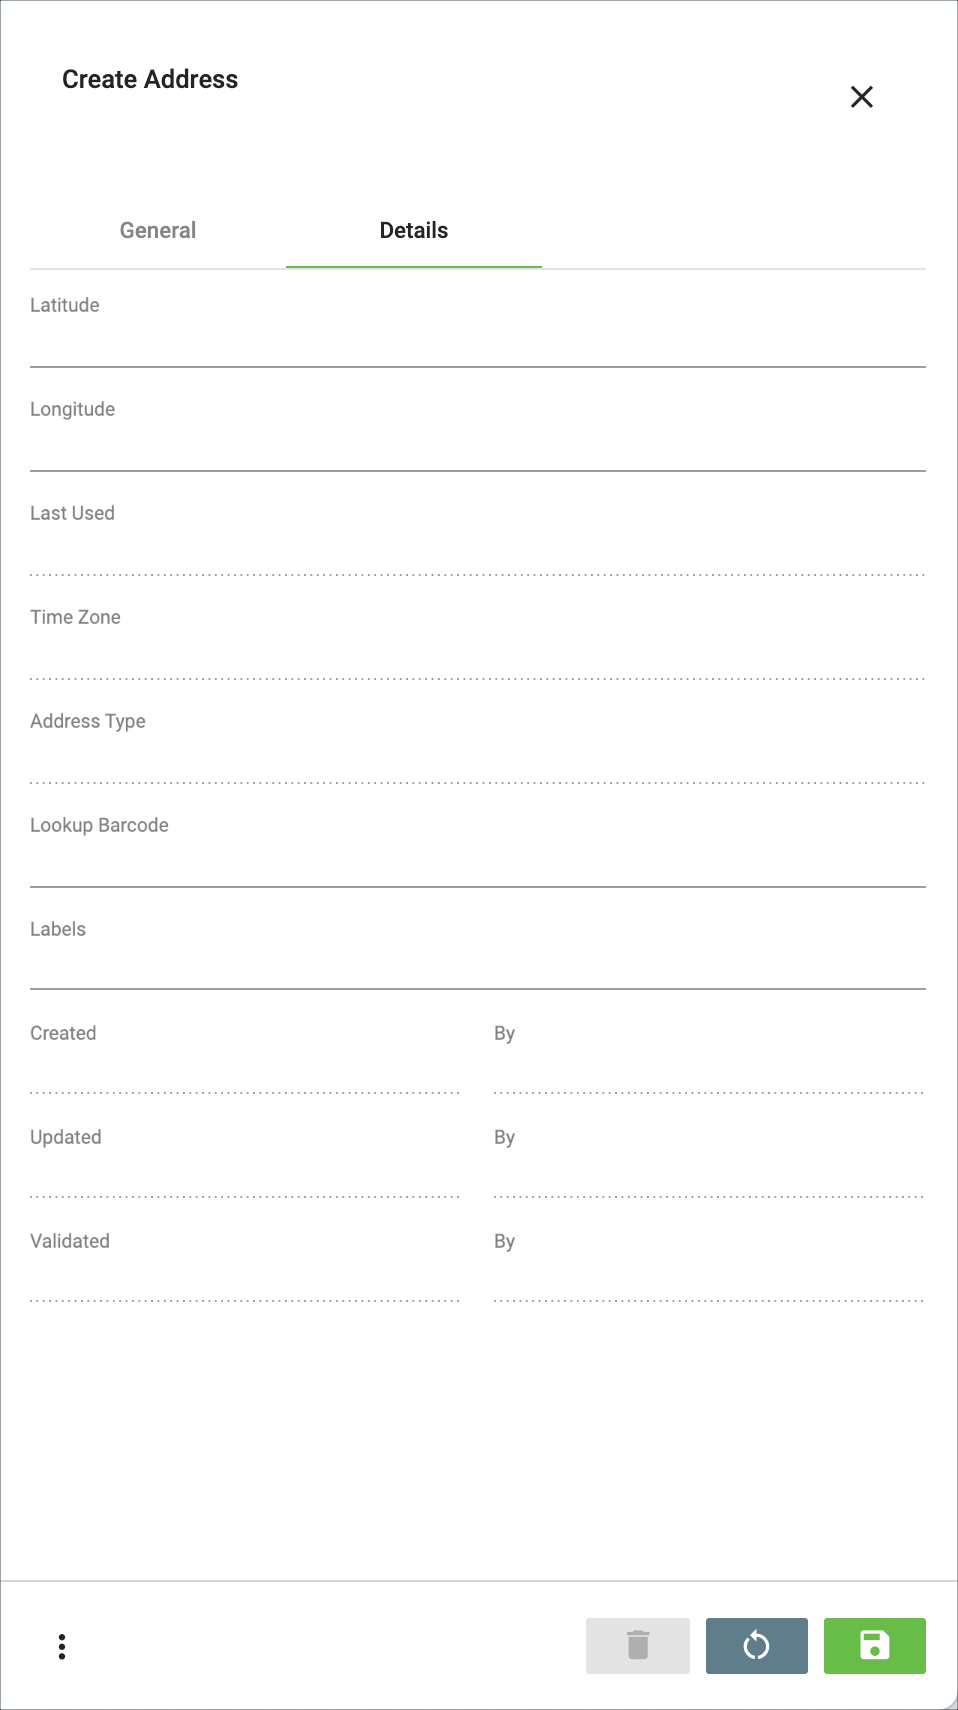
Details
The Details tab of the address form displays geocoded location data, Lookup Barcode, Labels, and several audit tracking fields.
Quick Tip: The Lookup Barcode must be unique for addresses used in the Operations App.
Action Menu
The action menu is the 3 vertical dots located in the bottom left corner of the address window.
Process Address
Process Address will validate the address.
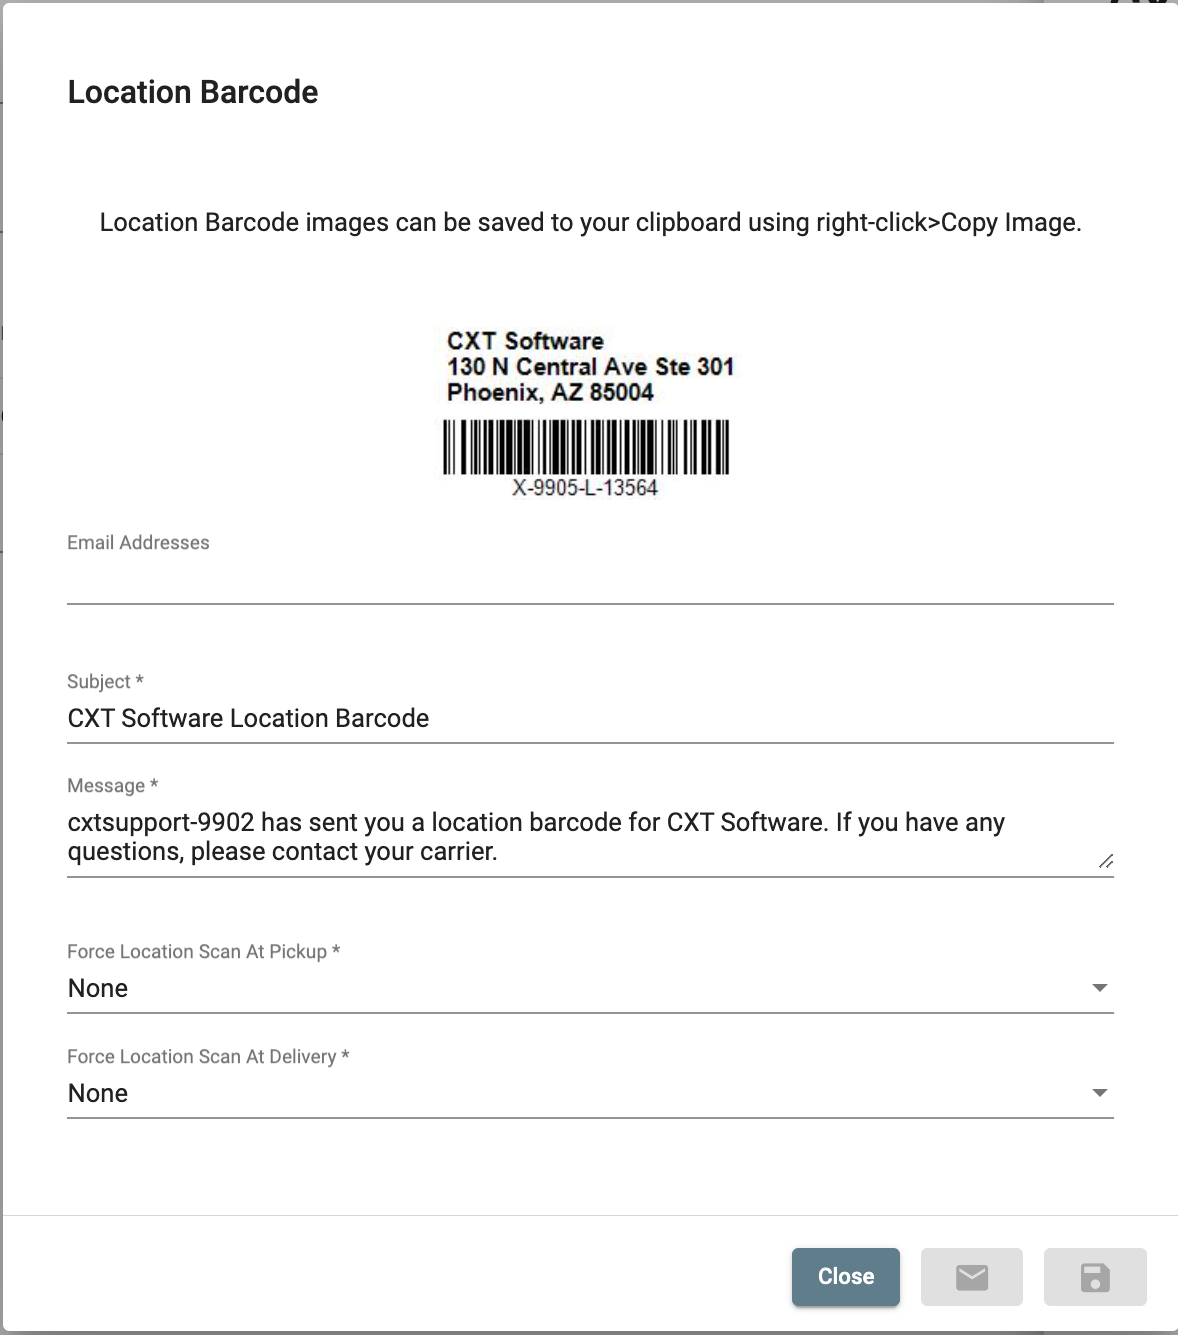
Location Barcode
Location Barcode displays the generated location barcode label which can be emailed or copied to the clipboard and pasted into a document for printing. The location barcode is available once the address has been saved. You can set orders with this address to force location scanning in Nextstop 3.5 or newer. See Force Location Scan in Nextstop 3.
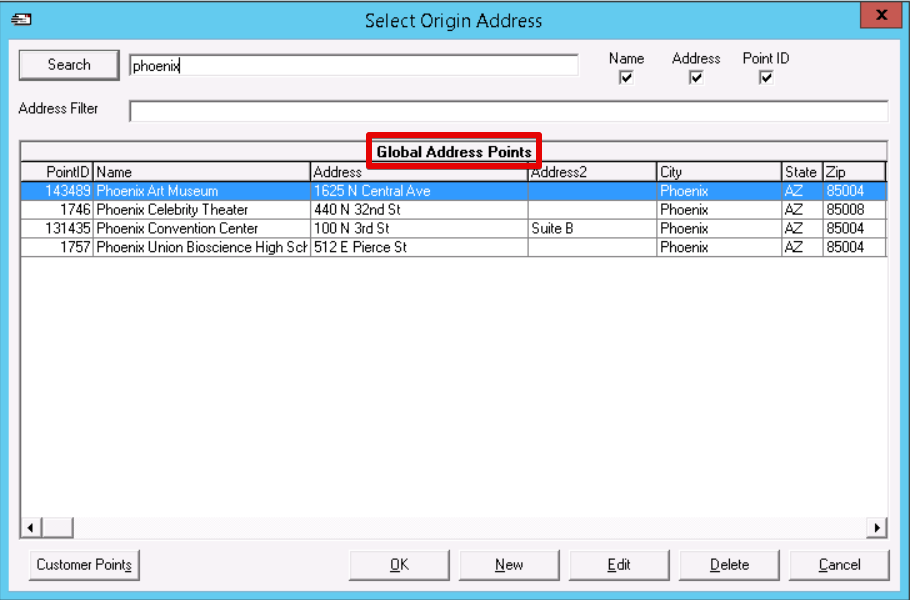
Global Address vs Customer Specific Address
A global address is available when placing orders for any customer in the Operations App. A customer specific address is available to only that specific customer ID during order placement inside the Operations App.
"Allow Customer Address Points" in the Orders tab of the customer record must be checked to view customer specific addresses. See Customers - New/Edit Customer for more information.
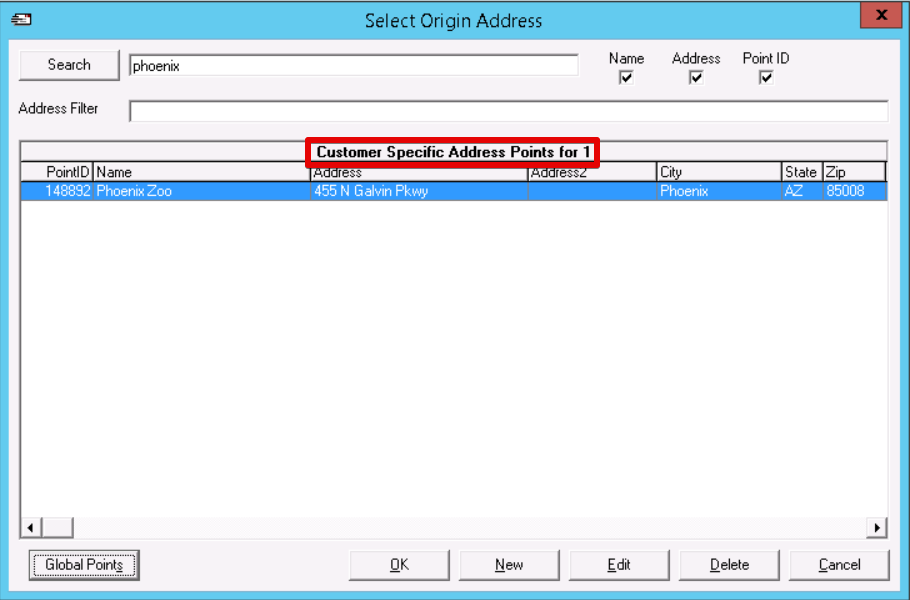
Example
Customer 1 has a customer specific address for the Phoenix Zoo.
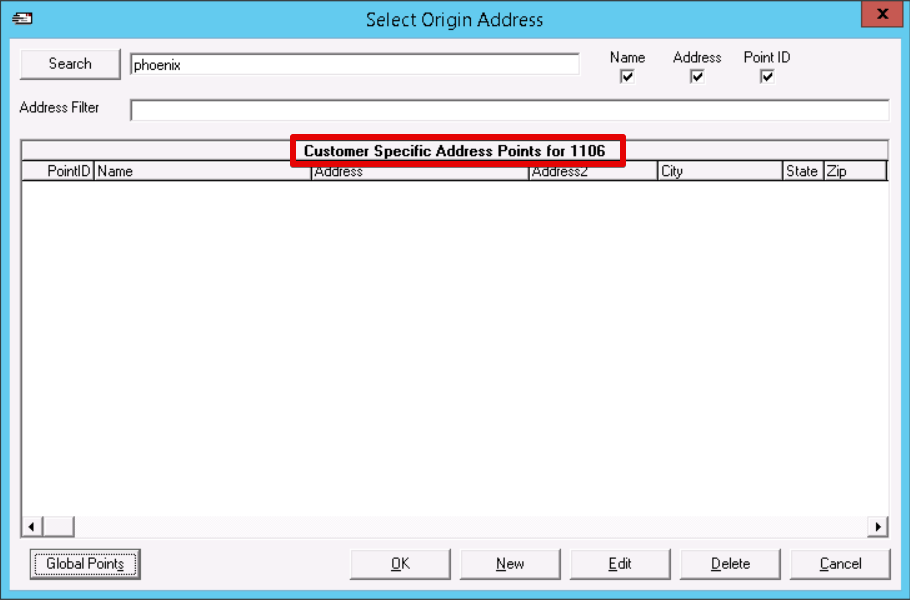
Customer 1106 will not be able to see the Phoenix Zoo address.
However, if the Phoenix Art Museum is set up as a global address, where the Customer ID is set to 0, then both Customer 1 and Customer 1106 can see the Phoenix Art Museum address.