Quick X Dispatch Order Setup Guide
- Michelle Cabaya (Unlicensed)
Analytics
Set up a customer in X Dispatch
Go to Maintenance > Customers and click the New button in the top left, or click the down arrow next to the New button and click Customer. Enter a unique Customer Number. The customer number can be entered manually or generated using the "Generate ID" button Use numbers only. No special characters or letters. This number cannot be changed once the customer is saved. Enter a Name. Quick Tip: You can load default field entries by clicking the "Load Defaults" button located on the toolbar. See Default Customer. located on the toolbar. Generate ID generates the and ID number based on the "Customer ID Algorithm" setting in the global options' "Misc" tab. See Global Options for more information.
See Customers - New/Edit Customer for more information.
Set up a Human Resource Record
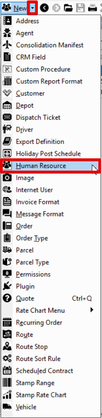
Go to Maintenance > Human Resources. Click the New button in the toolbar. Required fields: ID Class Business Unit When adding a deduction to a new human resource record, you must save the record first. Click the arrow next to the New button, or press the Alt and N keys. Click Human Resources, or press the H key.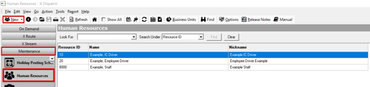
Alternate Steps
See Human Resources - New / Edit Human Resource for more information.
Set up a driver
Go to Maintenance > Drivers. Click the New button in the toolbar. Click the arrow next to the New button, or press Alt + N keys. Select Driver, or press the R key.Alternate steps:
![]()
See Drivers (Classic Operations App) for more information.
Create an order type
Go to Maintenance > Order Types. Click the New button. Click the arrow next to the New button, or press the N key. Click Order Type, or press the T key.Alternate steps:

See Order Types (Classic Operations App) for more information.
Create or assign a rate chart to the customer
How to Create a New Rate Chart
Click the arrow next to the New button, or press the N key.

Click Rate Charts.
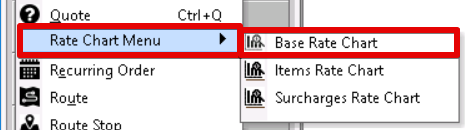
Select Base Rate.
See Base Rate Charts - New / Edit Base Rate Chart for more information.
How to Assign a Rate Chart to a Customer
- Go to Maintenance > Customers.
- Double click on the customer you would like to assign a rate chart to.
- Click the Accounting tab.
- Enter the Rate Chart ID.
See Customers - New/Edit Customer for more information.
Create a new order
Go to On-Demand > Orders. Click the New button, or press the Ctrl + N keys. Quick Tip: You can also click the "<Ctrl+N> for New Order" link at the bottom. Click the arrow next to the New button, or press Alt + N keys. Select Order, or press the O key. The fields that are required prior to saving an order will be highlighted in yellow.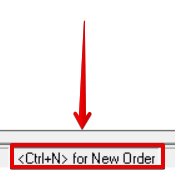
Alternate Steps

See Orders for more information.