The Customers section lists your customers.
To manage and view customers go to Maintenance > Customers. See here
Quick Tip
You can also access the Customer section through On Demand > Customers.

| Field Name | Description |
|---|---|
| ID | The Customer Number for the customer. |
| Name | Name of the customer. |
| Address | Address information for the customer. |
| City | |
| Local Phone | Phone number 1 for the customer. |
| LocalLat | Latitude of the customer's address. |
| LocalLon | Longitude of the customer's Address. |
Quick Tip
Click on a column name to sort by that column.
How to Search for a Customer
You can find customers by entering the criteria in the Look for field and selecting the column field you would like to Search Under.

How to Add a New Customer
- Go to Maintenance > Customers and click the New button in the top left, or click the down arrow next to the New button and click Customer.
Enter a unique Customer Number. The customer number can be entered manually or generated using the "Generate ID" button
 located on the toolbar. Generate ID generates the and ID number based on the "Customer ID Algorithm" setting in the global options' "Misc" tab. See Global Options for more information.
- Use numbers only.
- No special characters or letters.
- This number cannot be changed once the customer is saved.
- Enter a Name.
You can load default field entries by clicking the "Load Defaults" button located on the toolbar. See Default Customer.
How to Edit a Customer
- Go to Maintenance > Customers.
- Double click on the customer you would like to edit.
How to Delete a Customer
- Go to Maintenance > Customers.
- Double click on the customer you would like to delete.
- Click the Delete button.
Form

| Fields | Description |
|---|---|
| Customer Name | Unique number ID for the customer. |
| Name | Customer name. This will appear on orders, invoices, etc. It does not have to be unique and can be changed later. |
| Alternate Lookup | Alternate lookup ID for the customer. This field will only appear after the Customer Number is entered and Enable Alternate Lookup is enabled in the Global Options Misc tab. |
Orders
The Orders tab contains customer's local information on the left and order form related options on the right.
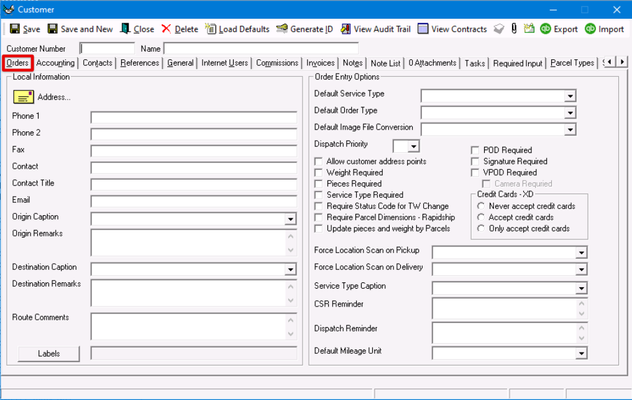
Local Information
| Field Name | Description |
|---|---|
| Click the Address button to enter or edit the address that will appear in the origin or destination field when the insert key is used while on the order form. |
| Phone 1 | This phone number will be placed in the Phone field of an order if the customer is used as the origin or destination. The phone number will automatically be formatted. Example: A number entered as "4053456789" will be changed to "(405) 346-6789". |
| Phone 2 | Secondary phone number for the customer. |
| Fax | Customer fax number. |
| Contact | Name of the main contact. |
| Customer's main email address. | |
| Origin Caption | Select the caption that will show on the customer's order form.
|
| Origin Remarks | This will be placed in the Remarks field of the Origin on the order from when the local address information is used for the pickup. |
| Destination Caption | Select the caption that will appear on the customer's order form
|
| Destination Remarks | This will be placed in the Remarks field of the Destination on the order from when the local address information is used for the delivery. |
| Route Comments | Comments specific to "X Route". |
| Labels | Requires X Dispatch 20.0 or newer. Label(s) for the customer to be used for reporting purposes. See Labels. |
Order Entry Options
| Field Name | Description |
|---|---|
| Default Service Type | This field can be left blank. The service type selected will be placed in the "Service Type" field of the order form every time this customer places an order. All service types are available for selection, but it is possible that the customer will not have the availability of a service type based on the assigned rate chart. |
| Default Order Type | This field can be left blank. The order type selected will automatically be placed in the "Order Type" field of the order form every time this customer places an order. All order types are available for selection, but it is possible that the customer will not have the availability of an order type based on the assigned rate chart. |
| Default Image File Conversion | Requires X Dispatch 20.0 or newer. Default image file type used for the customer's image attachments when sent through the message format status alert emails and used when saving in X Dispatch and Rapidship. Select from the following:
PDF files will not convert to any other image file type. |
| Dispatch Priority | Select the level of importance of the customer from 0 to 10. It is displayed in the dispatch board and can be a useful tool for making dispatch decisions. |
| Allow Customer Address Points | Turns on the customer specific address points when taking an order. If unchecked, the customer can only view global addresses. |
| Require Parcel Dimensions - Rapidship | Makes parcel dimensions required in Rapidship. |
| Weight Required | Make weight on the order form required. |
| Pieces Required | Make pieces on the order form required. |
| POD Required | Make POD, or proof of delivery, required for the delivery of an order. This is just the text part of the signature. |
| Service Type Required | Make service type on the order form required. |
| Signature Required | Make a signature required for the delivery of an order or route stop. |
| Require Status Code for TW Change | Make a status code required for a time window change. |
| Service Type Caption | Changes the caption of the service type on the order form. You can select "Service Type" or "Vehicle Type". |
| CSR Reminder | A reminder that will appear on the order form with a red flashing siren next to it. |
| Dispatch Reminder | Comments relating to the customer that is specifically for the dispatchers. It displays as a field in the dispatch board. |
| Default Mileage Unit | Select the default measurement unit of miles or kilometers to calculate the distance for on demand orders. |

Accounting
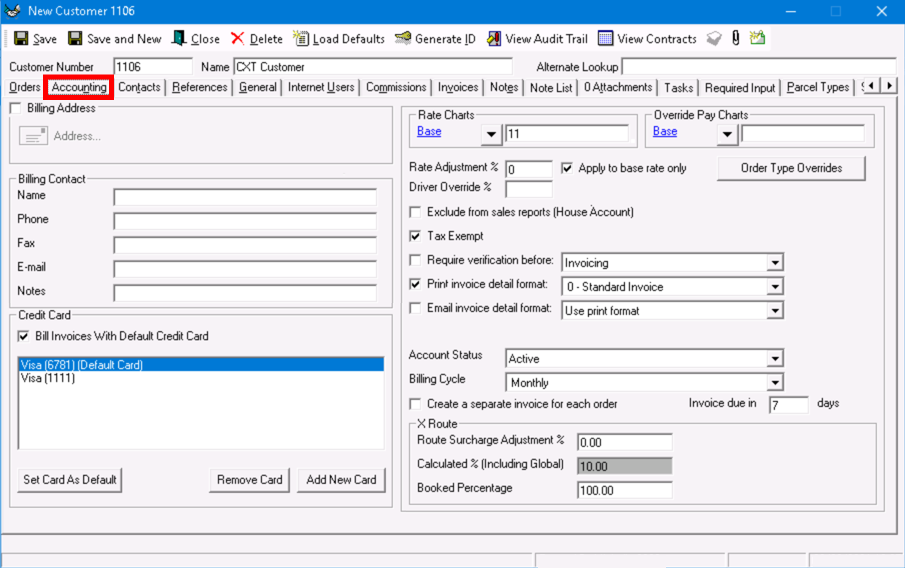
Billing Address
Check the box if the billing address is different than the local address found on the Orders tab. When checked, the address button  will be enabled to enter and edit the billing address.
Billing Contact
If the Billing Contact information is left blank, X Dispatch will default to the information in the Local Information in the Orders tab.
| Field Name | Description |
|---|---|
| Name | The customer billing contact. |
| Phone | Phone number for billing purposes. |
| Fax | Fax number for. |
| The "E-mail Address" of the "Customer" billing contact. This "E-mail Address" is what "X Dispatch" will use when emailing invoices to the "Customer". | |
| Notes | General "Billing Notes". |
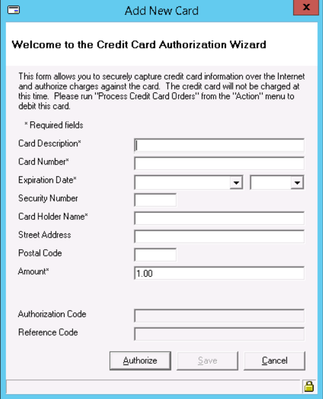
Credit Card
Click the "Add New Card" button to save credit card information for the customer. You can save more than one credit card, choose a default credit card, and bill invoices with the default credit card.
Rate Charts and Override Pay Charts
See How to Set Customer/Human Resource Driver override pay chart for more information.
| Field Names | Description |
|---|---|
| Base | Enter the number of the base chart you would like to assign the customer. |
| Rate Adjustment % | This is a discount or increase of the base chart. Enter a positive number for an increase, or a negative number for a discount. Example: Enter "- 20" for a 20% discount off the rate chart assigned. |
| Apply to base rate only | When enabled, the Rate Adjustment % to only apply to the base rate. When disabled, the Rate Adjustment % will be applied to base and item rates only. Surcharges are not included in the rate adjustment. |
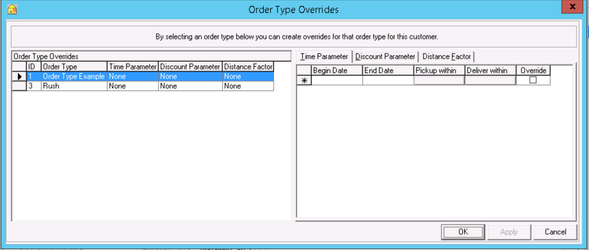
| Order Type Overrides | Click the button to override order type settings on a customer by customer basis. You can override time parameters by extending time frames on order types, give discounts or increases for a certain time, and change the distance factor calculation.
|
| Driver Override % | Enter the total driver pay percent. This will override the driver pay percent in the driver's HR record. |
| Exclude from sales reports ( House Account ) | Check the box if you would like the revenue from this customer not appear in the reports that are generated by X Dispatch. This is useful is situations where a customer account is set up to charge back your company for various deliveries, House Accounts. |
| Tax Exempt | Check the box to exclude the customer from sales tax. |
Require verification before "Require verification before invoicing" for X Dispatch 20.0 or older. | Check the box to require verification on an order before the selected action.
|
| Print invoice detail format | Check the box to print invoices according to the format selected. By default, X Dispatch provides three different formats:
You can set up additional formats. |
| Email invoice detail format | Check the box to email invoices to the email in the “Billing Contact” section and select a format.
|
| Account Status | Select from the following:
|
| Billing Cycle | Select how often the customer will be invoiced. You can add more billing cycle options. See How to Invoice a Customer Outside of the Normal Billing Cycle. |
| Create a separate invoice for each order | Check the box to bill and invoice each order placed by the customer separately. The invoice number will be the same as the order ID. |
| Invoice due in [ _ ] days | Enter a number. This number can be used on invoices and can be imported into your accounting package. |


X Route
| Field Name | Description |
|---|---|
| Route Surcharge Adjustment % | This adjusts from the global configuration. If a global surcharge is not set, the default is 0. Example: Enter "- 20" for a 20% discount off the surcharge. If a global surcharge is set, this field will adjust the global value for any routed work for this customer. Example: Global setting is 10%. Enter "-3" to discount the global setting by 3%, charging this customer a 7% surcharge. |
| Calculated % ( Including Global ) | The total adjusted percent applied to the route surcharge which includes the global adjusted percent under Options > X Route. |
| Booked Percentage | Used for driver pay percentage of the total rate. |
Contacts
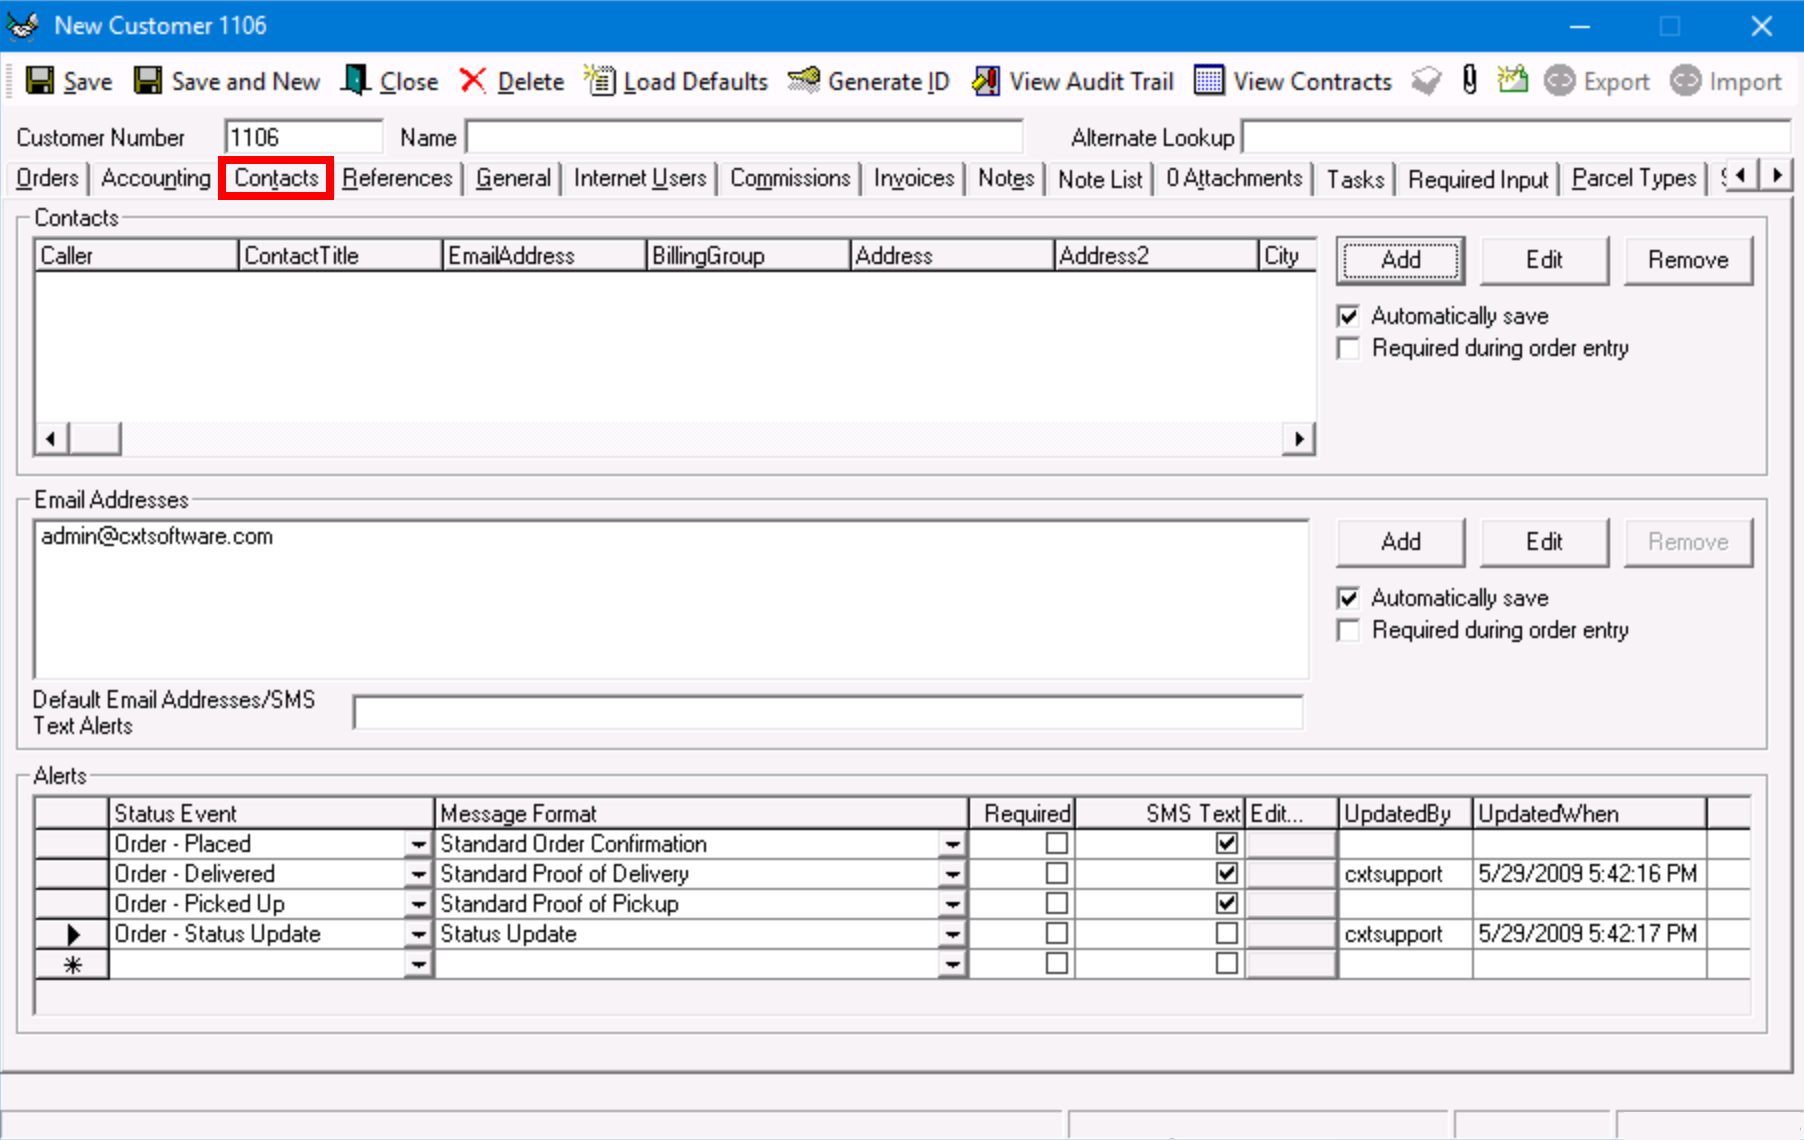
Contacts
This is a list of frequent contacts. It can be pre-populated and edited by using the Add, Edit, and Remove buttons on the right.
| Field Name | Description |
|---|---|
| Automatically save | Check this to save contacts to the list when placing an order. |
| Required during order entry | Check this to require the "Contact" field on the order form in X Dispatch. |
Email Addresses
This is a list of email addresses used for the "Email Confirmation" field on the order form. It can be pre-populated and edited by using the Add, Edit, and Remove buttons on the right.
| Field Name | Description |
|---|---|
| Automatically save | Check this to save email addresses to the list when placing an order. |
| Required during order entry | Check this to require the "Email / Fax Alerts" field on the order form. |
Default Email Addresses/SMS Text Alerts "Default email address" for X Dispatch 20.0 or older. | Email address(es) and/or phone number(s) that will automatically be entered in the "Email / SMS Text Alerts" field on the order form. |
Alerts
Create automatic email notifications when the status changes.
For X Dispatch 21.0 or newer, alerts set up here will be displayed as an Email notification when order is option in the Rapidship Place Order page. For example, the Status Event "Order - Delivered" must be set up here for "Delivered" to be an option for Email notification when order is.
| Field Name | Description |
|---|---|
| Status Event | Select an event of an order to trigger the email notification to be sent to the email address in the "Email / Fax Alerts" field. |
Message Format | Select the message format for the notification that will be sent. |
| Required | Check if the status event is required. |
| SMS Text | Requires X Dispatch 21.1 or newer. Check if the status event should send an SMS text message. See SMS Text Notifications. Visible when Global Option "Enable SMS Text Notifications" is enabled. |
| Edit | Click to edit the message format. |
| UpdatedBy | The last user to update the alert set up. |
| UpdatedWhen | The timestamp of when the alert was updated last. |
References
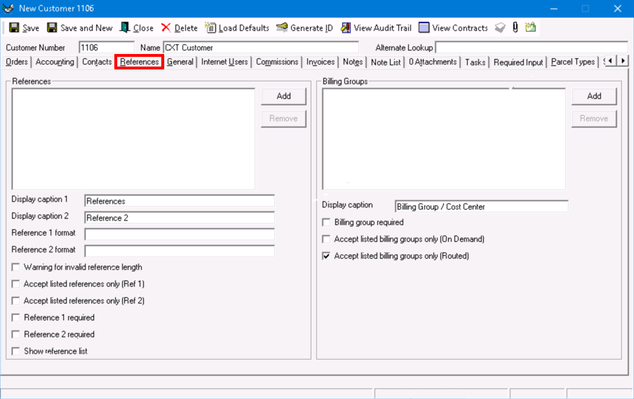
References
The References list can be pre-populated and modified using the “Add” and “Remove” buttons.
| Field Name | Description |
|---|---|
| Display caption 1 | Controls what the "Reference Caption" will read on the order form. |
| Display caption 2 | Controls what the "Reference Caption" will read on the order form in X Internet. |
| Reference 1 format | This value will automatically be entered into the "Reference 1" field on the order form. |
| Reference 2 format | This value will automatically be entered into the "Reference 2" field on the order form. |
| Warning for invalid reference length | Check this box if you want the warning to be based on the length of the value entered on the "Reference 1" field. |
| Accept listed references only ( Ref 1 Only ) | Check this box if you want only the references in the in the list to be accepted on the order form. This will only apply to the "Reference 1" field of the order form. |
| Reference 1 Required | Check this box to make the "Reference 1" field on the order form required. |
| Reference 2 Required | Check this box to make the "Reference 2" field on the order form required. |
| Show reference list during order entry | Check this box to show all the references in the list in a drop-down on the order form. |
Billing Groups
The Billing Groups list can be pre-populated and modified using the “Add” and “Remove” buttons.
| Field Name | Description |
|---|---|
| Display Caption | Changes the "Billing Group" caption on the order form. |
| Billing Group Required | Check this box to make the "Billing Group" field on the order form required. |
| Accept listed billing groups only (On Demand) | Check this box to allow only billing groups from the list to be accepted on the order form for On Demand orders. |
| Accept listed billing groups only (Routed) | Check this box to allow only billing groups from the list to be accepted on the order form for Routed orders. |
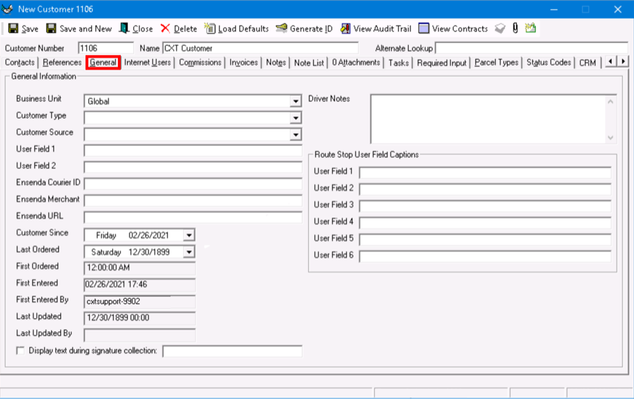
General
| Field Name | Description |
|---|---|
| Business Unit | Select the business unit that the customer belongs to. Business units are configured in Maintenance > Business Units. See Using Business Units for more information. |
| Customer Type | Select the customer type. Example: Medical Supplier, Auto Parts Distributor. Customer types are configured in Maintenance > Customer Types. See Customer Types for more information. |
| Customer Source | Select the customer source. Example: How you obtained the "Customer", Advertisement, Cold Call, etc. Customer sources are configured in Maintenance > Customer Sources. See Customer Sources (Desktop Operations App) for more information. |
User Field 1 | Allows you to keep track of any data you would like. These fields accept any type of data. |
| User Field 2 | |
| Ensenda Courier ID | Provided by Ensenda for their customers. |
| Ensenda Merchant | Provided by Ensenda for their customers. |
| Ensenda URL | Provided by Ensenda for their customers. |
| Customer Since | By default, this is the date the customer file was created. This date can be changed. |
| Last Ordered | Date that the customer placed their last order. |
| First Ordered | Date that the customer placed their first order. This cannot be changed. |
| First Entered | Date the customer file was created. This cannot be changed. |
| First Entered By | User who created the customer file. This cannot be changed. |
| Last Updated | Date the customer file was last updated. This cannot be changed. |
| Last Updated By | User who made the last update to the customer file. This cannot be changed. |
| Override The Default Signature Text in X Mobile | Overrides the signature text in X Mobile when capturing a signature. |
| Driver Notes | Enter notes to display to the driver in X Mobile when [DriverNotes] is added to the message formats. |
| Route Stop User Field Captions | Text entered into the User Field will modify the caption of the corresponding User Field of the customer's route stop record. |
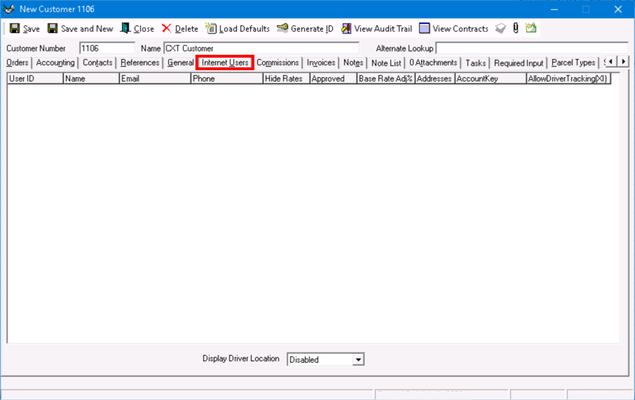
Internet Users
The Internet Users tab displays a summary of all the internet users associated with the customer. To edit an internet user, double-click the "User ID" of the internet user. See Internet Users - New / Edit Internet User for more information.
| Field Name | Description |
|---|---|
| User ID | Alphanumeric username the internet user uses to log in. |
| Name | Internet user's name. This can be alphanumeric and is displayed when logged in. |
| Internet user's email address. | |
| Phone | Internet user's phone number. |
| Hide Rates | Whether or not rates are hidden for the internet user.
|
| Approved | Whether or not the internet user is approved to log in to Rapidship or X Internet. |
Base Rate Adj % | Internet user's Rate Adjustment which is specific to the internet user. This can be a dollar or percentage amount. |
| Addresses | Number of addresses in the internet user's address book. |
| AccountKey | The customer record's Alternate Lookup. |
AllowDriverTracking(XI) "AllowDriverTracking" for X Dispatch 20.0 or older. | Whether or not the internet user is allowed to track drivers on X Internet. This does not include tracking drivers in Rapidship. |
| Display Driver Location | Requires X Dispatch 21.0 or newer. Setting for whether or not driver location is displayed for all of the customer's internet users.
|
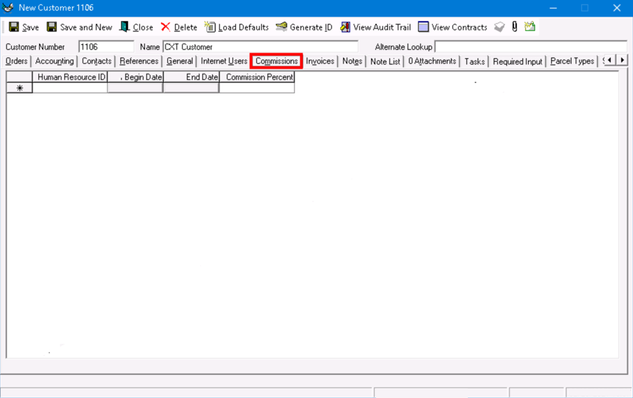
Commissions
The Commissions tab displays a list of people that receive commissions on an order from the customer.
| Field Name | Description |
|---|---|
| Human Resource ID | Human Resource ID of the person that receives the commission. |
| Begin Date | Date the person begins receiving a commission. |
| End Date | Date the person stops receiving a commission. |
| Commission Percent | Percentage of the commission. |
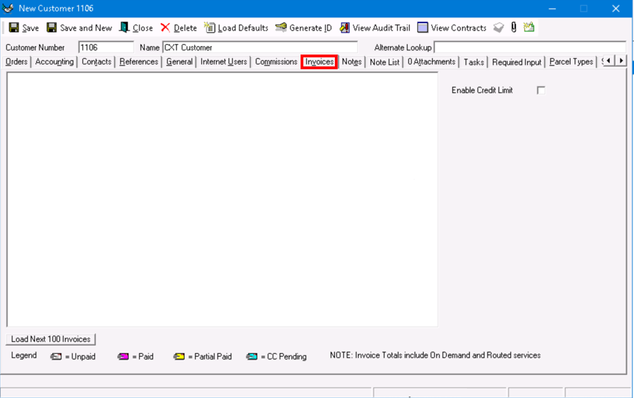
Invoices
The Invoices tab displays a list of invoices for the customer. The list shows the invoice number, date of invoice and total invoice amount.
In X Dispatch 18.0 or newer, both routed and on demand invoice totals will be displayed. Older versions show only on demand totals.
Working With Invoices
- Click on the [+] next to the invoice to show the orders in the invoice.
- Double click the order number to open the order form.
- Right-click on an invoice for a menu to:
- Mark as Paid
- Mark as Short Paid
Mark as Unpaid
This is option is disabled when the QuickBooks integration is enabled.
- Preview Invoice
- Email Invoice
- Invoice color legend:

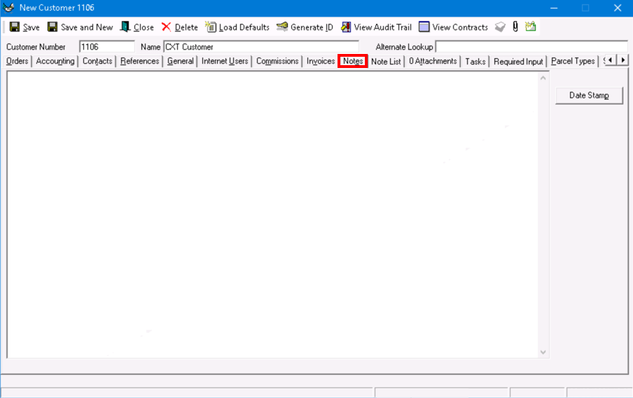
Notes
The Notes tab displays a text box that you can use to enter notes for the customer. The notes will display on the order form. Click the "Date Stamp" button to place today’s date on a new line.
Note List
The Note List tab displays notes for the customer.
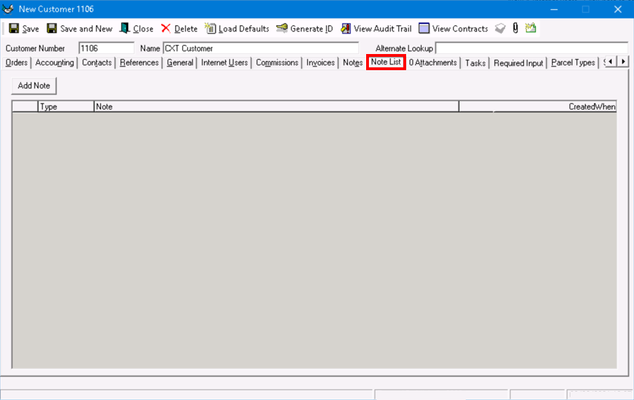
How to Add a Note
- Click the "Add Note" button.
- Click the arrow down under Type to select the note type. Note types can be configured in Maintenance > Note Types. See Note Types for more information.
- Click the Note section to add your note.
- Go to File > Save when done.
How to Edit a Note
Click the Type or Note field of the note you want to edit.
How to Delete a Note
- Click the box on the left of the note you would like to delete to highlight the entire row.
- Press the delete key on your keyboard.
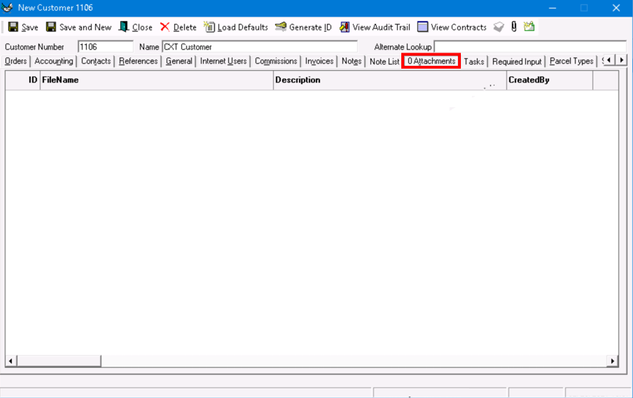
Attachments
The Attachments tab lists any files that have been attached to the customer.
| Field Name | Description |
|---|---|
| ID | This number is automatically generated by the system and cannot be typed in. |
| File Name | Name of the file. |
| Description | Description of the type of file. |
| Created By | Name of the CSR that attached the file. |
How to Insert an Attachment
Right-Click anywhere in the Attachments tab to display the menu.
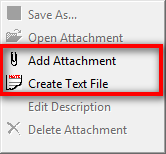
- Click on "Add Attachment" to select the file you want to attach.
- Click on "Create Text File" to open Notepad to you can type a note to attach.
How to View an Attachment
Double-click the file name for the attachment you want to view.
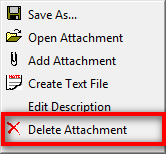
How to Delete an Attachment
- Right-click on the attachment you want to delete.
- Click on "Delete Attachment".
Tasks
The Tasks tab allows you to create tasks related to the customer.
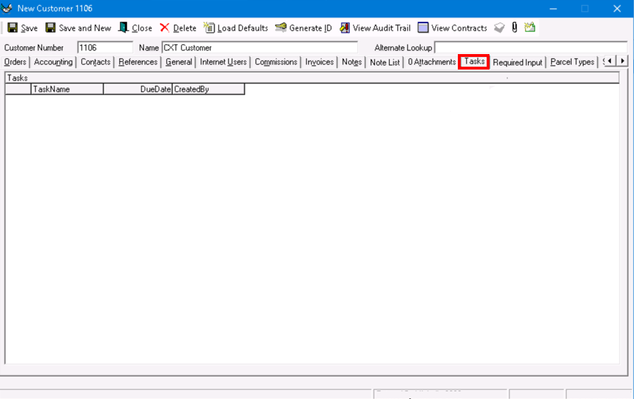
| Field Name | Description |
|---|---|
| Task Name | The name of the task created. |
| Due Date | Date and time the task is due. |
| Created By | Name of the user that created the task. |
How to Create a Task
- Right-click anywhere in the Tasks tab to display the menu.
Click on "New".

Fill in the "Edit Task" form
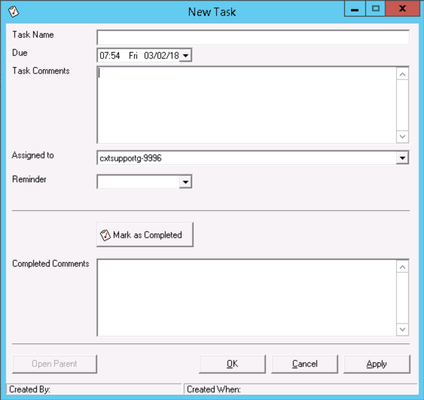
You can set a timed reminder for the task for X Dispatch to alert you when it is almost due. When a "Reminder" is set, the "Edit Task" window will automatically appear at the time that the "Reminder" is set.
Click "OK" to save.
How to View a Task
Double click the task name of the task you want to view.
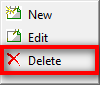
How to Delete a Task
- Right click on the task you want to delete to display the menu.
- Click "Delete".
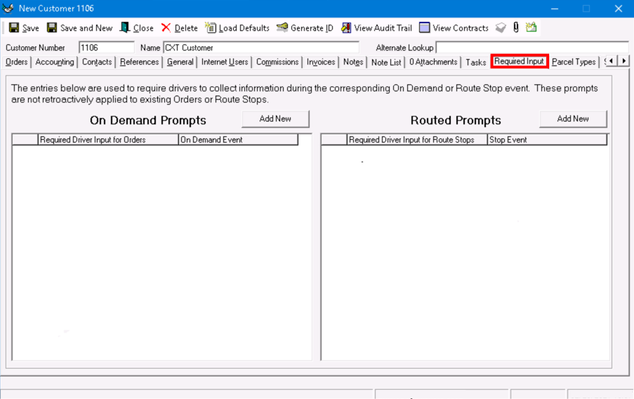
Required Driver Input
The Required Driver Input allows you to enter prompts for drivers in Nextstop when at a stop. See Nextstop 3 Required Driver Input for more information.
For X Dispatch 21.0 or newer, required driver input will not be added to posted recurring orders. Required driver inputs can be added directly to the recurring order form.
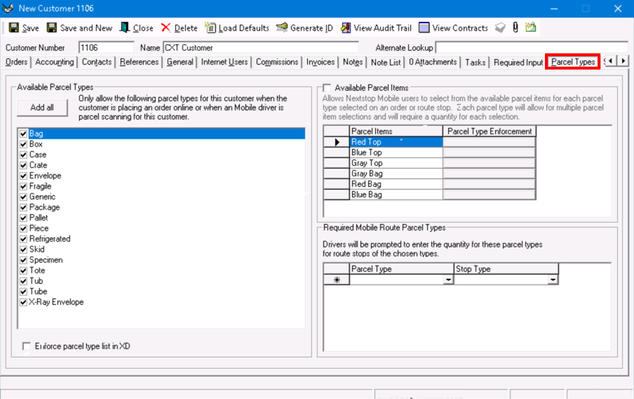
Parcel Types
The Parcel Types tab allows you to control which parcel types are available to the customer.
| Section / Field | Description |
|---|---|
| Available Parcel Types | Select the parcel types that are specific to the customer by checking the checkbox in front of the parcel type or click the Add all button to check all the boxes. You can edit the parcel types list in Maintenance > Parcel Types. See Parcel Types (Desktop Operations App) for more information. Only parcel types selected in the Available Parcel Types will be available in Nextstop. |
| Enable parcel type list in XD | Requires X Dispatch 21.0 or newer. When enabled is checked, all of the orders, route stops, contract stops, and parcel forms associated with the customer in X Dispatch will only accept the selected parcel types. |
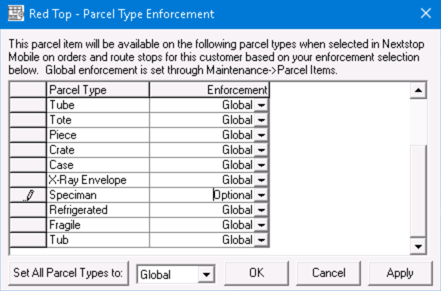
| Available Parcel Items | Requires X Dispatch 19.2 or newer and used in Nextstop 3 or newer. Configure parcel items and parcel type enforcement for drivers to select in Nextstop. See Parcel Items (Desktop Operations App). The checkbox must be checked to enable parcel item options in Nextstop for Available Parcel Types selected. Click the corresponding button in the Parcel Type Enforcement column to edit the parcel item's enforcement type.
Quick Tip Use the Set All Parcel Types to button to set all available parcels to the same enforcement type. Parcel Type Enforcement Icons
|
| Required Mobile Route Parcel Types | Configure required parcel types during driver action for specific stop types by selecting the Parcel Type and Stop Type. The Parcel Type cannot be duplicated. For parcel types to be available in Nextstop, the parcel type must be selected in both Required Mobile Route Parcel Types and Available Parcel Types. |
Status Codes
The Status Codes tab allows you to control which status codes display when a driver is scanning a parcel.
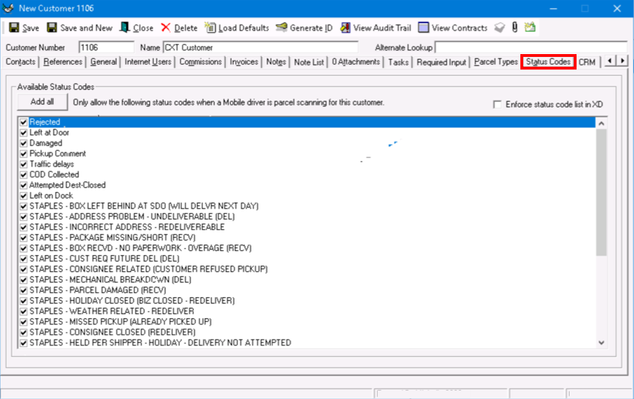
"Enforce status code list in XD" introduced in X Dispatch 18.0.
When checked, only status codes that are checked will display in the dropdown lists in X Dispatch and you will be restricted from manually entering in a new status code on any form associated with the customer. This is disabled by default.
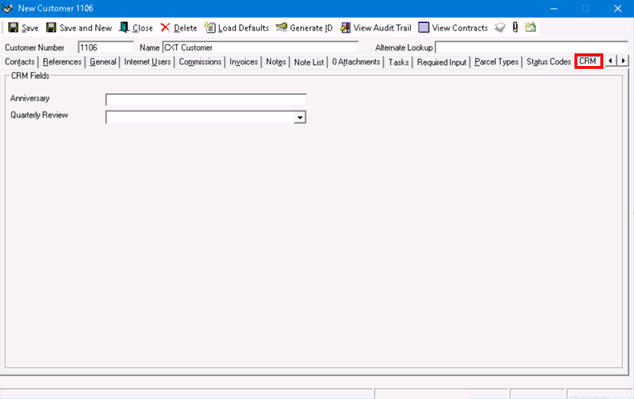
CRM
The CRM tab allows your company to create customized fields to be able to track any type of data. The CRM tab is empty until you define the CRM fields. You can add and edit CRM fields in Maintenance CRM Fields. See CRM Fields for more information.