Barcode Scanning with X Mobile for Android
- Michelle Cabaya (Unlicensed)
Analytics
This KnowledgeBase article reviews how to setup Android devices for X Mobile scanning.
CXT Software **strongly** recommends reviewing this article prior to purchasing Android devices for scanning.
Android
The introduction of low cost Android devices has allowed the concept of parcel scanning both in X Dispatch and X Route to be considered by many CXT Software customers. Before Android devices were available, generally only costly high-end mobile devices manufactured by Motorola, Intermec, and others had barcode scanning capabilities that performed well enough to be useful in the commercial delivery business. Technology however constantly changes, and now Android hardware, potentially paired with Bluetooth scanners and GetBlue software have become a viable and attractive scanning option.
Currently CXT Software recommends Android solutions only for low-volume scanning operations. Other more capable devices are strongly recommended for high-volume scanning because of superior scan rates, ruggedized devices permitting long-term usage, and quality vendor support programs that are extremely important for enterprise scanning operations.
With the availability of multiple Android scanning solutions*, it's important to select the correct one. The purpose of this KnowledgeBase article is to review the benefits and drawbacks of these different solutions and how to configure them.
* Types of Android scanning described in this article will change as more options become available.
Android Devices and X Mobile
Using Android devices for barcode scanning in X Mobile is supported by compatible devices listed on CXT Software's X Mobile Compatibility List. Review this list to assist in the selection of Android devices. CXT Software cannot provide technical support for devices not listed.
Devices confirmed as functional with Bluetooth scanners display this logo:
To view compatible Bluetooth barcode scanners, expand device details by clicking Bluetooth logo and click on "Peripheral Devices" link. To use a supported Bluetooth barcode scanner with X Mobile, the GetBlue Android application must be purchased. GetBlue is a data acquisition application required to send data from Bluetooth scanners to X Mobile.
Android Barcode Scanning Configurations
Different options exist for Android barcode scanning depending upon the hardware devices used. The Android options reviewed in this article are:
- Android 2.2 (and greater) + Internal Camera Device + GetBlue Software
- Android 3.0 (and lower) + Bluetooth Device + GetBlue Software
- Android 3.0 (and greater) + Bluetooth HID Device
Other options may currently exist, and new options will certainly become available, however if they are not included in this article, CXT Technical Services cannot recommend them.
Android 2.2 (and greater) + Internal Camera Device + Barcode Scanner Software + GetBlue Software
Summary
Scanning using an internal camera found on most Android devices is generally functional but not recommended. An internal camera is not a barcode scanner so for various reasons (difficulty focusing and "finding" barcode) scan rates are slow. Compounding this problem is the image must be converted into barcode data before it can be used by X Mobile. Furthermore the delivery person must switch back and forth between X Mobile and GetBlue. These issues ultimately cause delays between each scan that can be frustrating for the driver and for the customer waiting for their packages.
Hardware requirements
Android device with a front-facing camera.
Software requirements
Android 1.0 or greater, Barcode Scanner by ZXing, and GetBlue application.
Configuration
(Not all Android menus are the same, thus screenprints below may not be what is actually viewed on device.)
- Install Barcode Scanner
- Install GetBlue
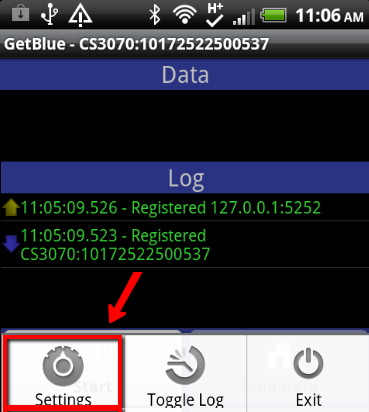
Run GetBlue and go to Menu -> Settings
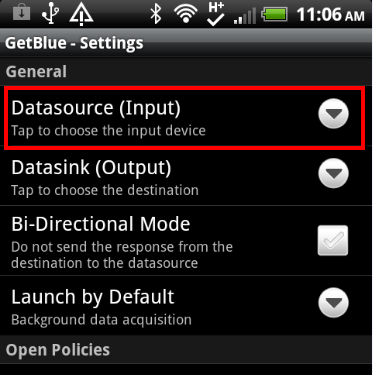
Click on "Datasource (Input)" option.
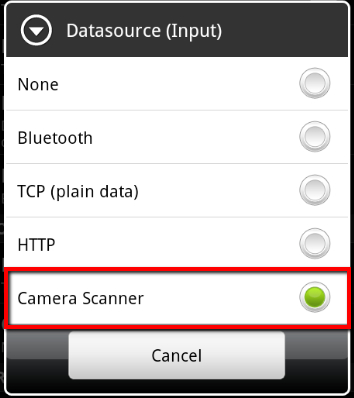
Select "Camera Scanner"
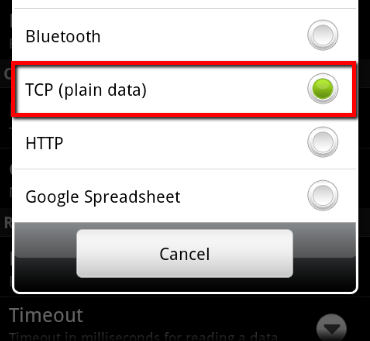
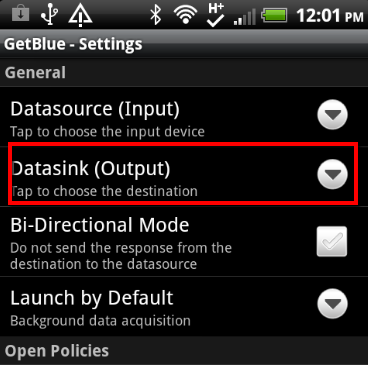
Go back to Settings and select "Datasink (Output)"

Select "TCP (plain data)"
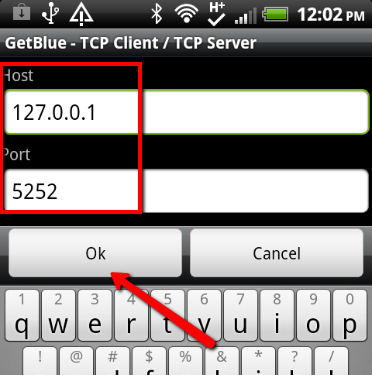
Configure TCP CLIENT as follows and click OK.
- HOST: 127.0.0.1
- PORT: 5252
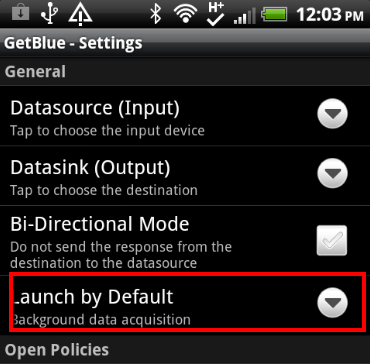
Click "Launch by Default"

Select "Background data acquisition"

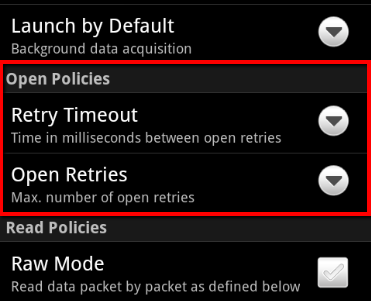
Configure Retry Timeout and Open Retries in Open Policies as follows:
- Retry Timeout: 5000
- Open Retries: 1000
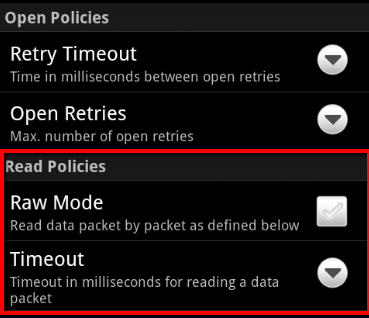
Configure Raw Mode and Timeout in Read Policies as follows:
- Raw Mode: Unchecked
- Timeout: 200
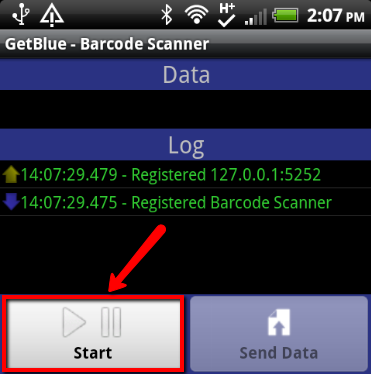
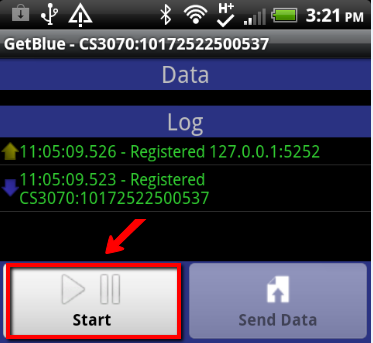
Click "Back" to return to main GetBlue screen and click "Start" to capture barcode scan data from camera.
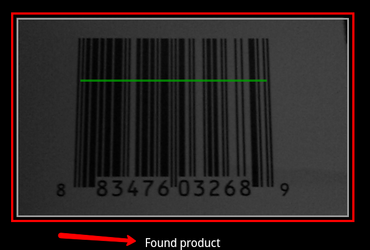
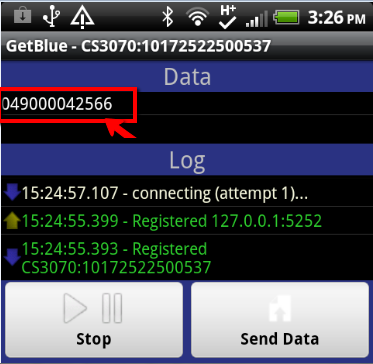
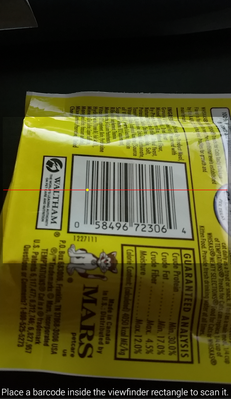
Scan barcode to confirm GetBlue recognizes barcode scan from camera. Position barcode so it lines up inside rectangle and is in focus. Once GetBlue recognizes barcode, a beep sounds and the red line turns green. "Found Product" is displayed.

If Android's camera has an "Infinity Focus" lens, it cannot focus on a close-up barcode and thus won't scan it. If this is the case, move barcode further from camera.
Scanning in X Mobile using device camera
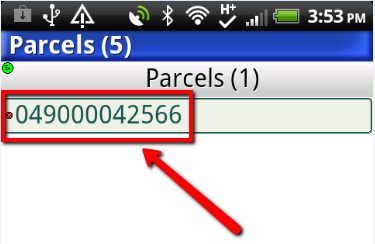
Scanning barcodes in X Mobile using camera requires X Mobile running in the background while in a screen or field that accepts scanner input. The X Dispatch or X Route "Parcels" screen is the most common place for scanner input, however sometimes data is scanned into "Comments" or even "Signature" fields.
- Launch X Mobile and move to a screen or field that accepts scanner input.
- Launch GetBlue, keeping X Mobile running in the background..
Click on "Start" in GetBlue to capture barcode scan using camera.

Move barcode in front of camera so that it appears in the rectangle and is focused. Wait for a good scan confirmation by "Found Product" text appearing on screen.
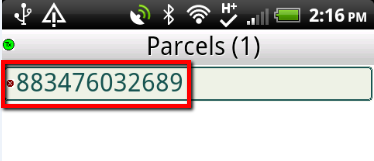
Switch to X Mobile to find successful barcode scan.
Android 3.0 (and lower) + Bluetooth Device + GetBlue Software
Summary
Scanning using an external Bluetooth enabled scanner with an Android* device works significantly better than with an internal camera because of faster scan rates. A Bluetooth scanner is designed from the ground up to scan barcodes, so it's tuned to do this most effectively. Compared to internal cameras there is less difficulty acquiring the barcode image and no need for internally translating the scanned data into barcodes since they are scanned as barcodes, not images.
* Without availability of HID profiles. HID, or Human Interface Device, profiles allow most Bluetooth keyboard devices (scanners) to connect to these Android devices with ease and without having to install keyboard-specific drivers. This means that any Bluetooth keyboard device that supports HID (most of them) can connect to and provide input for such Android devices. (Android 2.3 technically supports HID profiles, but connecting Bluetooth keyboards to devices powered by this version of the Android OS often requires extra software. Tablets powered by Android 2.2 and below require extra software for external keyboard use.)
Hardware Requirements
Android device with Bluetooth, and Bluetooth enabled barcode scanner.
Software Requirements
Android 3.0 or lower and GetBlue application.
Configuration
Pairing Bluetooth Scanner: "Pairing" means connecting Android device with the scanner via Bluetooth wireless communication.
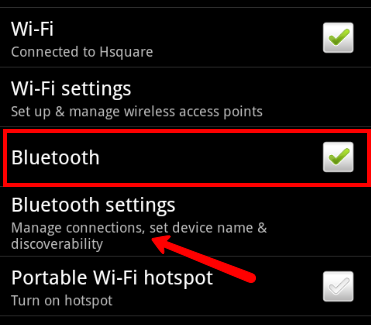
On Android, go to "Settings -> Wireless & Networks"
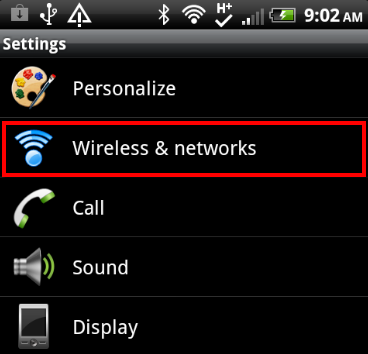
Ensure "Bluetooth" is enabled by checking Bluetooth option. Click "Bluetooth Settings" to begin pairing process.
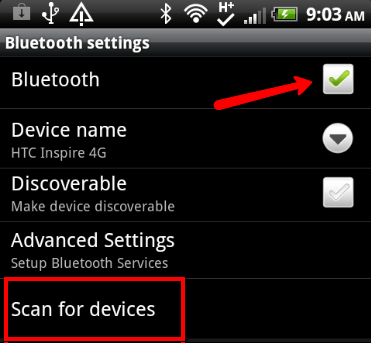
Before Bluetooth barcode scanner can be paired, ensure scanner is on, usually by pressing scan button. The scanner may require to be set to pairing mode to pair it with the Android device. Please consult scanner's documentation for more details if necessary. Click "Scan for Devices" to search for Bluetooth barcode scanner.
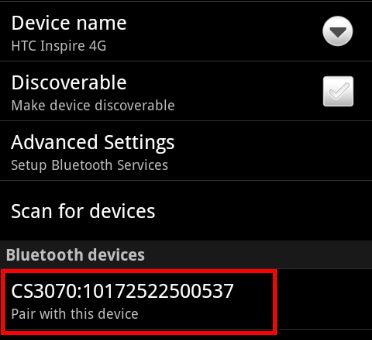
Under "Bluetooth devices" section, the Bluetooth scanner should be listed. Click on it to pair device.
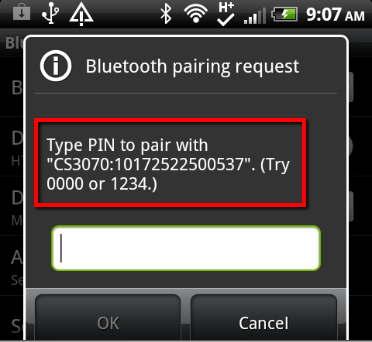
Complete pairing process by entering scanner's PIN or Passcode. Hint: Most device passwords default to 0000 or 1234.
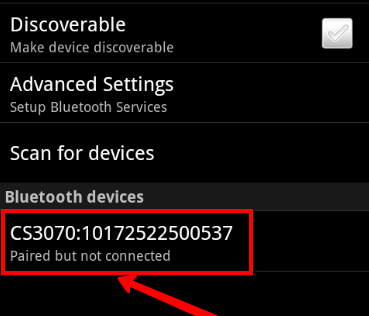
Confirm scanner is successfully paired with Android device by reviewing "Bluetooth devices" section. Scanner should be listed as "Paired but not connected"
Configure GetBlue with Bluetooth scanner
To use a supported Bluetooth barcode scanner with X Mobile, the GetBlue Android application must be purchased. GetBlue is a data acquisition tool required to send data from Bluetooth barcode scanner to X Mobile.
Run GetBlue and go to "Menu -> Settings."

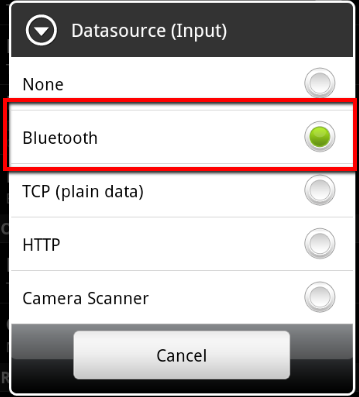
Click on "Datasource (Input)" option.

Select "Bluetooth"
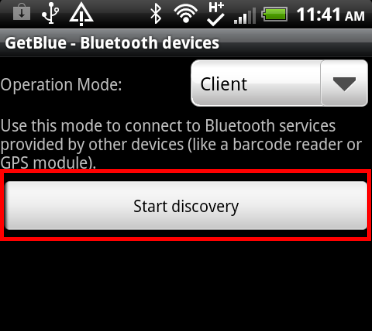
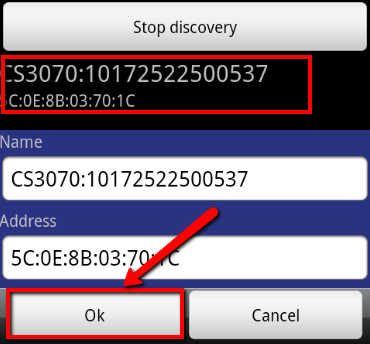
Check to ensure "Operation Mode" is set to "Client." Click on "Start Discovery" to find paired Bluetooth scanner.
Select scanner and click "Ok."
Click on "Datasink (Output)."
Select "TCP (plain data)"

Configure TCP Client as follows and click "Ok."
Host: 127.0.0.1
Port: 5252
Click "Launch by Default"
- Select "Background data acquisition"

- Configure "Retry Timeout" and "Open Retries" in Open Policiesoptions as follows:
Retry Timeout: 5000
Open Retries: 1000
- Configure "Raw Mode" and "Timeout" in Read Policiesoptions as follows:
Raw Mode: Unchecked
Timeout: 200
- Click "Back" to return to main GetBlue screen and select "Start" to capture barcode scan data from Bluetooth scanner.
- Scan barcode to confirm GetBlue can recognize barcode scan from Bluetooth scanner.
- Open X Mobile and navigate to scannable screen (route manifest screen, on demand manifest screen, or parcel OS&D screen) and scan barcode.
Once scanner is paired with Android device and GetBlue is configured and running in background, X Mobile scanning is functional.
Android 2.3 (and greater) + Bluetooth HID Device
Summary
Scanning using an external Bluetooth enabled scanner with an Android device works significantly better than with an internal camera because of faster scan rates. A Bluetooth scanner is designed from the ground up to scan barcodes, so it's tuned to do this most effectively. Compared to internal cameras there is less difficulty acquiring the barcode image and no need for internally translating the scanned data into barcodes since they are scanned as barcodes, not images.
Some Android 3.0, and all Android 4.0+ devices support HID profiles. HID, or Human Interface Device, profiles allow most Bluetooth keyboard devices (scanners) to connect to these Android devices with ease and without having to install keyboard-specific drivers. This means that any Bluetooth keyboard device that supports HID (most of them) can connect to and provide input for such Android devices. (Android 2.3 technically supports HID profiles, but connecting Bluetooth keyboards to devices powered by this version of the Android OS often requires extra software and is not recommended. Tablets powered by Android 2.2 and below require extra software for external keyboard use.)
On Android 3.0 and higher when a HID Bluetooth device is connected the onscreen keyboard may be disabled (depending on the manufactures manipulation of Android). To re-enable the keyboard power down the Bluetooth HID Scanner and the keyboard will automatically reactivate. This is a known limitation of the Android OS and is not related to CXT Software.
Hardware requirements
Android with HID Profile Support, and Bluetooth enabled barcode scanner with HID Profile Support.
Configuration
(Screenshots from Android 4.1.2 Nexus 7 by ASUS paired with Socket 7Xi barcode scanner.)
Pairing Bluetooth Scanner: "Pairing" means connecting Android device with the scanner via Bluetooth wireless communication.
Select "Settings" from applications.

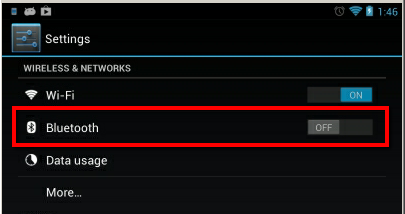
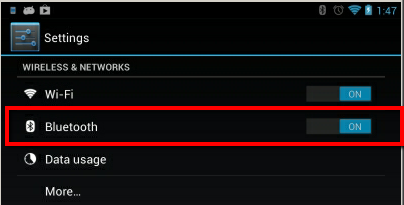
If "Bluetooth" under Wireless & Networks is "Off," then press "Bluetooth" to enable.
Ensure scanner is on, consult manual for instructions. The scanner may require to be set to pairing mode to pair it with the Android device, also consult manual for instructions.
Click "Bluetooth" to begin pairing process.
Depending upon the hardware Android may begin automatically searching for Bluetooth enabled devices.
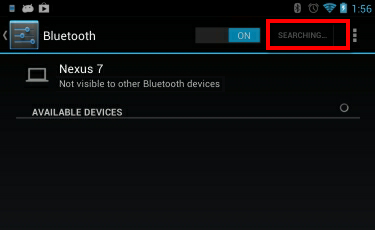
Scanner may be found.
If scanner is not found, or if Android does not automatically search, then press "Search for Devices."
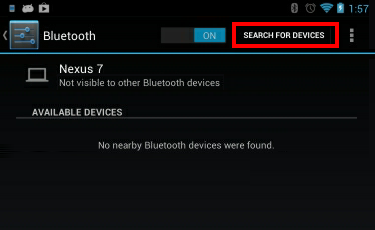
The search routine should find scanner and list it under "Available devices"
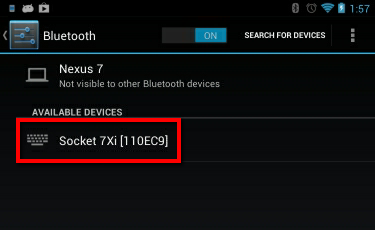
Complete pairing Android with scanner by pressing device name under "Available Devices."
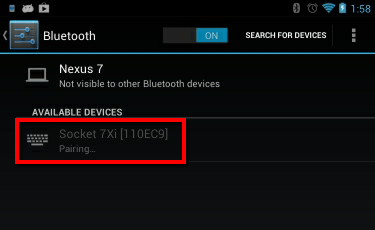
The device indicates it's attempting to pair with scanner.
If pairing is successful, scanner is listed under "Paired Devices."
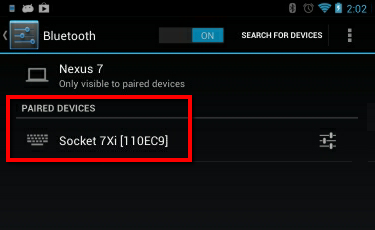
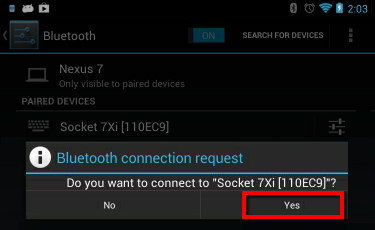
Scanner must now be "Connected" to the Android. A prompt appears requesting connection, respond "Yes."
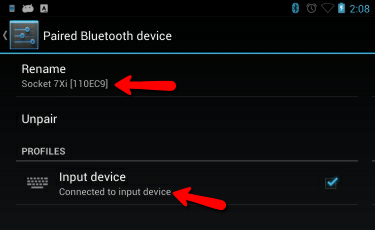
If connection is successful, scanner is listed as a "Paired Bluetooth device" and Android is "Connected to input device."
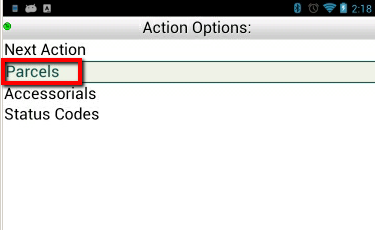
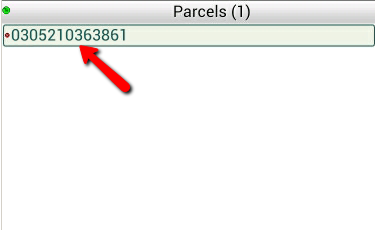
Once Bluetooth scanner is paired and connected, X Mobile can be started, and a screen such as "Parcels" accessed, and barcodes scanned.
Configuration Troubleshooting
Various errors or problems can occur depending upon model of Android and scanner used. Refer to device documentation for resolution to such issues. Such resolution may require removing and/or repowering of Android and/or scanner, or other configuration changes.
With devices used in this KnowledgeBase article, errors appeared during pairing phase.
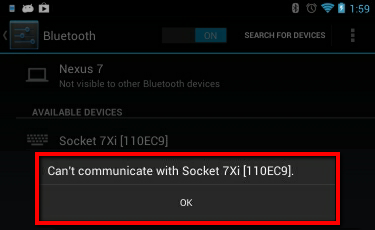
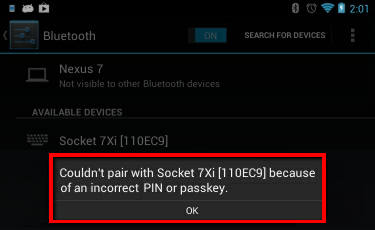
To fix these problems, repeated attempts at pairing were performed, and the scanner was repowered. Eventually the two devices "Paired." Continued testing with these particular devices resulted in the necessity for continued repetition of pairing and connection steps if scanner was manually unpaired. Pressing the power button briefly on scanner completed the enabling of setup. Thus time spent working with devices is important to create familiarity with their configuration. Also, various situations will arise with different devices that require alternative problem-solving steps. Be sure to read all documentation and search on the Internet forums for problem-solving information.
The Socket 7Xi was also factory reset and configured to use HID Profiles to guarantee it was using this mode, even though HID Profiles was the default setting. These steps were performed very easily by using barcodes available in the documentation.
Barcodes are examples only, do not scan. Contact manufacturer for device-specific codes.


Prefix and Suffix Character
Scanners need to be programmed with a prefix and suffix character that designate the beginning and ending of the barcode. By default CXT Software uses the dollar sign "$" for this code because typically dollar signs do not appear in barcodes. Barcode prefixes and suffixes are defined in X Mobile device passcodes, and can be viewed in the CXT Support Site "Passcode" page here: Passcode link. Please enter support ticket if prefix and suffix code must be changed.
Review scanner documentation or contact manufacturer for prefix and suffix code programming details. It can be as simple as scanning a barcode. For example, to program the Socket 7Xi barcode scanner used in this article with the dollar sign prefix and suffix, the barcode below was scanned.
Barcodes are examples only, do not scan. Contact manufacturer for device-specific codes.

Android 4.0 (and greater) + Internal Camera Device
Summary
Scanning using an internal camera found on most Android devices is generally functional but not recommended. An internal camera is not a barcode scanner so for various reasons (difficulty focusing and "finding" barcode) scan rates are slow. Compounding this problem is the image must be converted into barcode data before it can be used by X Mobile. These issues ultimately cause delays between each scan that can be frustrating for the driver and for the customer waiting for their packages.
Hardware requirements
Android device with a front-facing camera.
Software requirements
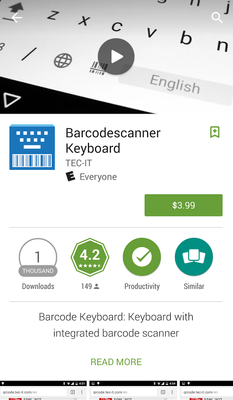
Android 4.0 or greater, Barcodescanner Keyboard by TEC-IT.
Configuration
(Not all Android menus are the same, thus screenprints below may not be what is actually viewed on device.)
Install Barcodescanner Keyboard by TEC-IT. You can use the demo or the full version for 3.99.
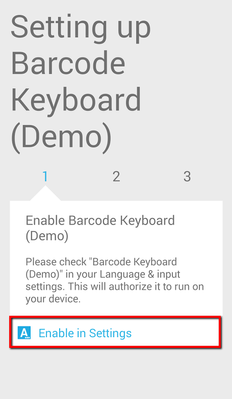
Run Barcodescanner Keyboard by TEC-IT and enable the keyboard in settings
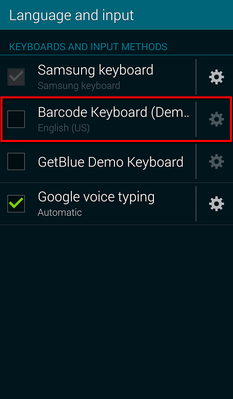
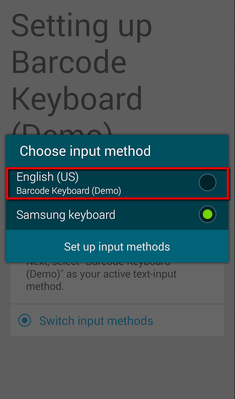
Choose the Barcodescanner Keyboard as your input method
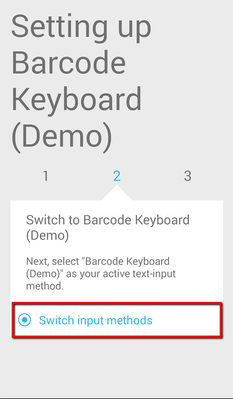
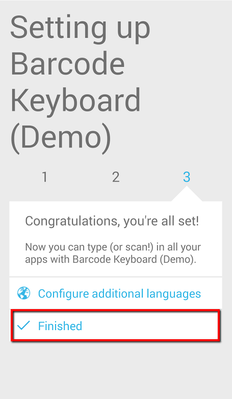
Tap Finished to move on to configure settings
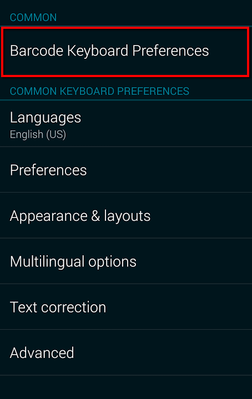
Under settings choose "Barcode Keyboard Prefernces"
Enable the highlighted options for best results
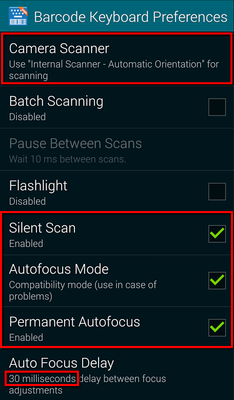
- Camera Scanner option should be "Internal scanner- Automatic Orientation for scanning"
- Silent Scan Enabled
- Autofocus Mode, Compatibility mode
- Permanent Autofocus
- Autofocus delay: 30-100 Milliseconds
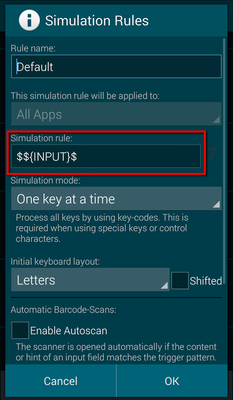
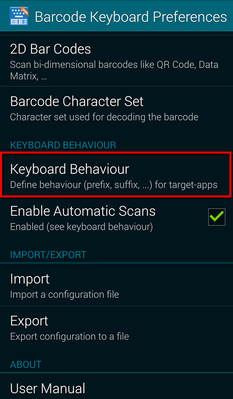
Choose "Keyboard Behavior" then Scroll to the bottom and tap "Default" and then "Edit".
Open X Mobile, you will now see a barcode icon on the beyboard. On the Parcels screen tap the barcode icon
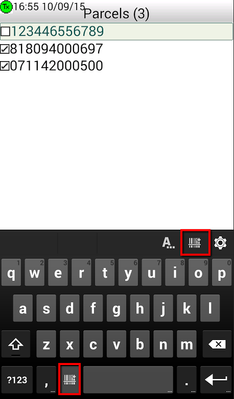
Now to capture the barcode just align the red line with the barcode.
Then change the text under "Simulation rule" to "$${INPUT}$" and then tap "OK".