Cloud Client - Options
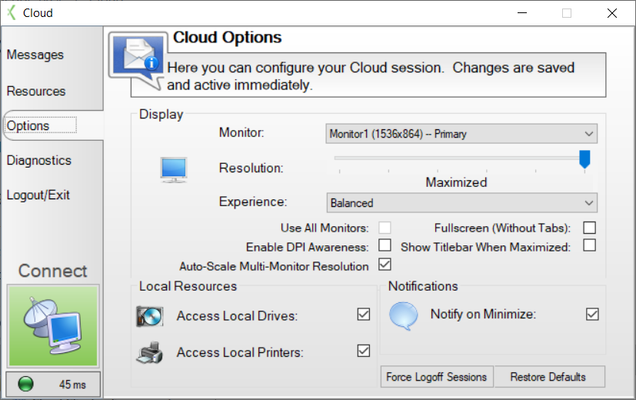
The Options tab is where you can change several parameters of your Cloud Client experience. From here, you can change the way the remote session Displays, the Local Resources you will be able to access, and how Notifications are displayed within the client.
Display
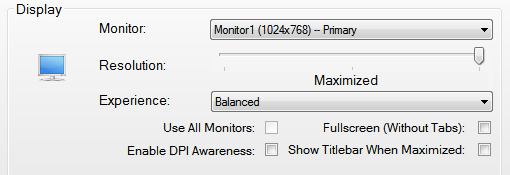
The Display section allows you to customize the visual aspects of your Cloud session. By default, your session will appear maximized on your primary monitor. This allows you the maximum amount of screen real estate within the cloud environment while still allowing you easy access to other applications running on your local system.
| Field | Description |
|---|---|
| Monitor | This drop down will allow you to select which monitor the Cloud Client will use when you connect, and you are not in fullscreen mode. The monitor number, current resolution, and an additional indicator if it is the system primary monitor, are displayed. By default, the session will appear on Monitor 1. |
| Resolution | Slide the caret on the trackbar to change the size of the cloud session. This option is only available if not running in full-screen mode. The option at the far right will always be "Maximized". This will fill the available screen real estate but will leave your local taskbar, start menu, and notification area displayed. If you select an option less than maximized, the session will display in a window of the selected size. This field defaults to "Maximized". |
| Experience | This drop-down list configures some low-level settings within the Cloud Session. In most cases, it is optimal to leave it at the default "Balanced" setting. If you experience display anomalies while connected to the cloud session, you can try changing the "Experience" to "Quality". However, note that this will require a higher bandwidth connection and can slow down your cloud session. If you have a slower internet connection, you can change this setting to "Performance" at the expense of image quality within the "Cloud Session". |
| Use All Monitors | Checking this box will make the Cloud Enviornment connect using all monitors attached to the workstation. You will be required to enter your Cloud Environment login credentials twice. |
| Fullscreen (Without Tabs) | Checking this box will set the Cloud Session to run in "Fullscreen Mode". In this mode, the session will occupy your entire screen. Your local taskbar, start menu, and notification area will not be visible while your session is connected. I connection bar is displayed at the top of the screen allowing you to minimize or close the session. By default, this checkbox is not checked. |
| Enable DPI Awareness | For Windows Vista or higher. Checking this box will enable DPI Awareness which can prevent odd resolution issues when connected to the Cloud Client. |
| Show Titlebar When Maximized | Checking this box enables the standard Windows titlebar which allows you to drag the window. |
Local Resources
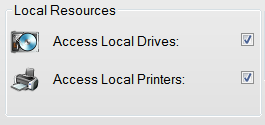
The "Local Resources" options enable you to make devices on your local system available to you while connected to the "Cloud Environment".
| Status | Description |
|---|---|
| Access Local Drives | If checked, you will be able to access your local drives while connected to the Cloud Environment. This can be useful to save files to your local system, such as Report PDF files or Invoice Exports. The drive will be listed under "Computer" in any "File Dialog Box" using the following Syntax: <Local Drive Letter> on <Local System Name>. For example: C on CXTTEST. |
| Access Local Printers | If checked, you will be able to print to printer devices that are configured on your local system. The printer will appear with "(redirected)" after its name when given the option to select a printer. Note that if the printer does not have a compatible device driver installed, it might not become available while connected to the Cloud Environment. You can only print using the first five printers installed, or the first four and the default printer if one is set as default. |
Notifications
Notification options allow you to change the way that the Cloud Client notifies you about various situations. It also allows you to determine which kinds of notifications you receive.
| Status | Description |
|---|---|
| Notify on Minimize | If checked, you will receive a reminder when you connect or hit the X icon at the upper right of the Cloud Client. The reminder states that the client is still running minimized to the system notification area until you disconnect from your "Cloud Session" or restore the minimized window. |
Force Logoff Sessions
This button will reset your RDS session in case it becomes frozen and you cannot log in/out in a standard way.
Restore Defaults
This button will clear any modifications that you have made to the Cloud Client options. The options are all returned to their default values. Note that these changes are saved and activated immediately.


